

Real-time and Realistic Material
from
Substance Suite to Unreal Engine
Introduction
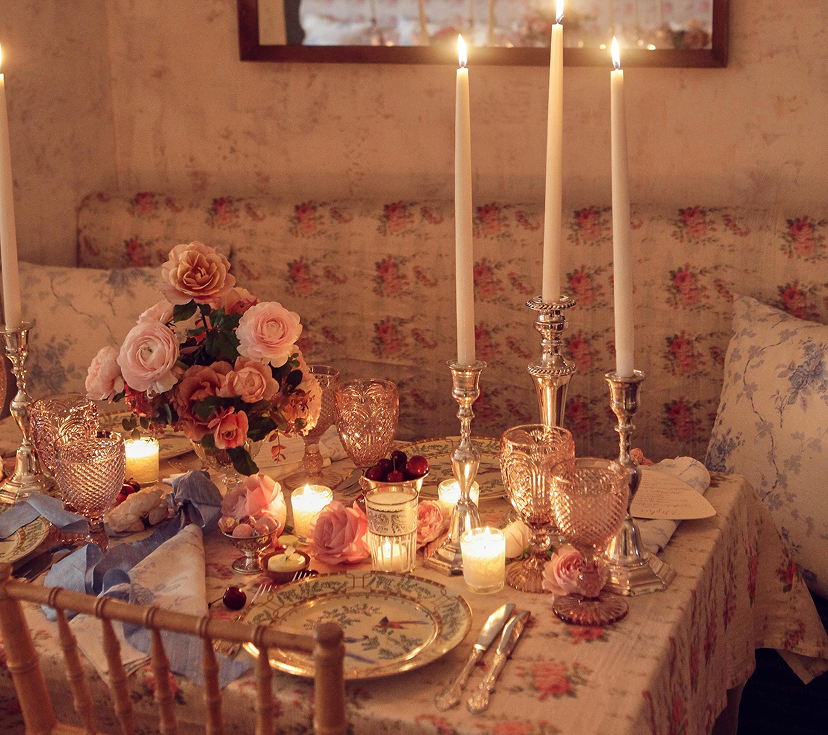
Hey there! Creating realistic materials for real-time rendering is an exciting challenge. In this project, I set up a courtyard table scene, ready for an afternoon tea, featuring both man-made and organic objects. The assets include:
-
Man-made objects: Glassware, candle stand, candle, vase, plate, tablecloth
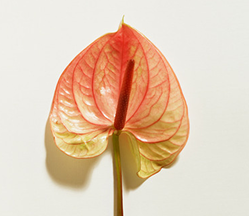
- Organic objects: Passion fruit, cherry, peach, anthurium petals and stem
By using Substance Suite’s procedural workflows and Unreal Engine’s real-time rendering capabilities, I’ve created materials that trying to push the boundaries of realism. This breakdown will focus on the technical details, from modelling, UV mapping to shader adjustments.
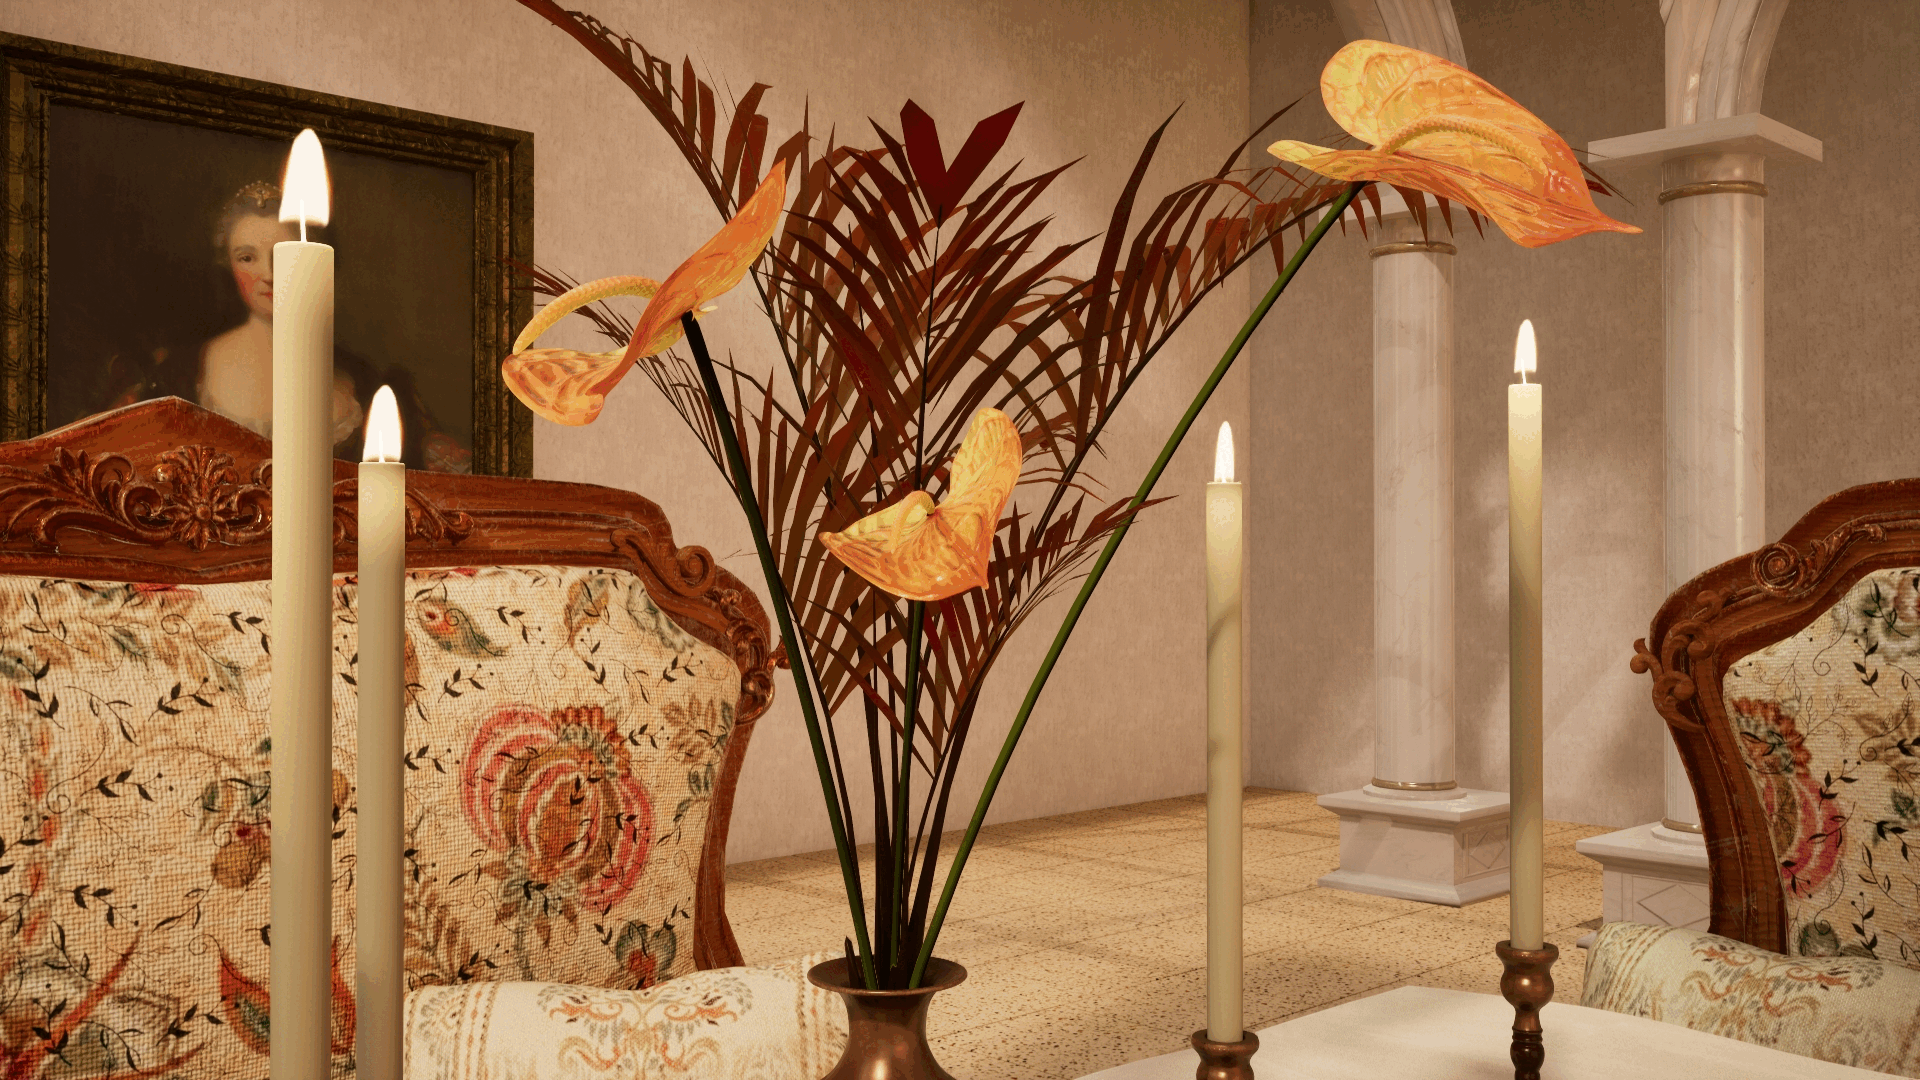
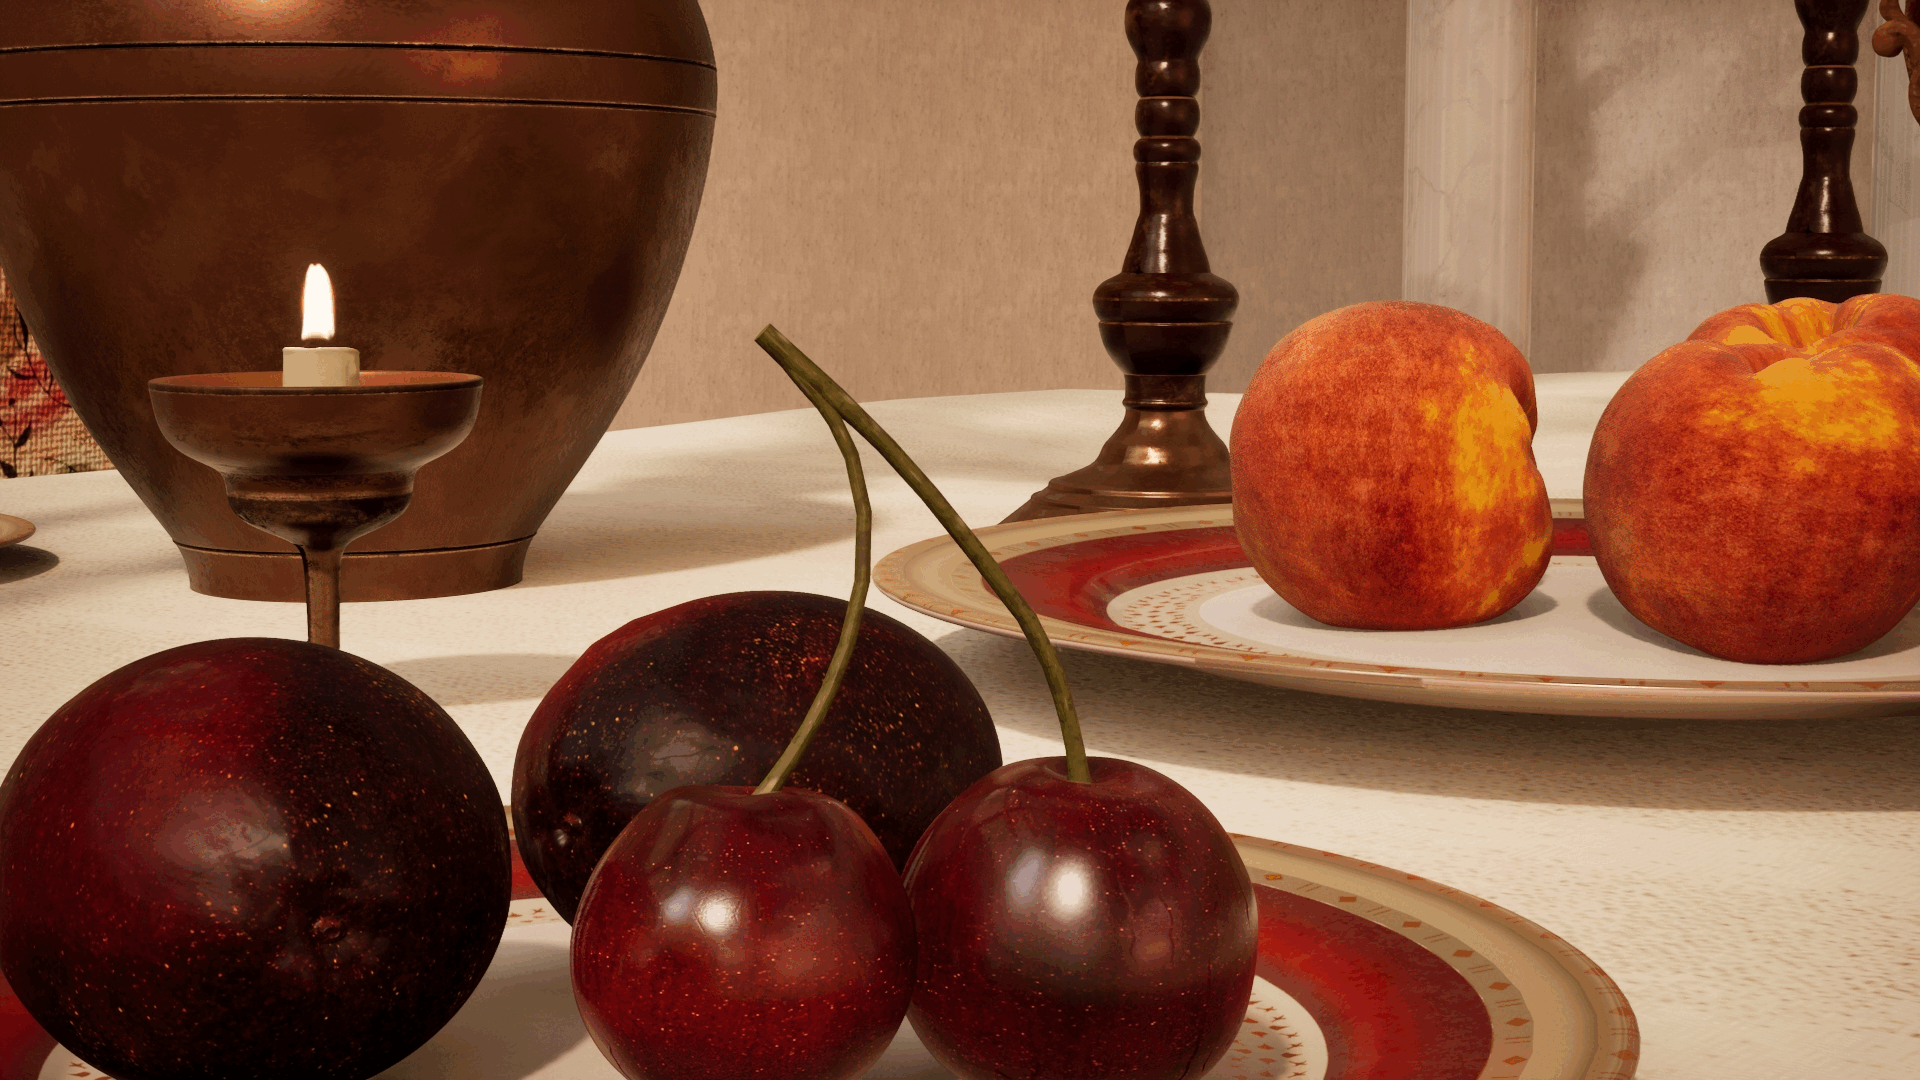
Final Render

Reference
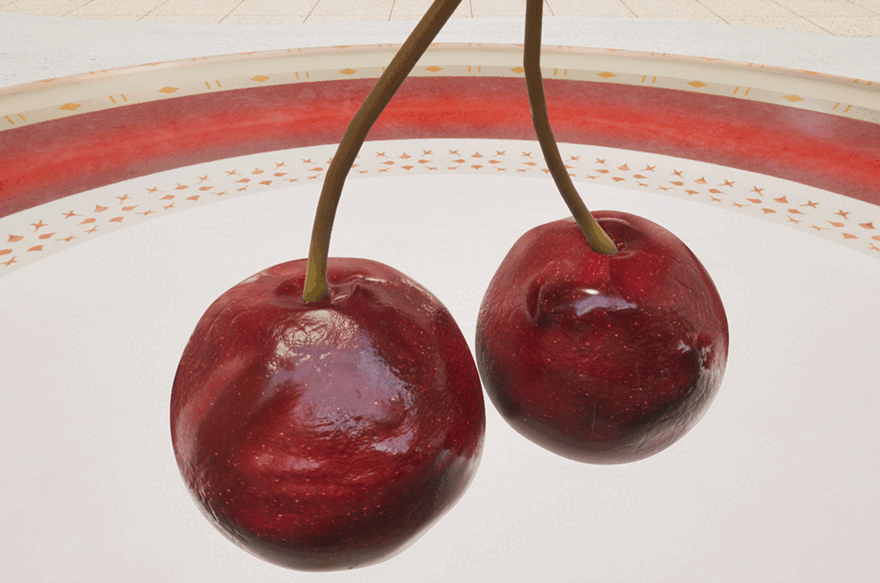
My main inspiration behind the project is food photography. I also ran into renders of other types of food on different CG forums. My inspiration comes from other artists as well.
I gathered reference images and built a library by collecting images from the internet. That way I was able to roughly visualize the final look of the scene in my head and think of ways to improve my workflow. I looked at certain food in my hand to better understand what kind of shader I was going to recreate, like peaches and petals.


Workflow: From Substance Suite to Unreal Engine
︎ 1. The Role of Substance Suite in Material Creation
-
Procedural Material Design: Substance Designer is my go-to for creating complex materials.
- Texture Painting with Substance Painter: Substance Painter lets me paint directly onto 3D models.
︎ 2. Integration with Unreal Engine for Real-Time Rendering
- Real-Time Material Adjustments: Unreal Engine’s Substance plugin allows us to tweak materials in real-time.
- Scalability and Performance: The procedural nature of Substance materials makes them highly scalable.
Step 01: Modeling and UV Mapping
︎Tools: Maya (primary), Blender (curved surfaces), Marvelous Designer (cloth simulation).
I created most of the models in Maya, using Blender for curved surfaces like vases, glasswares and candle stand due to its flexible custom curve beveling feature. The tablecloth was simulated in Marvelous Designer for realistic folds and draping effects.
For efficient UV mapping, I considered camera placement and removed unseen surfaces to optimize texture space. Unnecessary geometry not only wastes texture space but can also impact shader calculations in Unreal Engine.
For example:
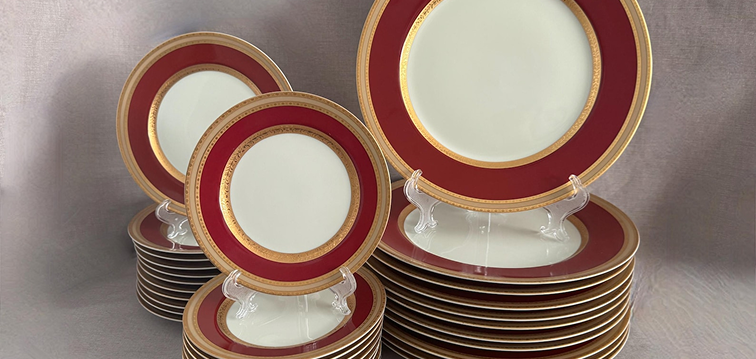
Dinner Plate:
The bottom face was deleted, allowing the top surface to use more UV space for higher detail.
![]() DinnerPlate
DinnerPlate
The bottom face was deleted, allowing the top surface to use more UV space for higher detail.
 DinnerPlate
Passion Fruits:
UVs were trying to unwrapped into rectangular blocks, making them ideal for Substance Designer.
![]()
UVs were trying to unwrapped into rectangular blocks, making them ideal for Substance Designer.
PassionFruits
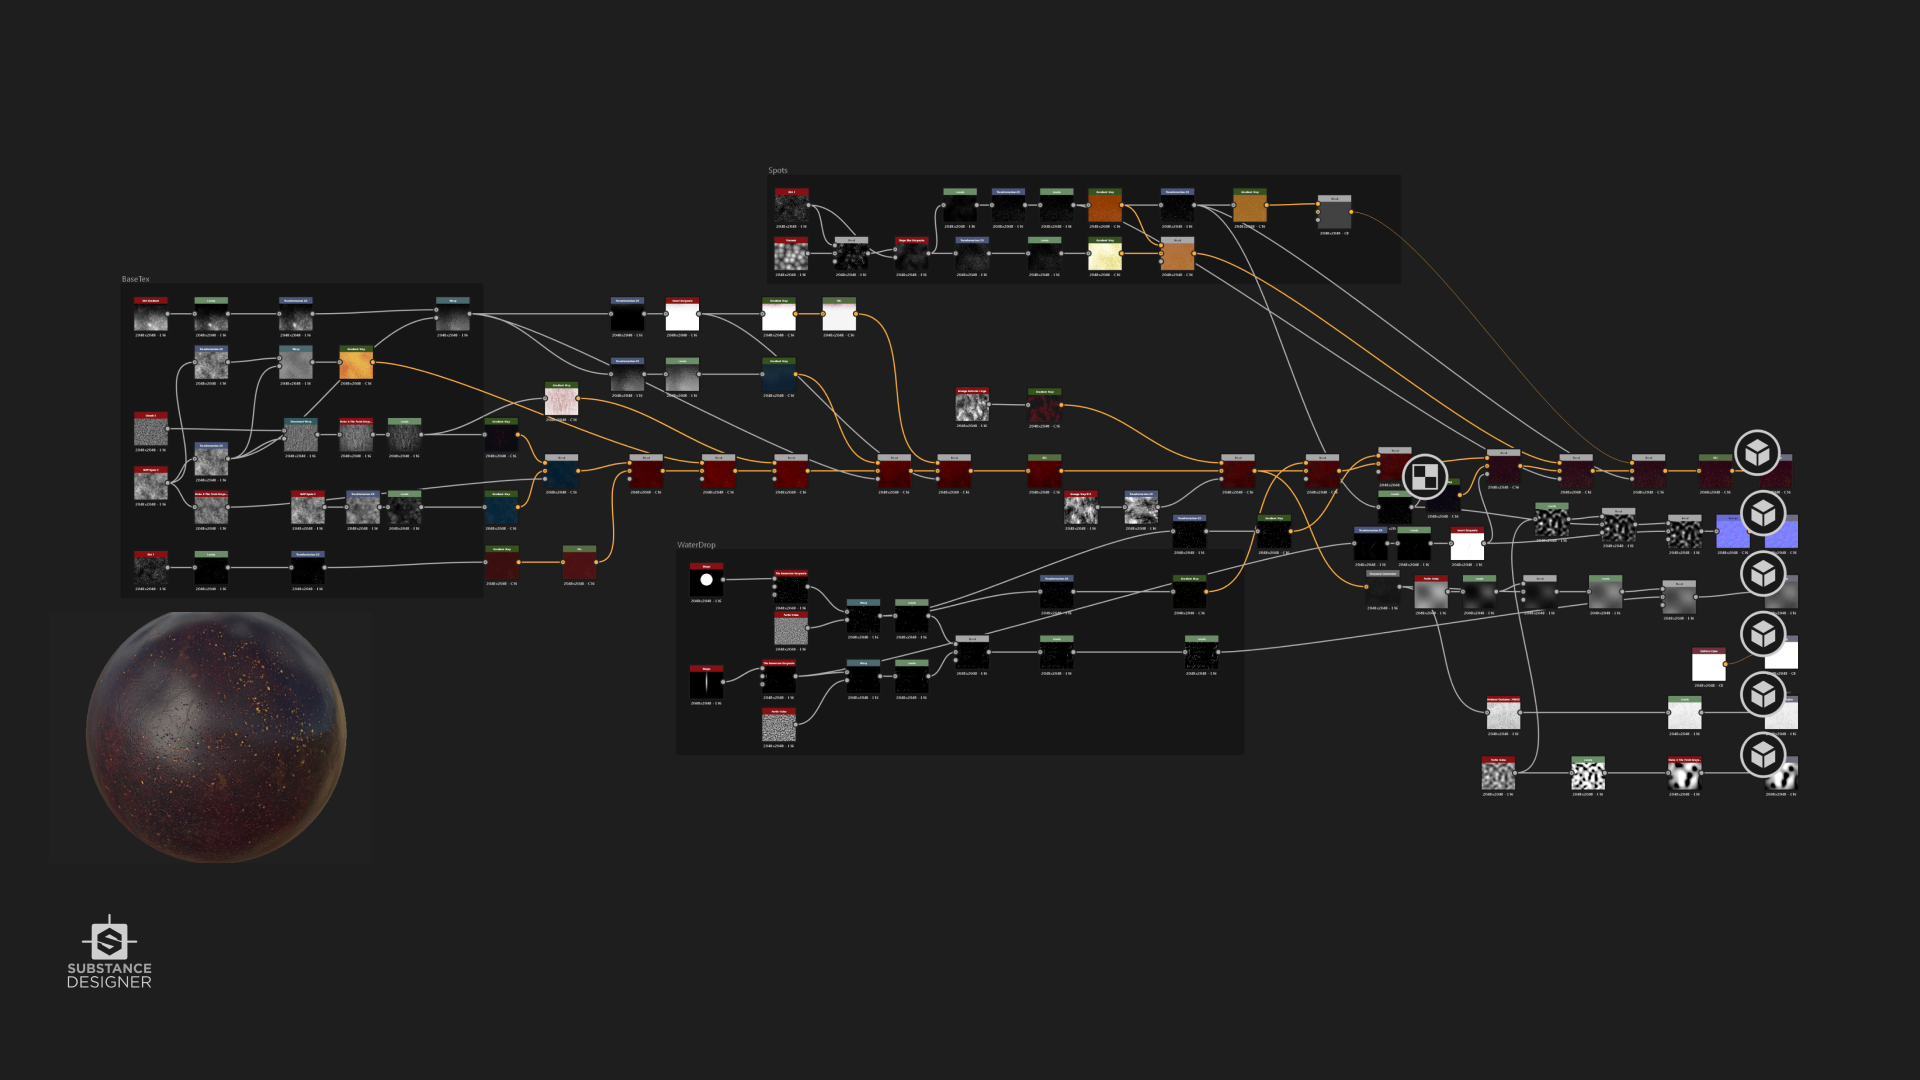
Step 02: Procedural Material Creation
︎Example: Cherry and Anthurium Material Breakdown
With the models in place, I turned to Substance Designer to create the materials.
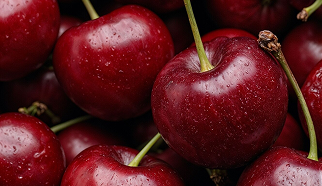
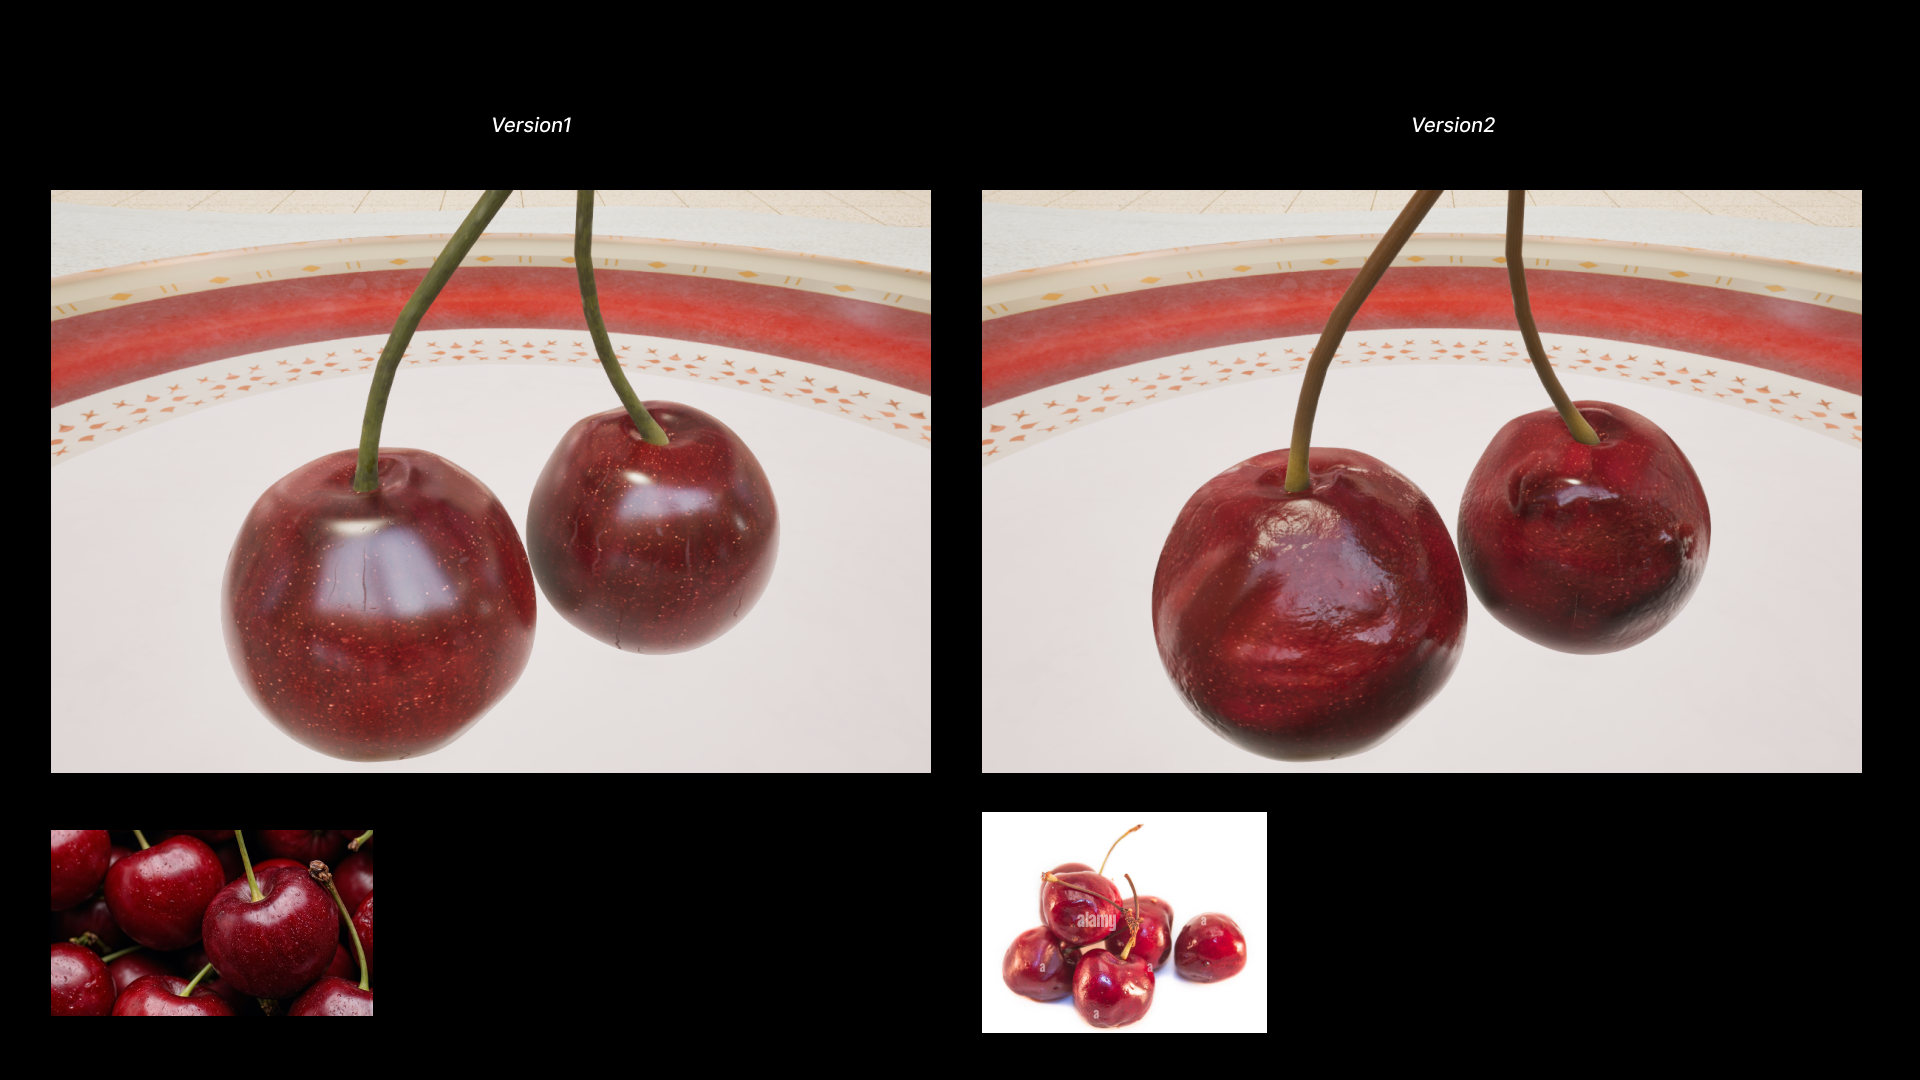
Take the cherry for example: I analyzed its composition and identified three key noise elements: a variable that would produce the range from pale pink to deep red, a vertical striped pattern for the fruit's texture, and a speckled detail to add depth and realism.
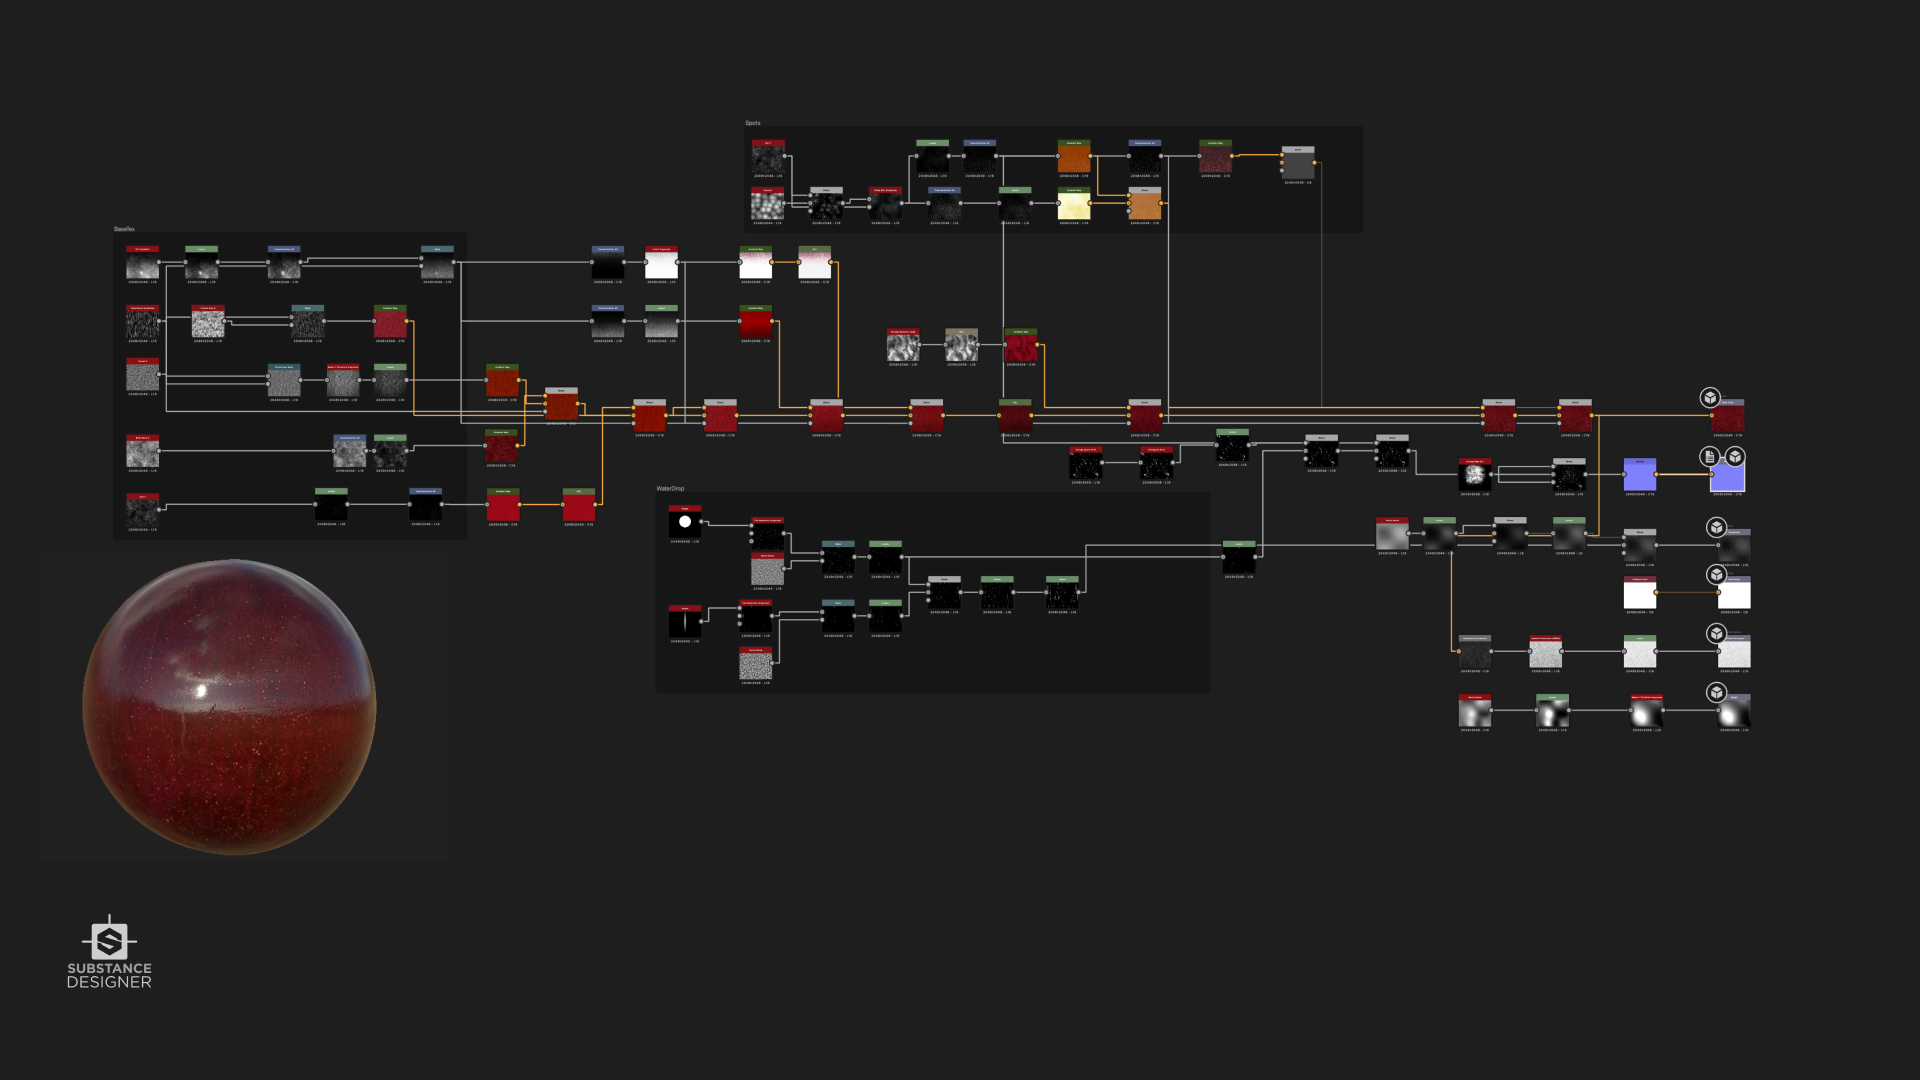
Cherry Material Breakdown - Detail to realism
Key noise elements:
⑴ Perlin Noise (Scale 256) for macro red variation.
⑵ Directional Noise (Vertical, Scale 64) for subtle stripes.
⑶ Cell Noise (Scale 32) for “pore” details.
As I refined the material, I realized it had a slightly toy-like quality, so I incorporated subtle water droplet elements in the roughness channel and added minor scratches and imperfections in the normal channel. This attention to detail helped to elevate the material's authenticity, a process I repeated for the passion fruit and other organic elements.
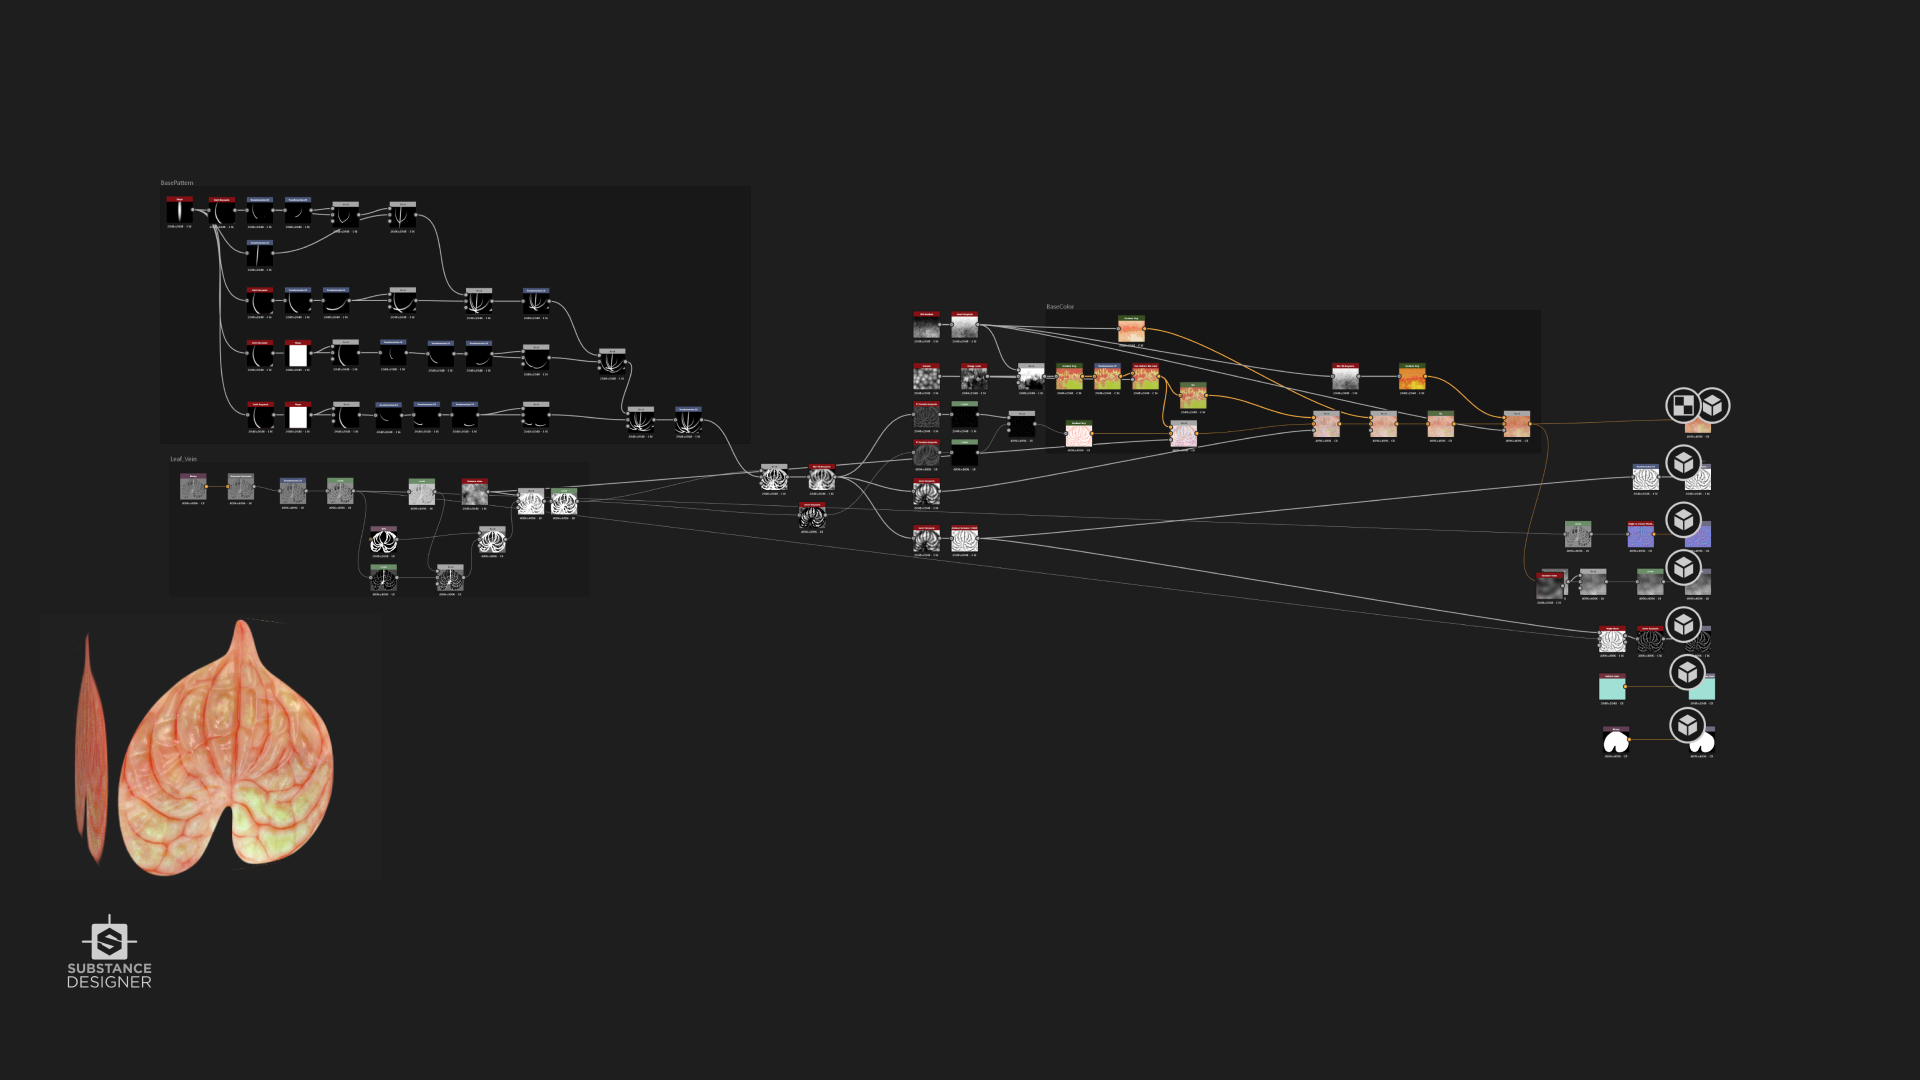
Petal Material Breakdown
For Anthurium, here are 4 key steps to make the petal material:
⑴ Baking : baking the Height Map from High-Poly Mesh to capture the petal’s intricate surface details.
⑵ Swirl node: swirl the every shape to the petal’s vein-like structures, blending it into the base height map for a more organic appearance.
⑶ Noise and Blur node : adjusted the noise scale and intensity to align with the petal’s organic flow, ensuring the veins felt natural and not overly uniform.
⑷ Gradient Color node : Adding color variation to the petal, mimicking the natural pigmentation found in real petals.
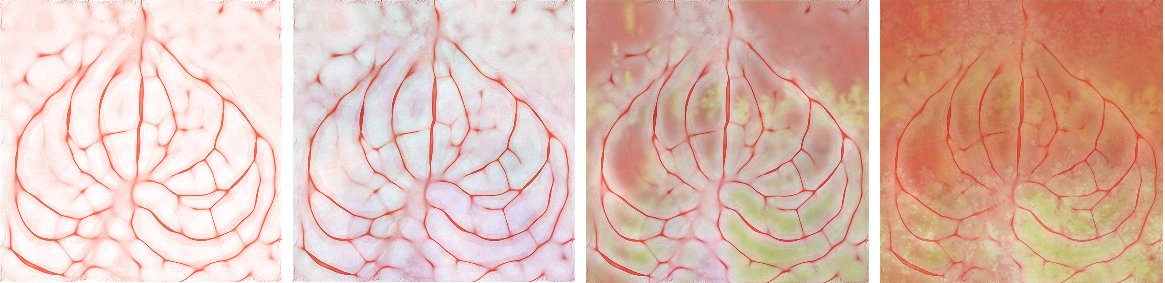
Base Color Gradient Iteration
︎Stem
![]()

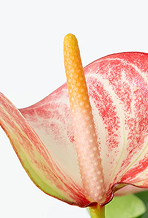
︎Anthurium Stigma
![]()
︎Peach
![]()

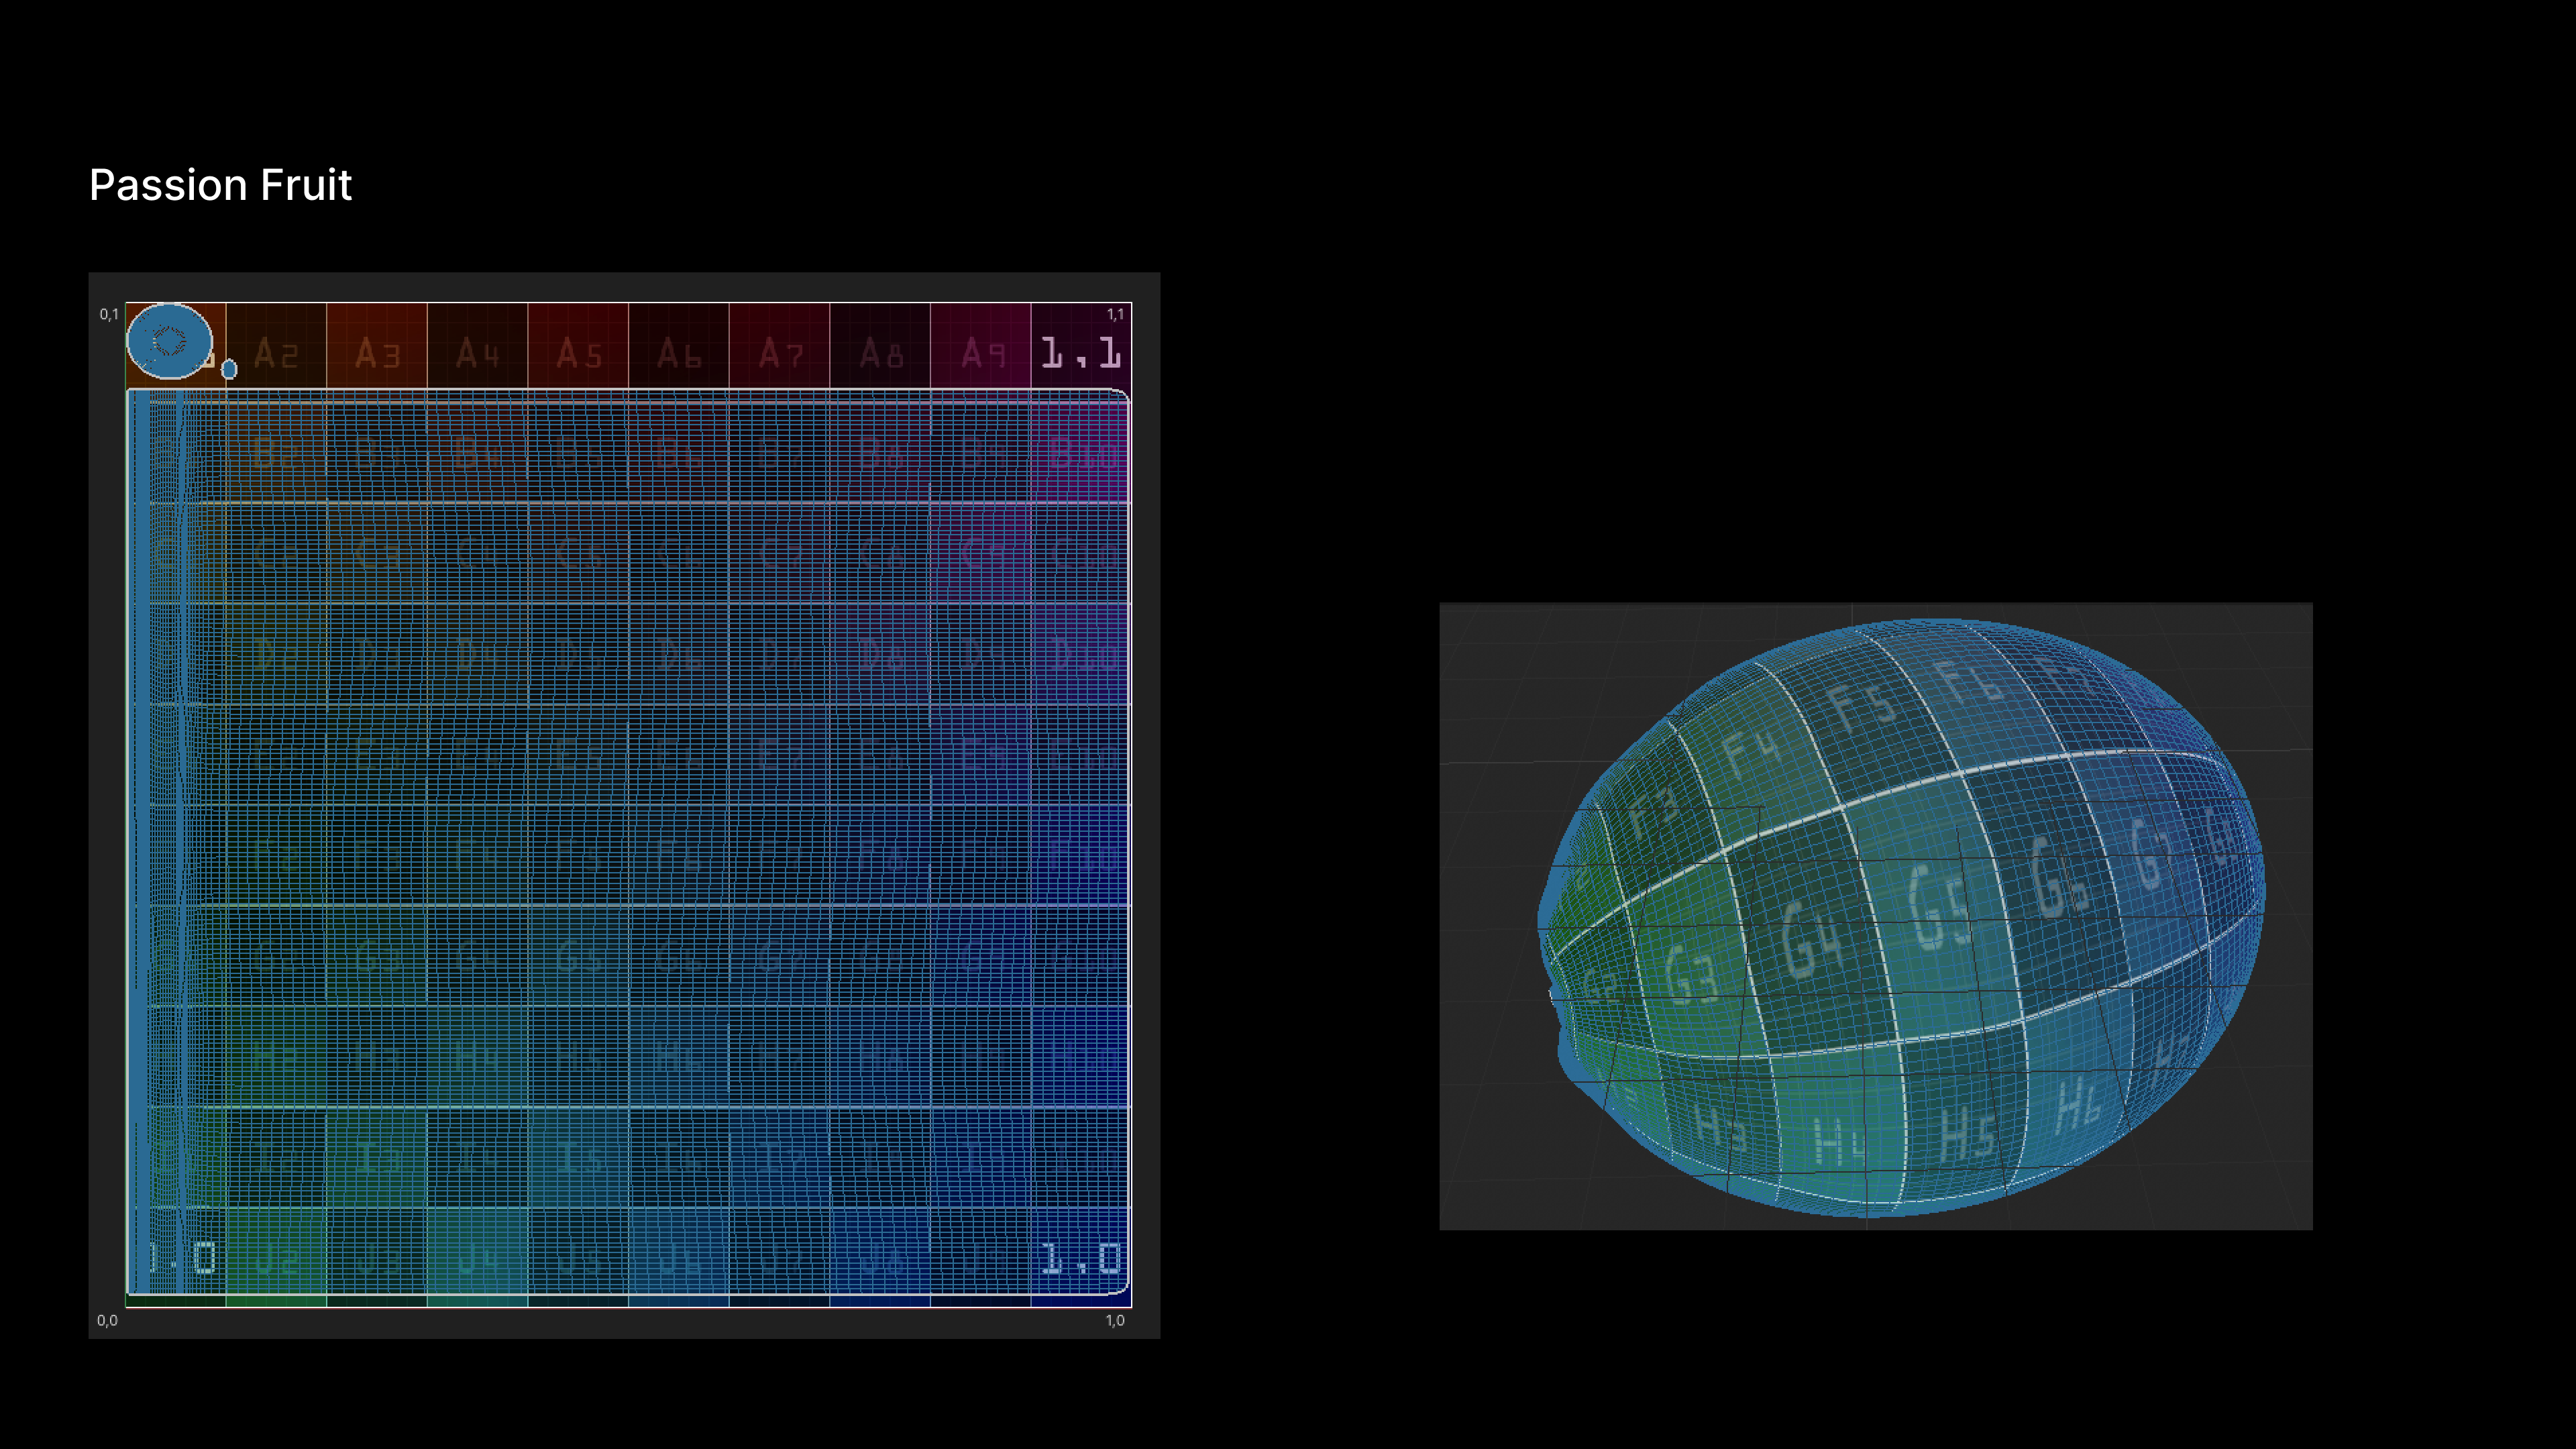
︎Passion Fruit
![]()
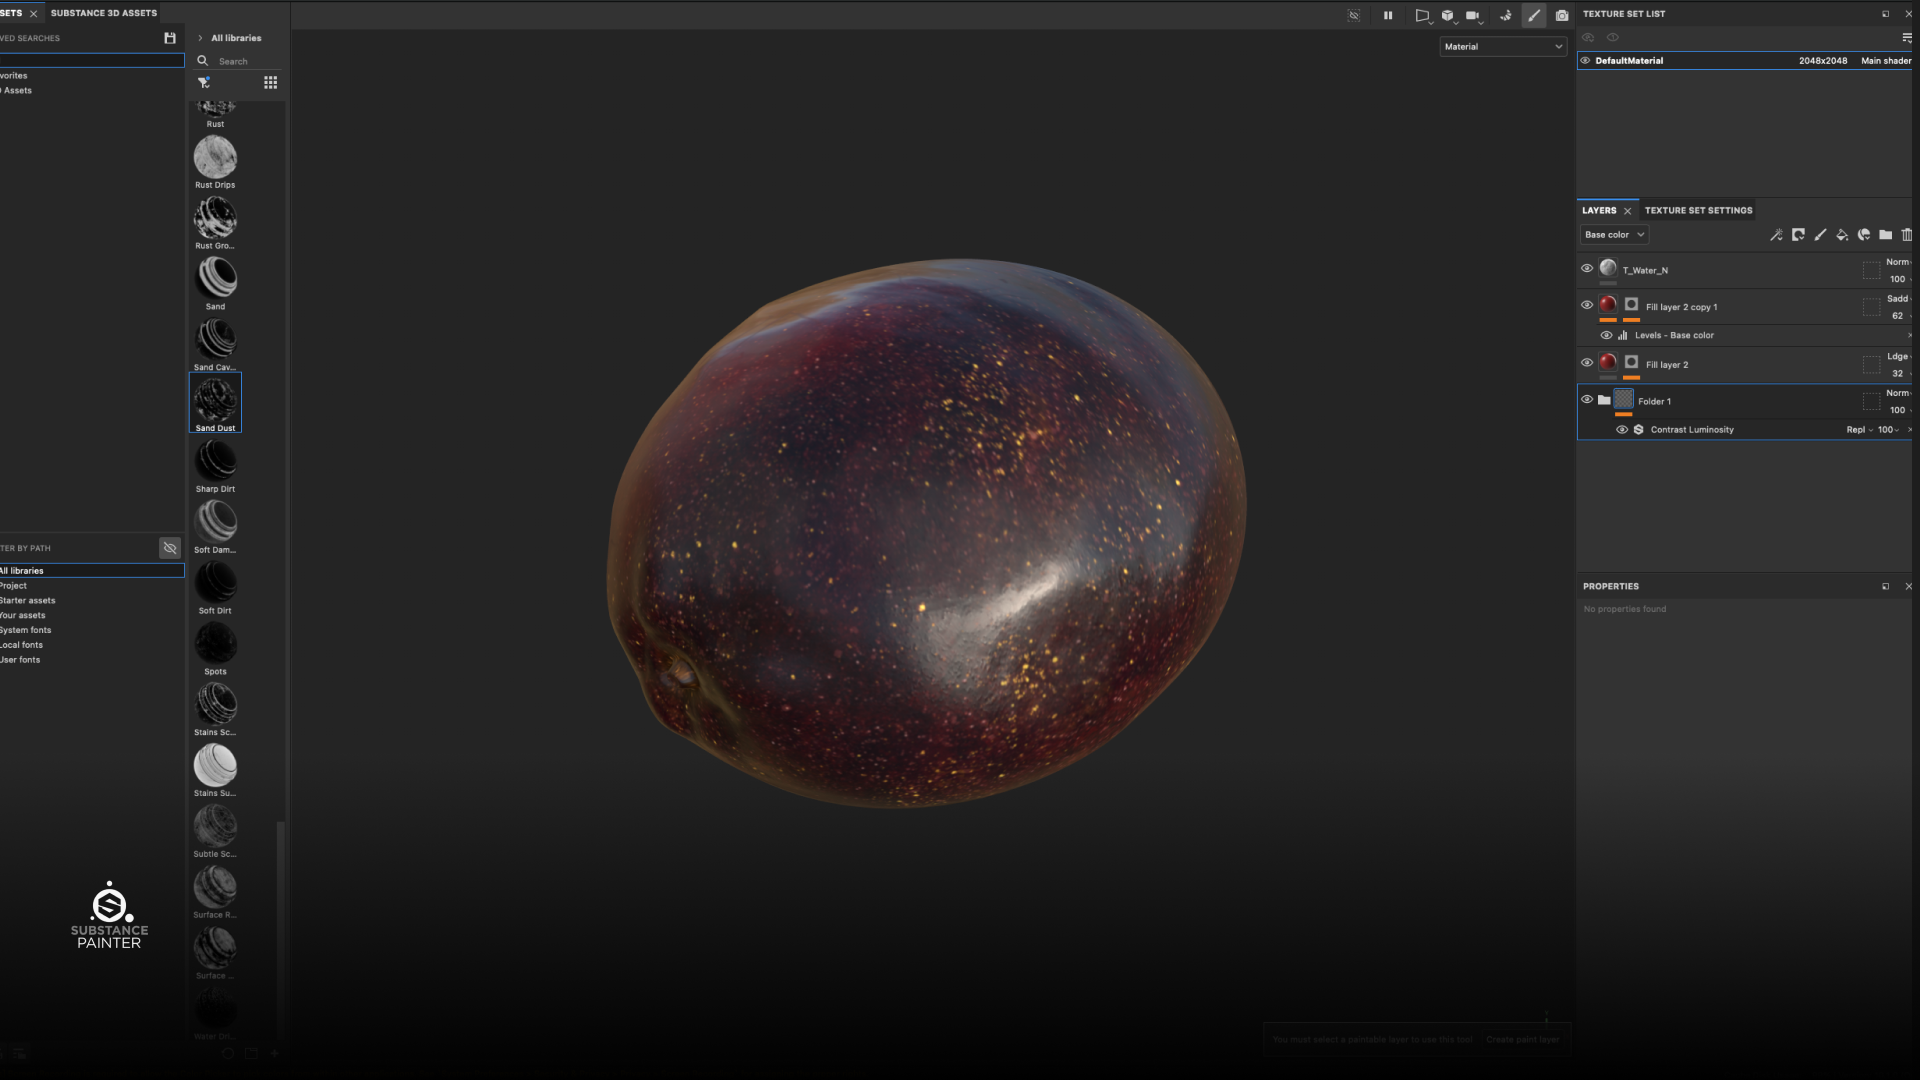
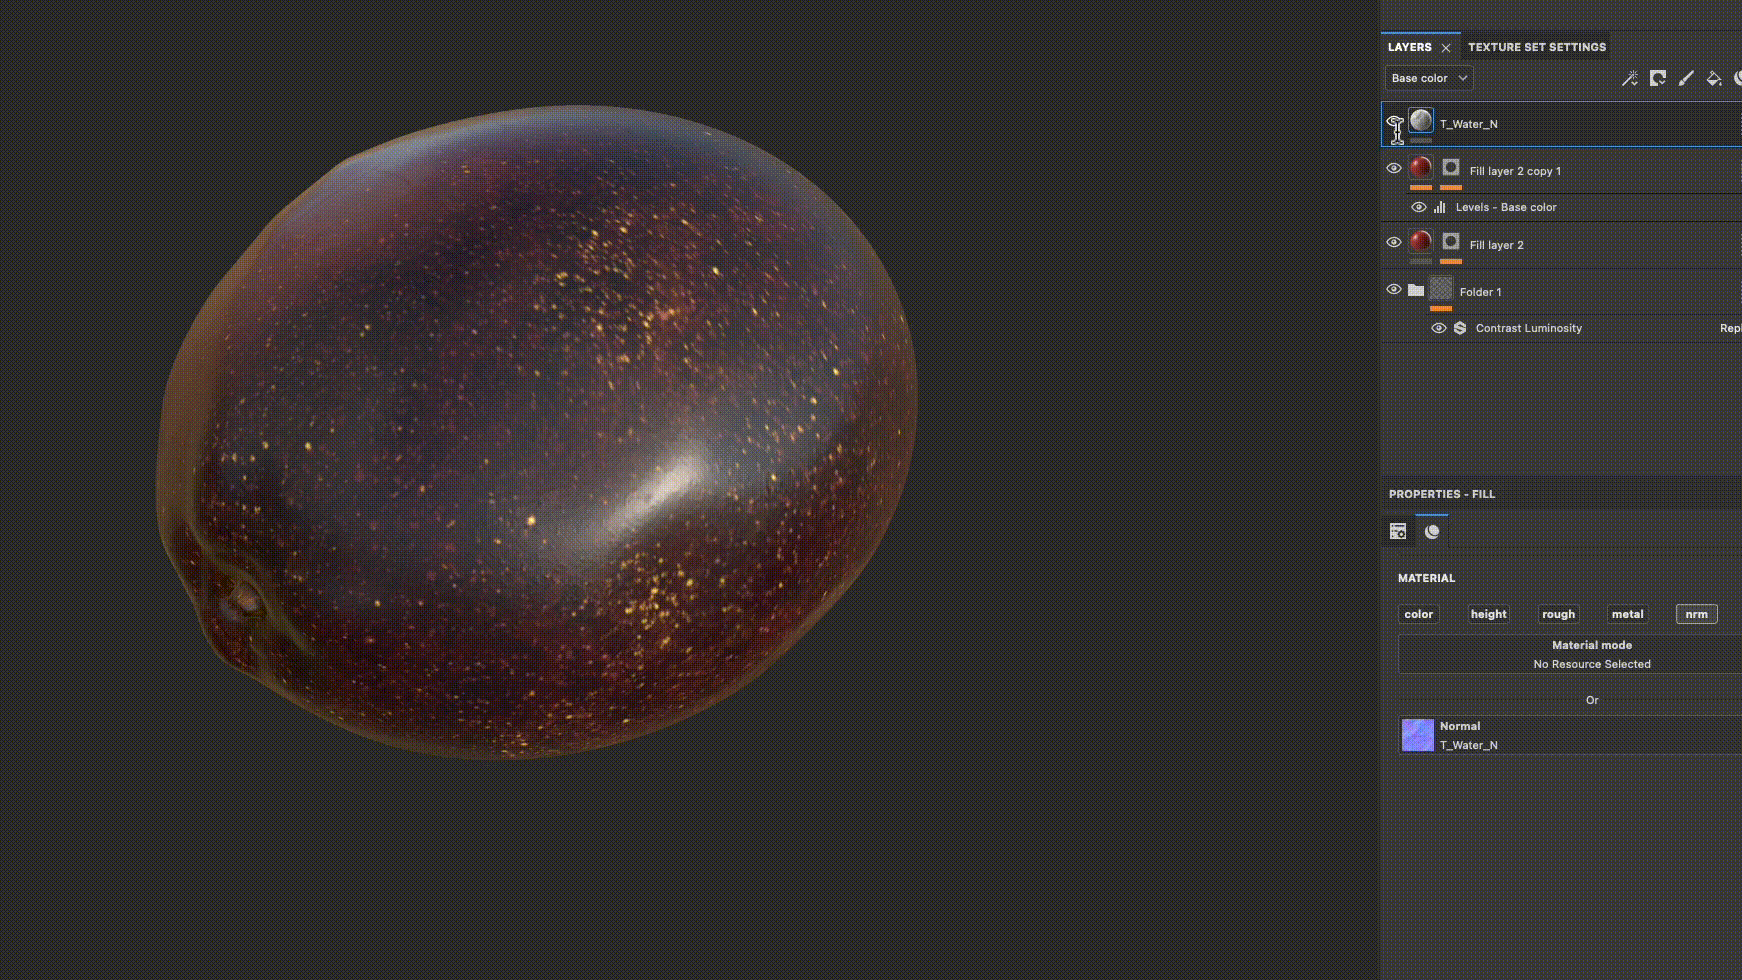
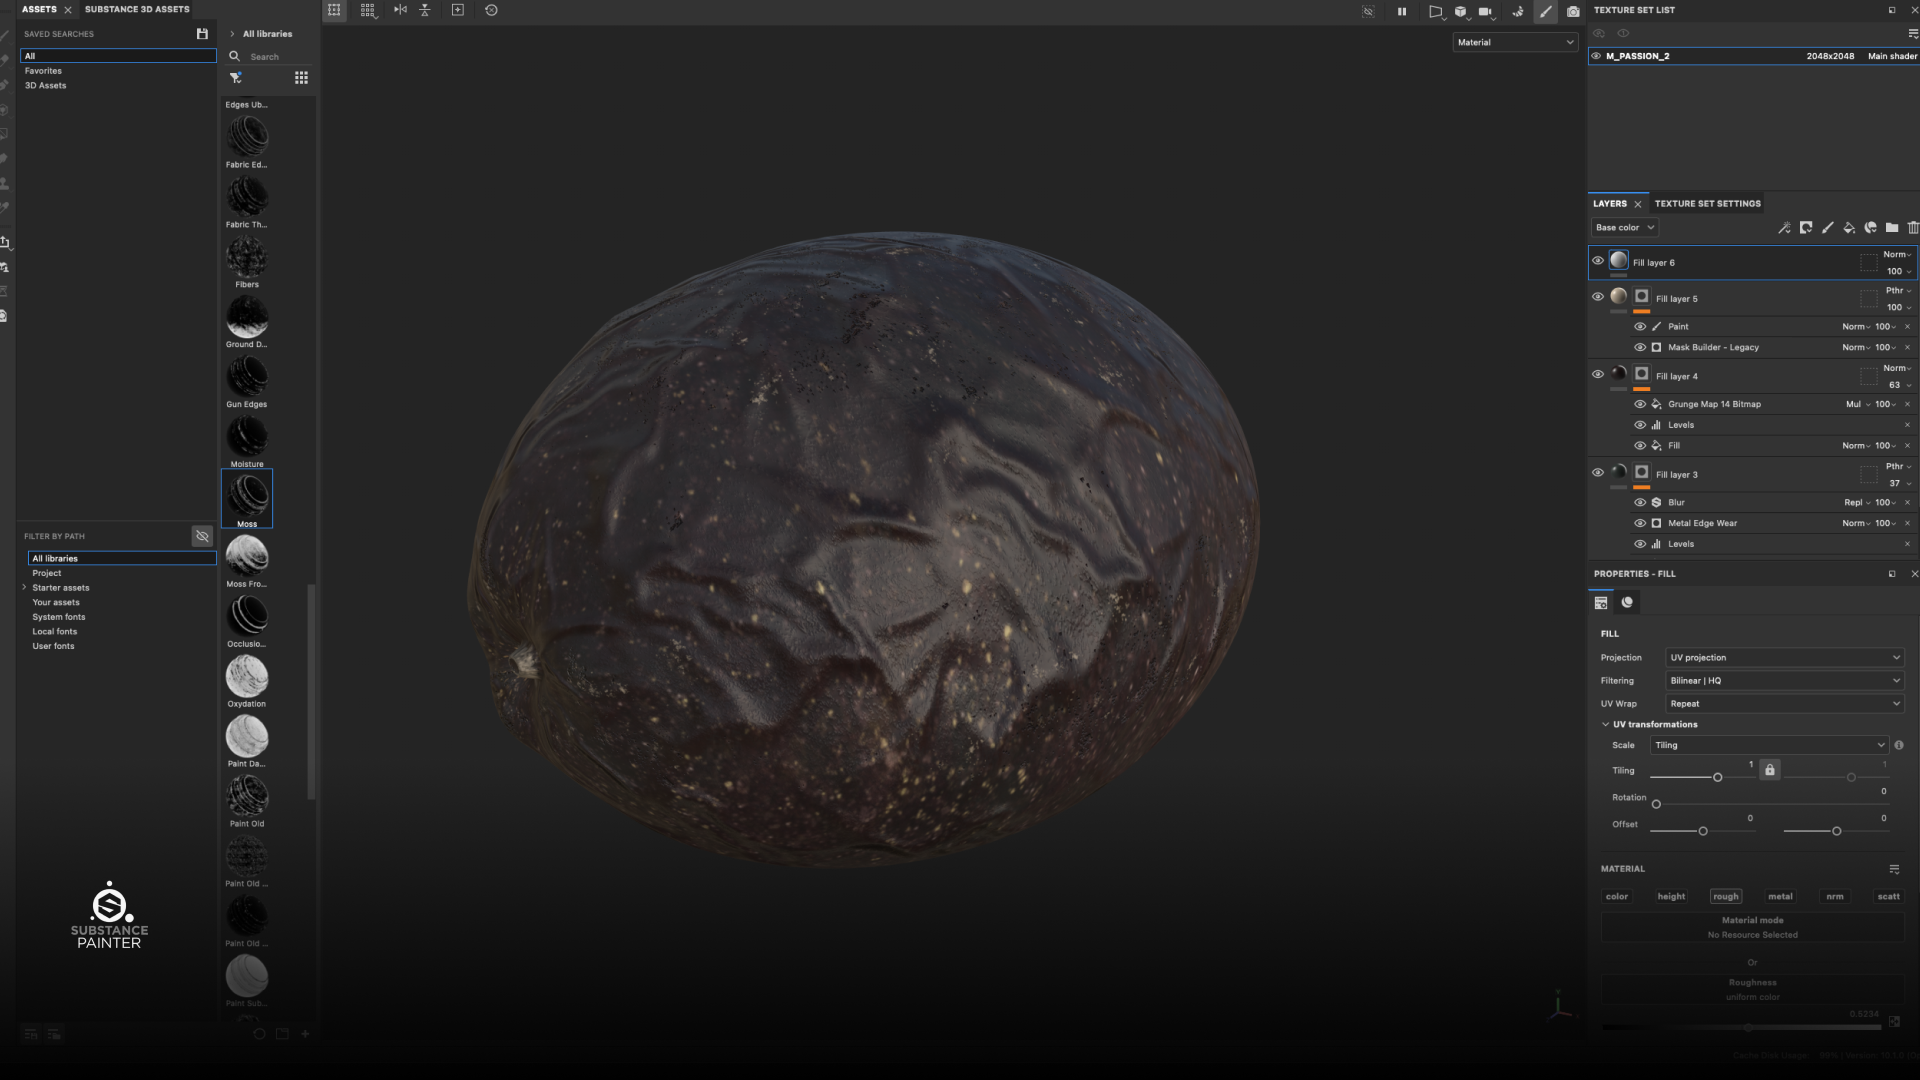
Step 03: Texturing in Substance Painter
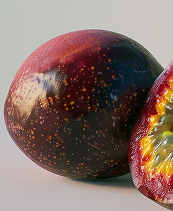
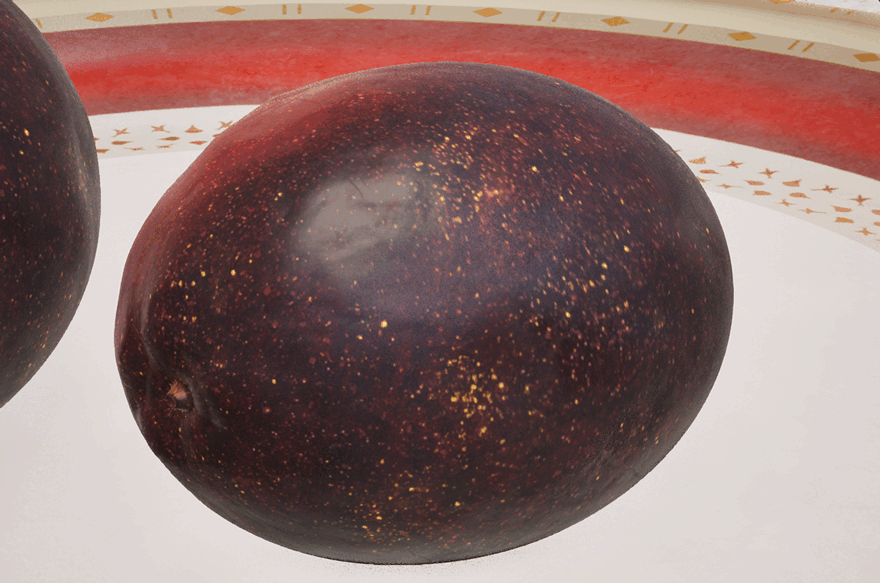
︎Example: Passion Fruit Material Breakdown
While Substance Designer provided the foundation, Substance Painter allowed me to add the final touches of realism. For the passion fruit, I noticed a distinct red variation on the left side in the reference image, and I carefully replicated this detail in Painter. Additionally, I found that the normal map from Substance Designer didn't quite capture the nuanced shape of the fruit, so I added a wave noise pattern to introduce more natural variations along the edges.
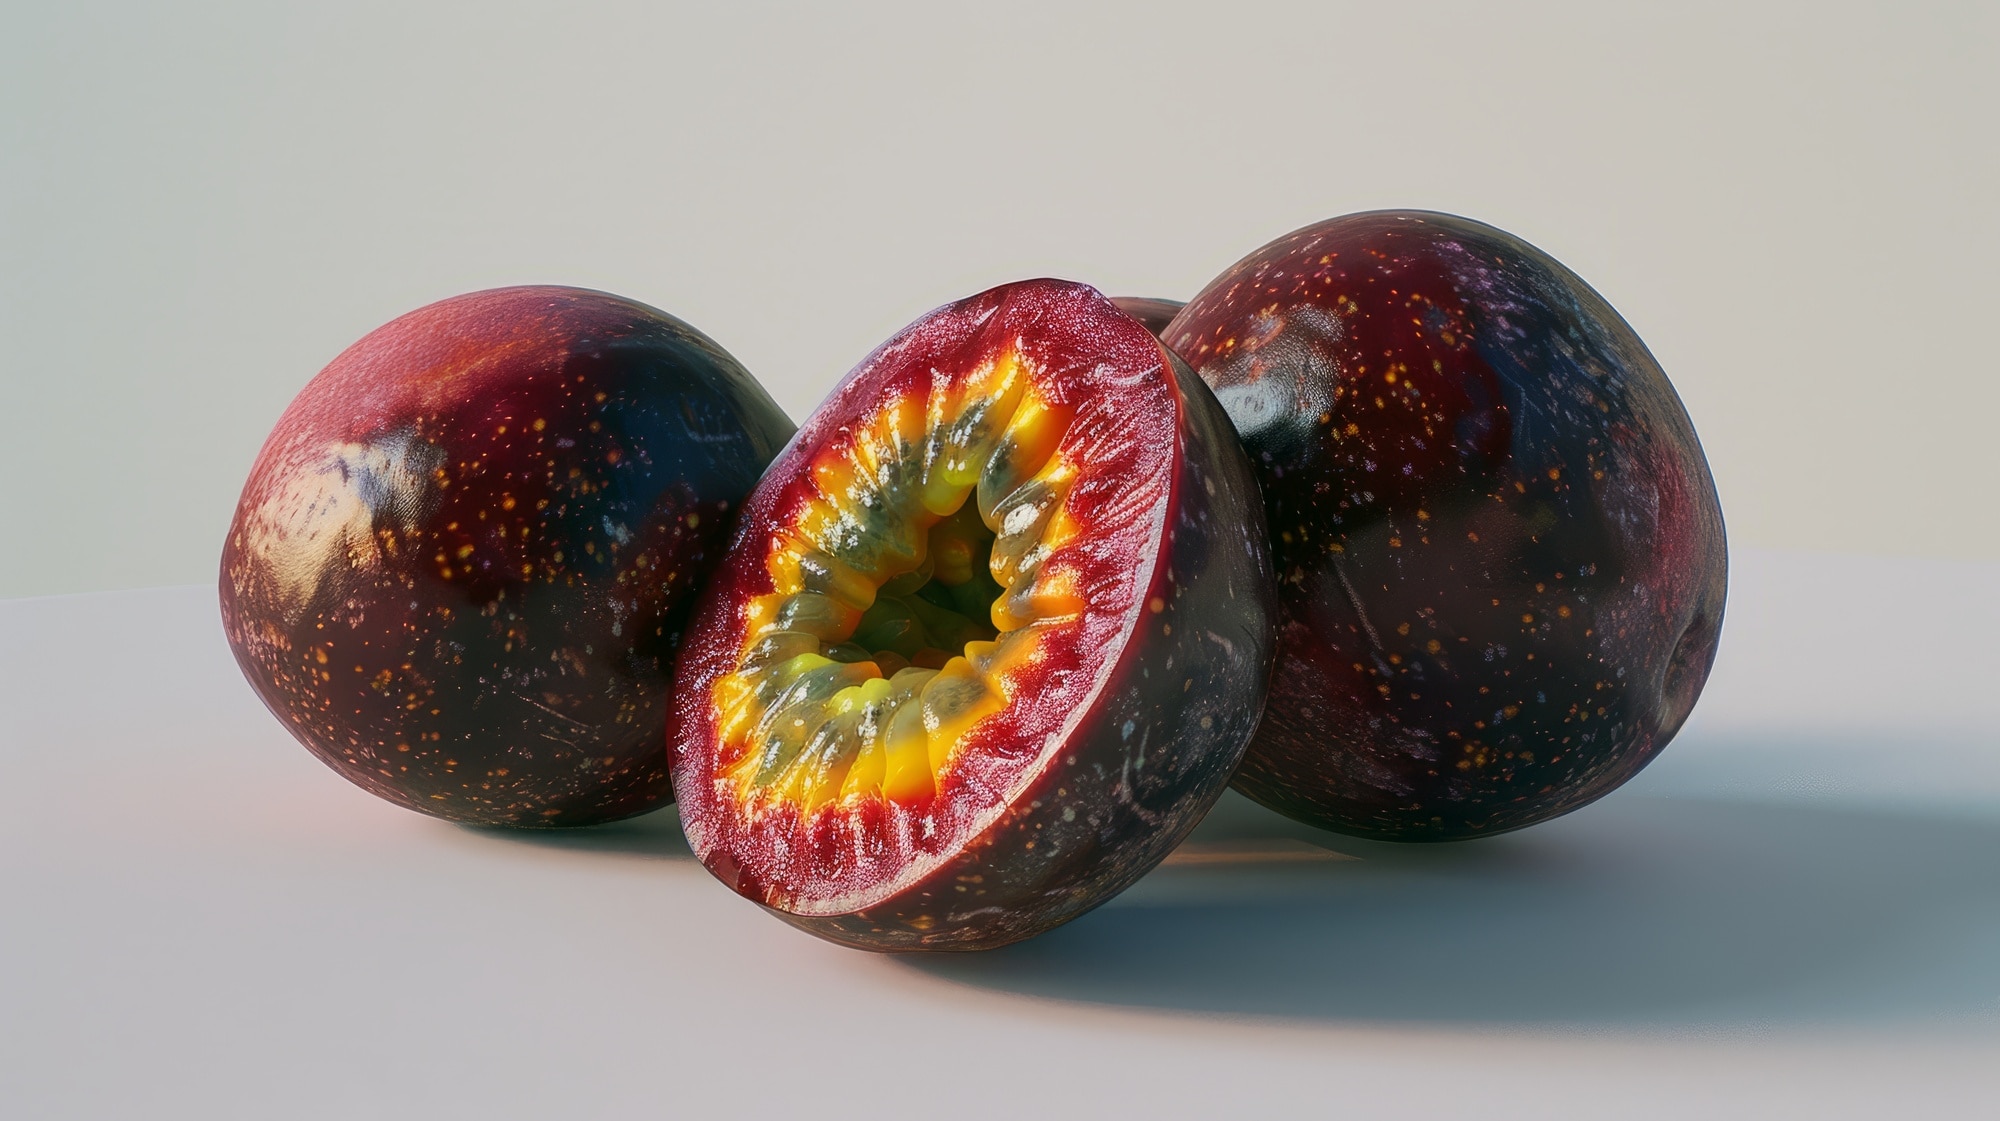
Reference for Passion Fruit
Detaild layers for Passion Fruit
Normal Map Pattern
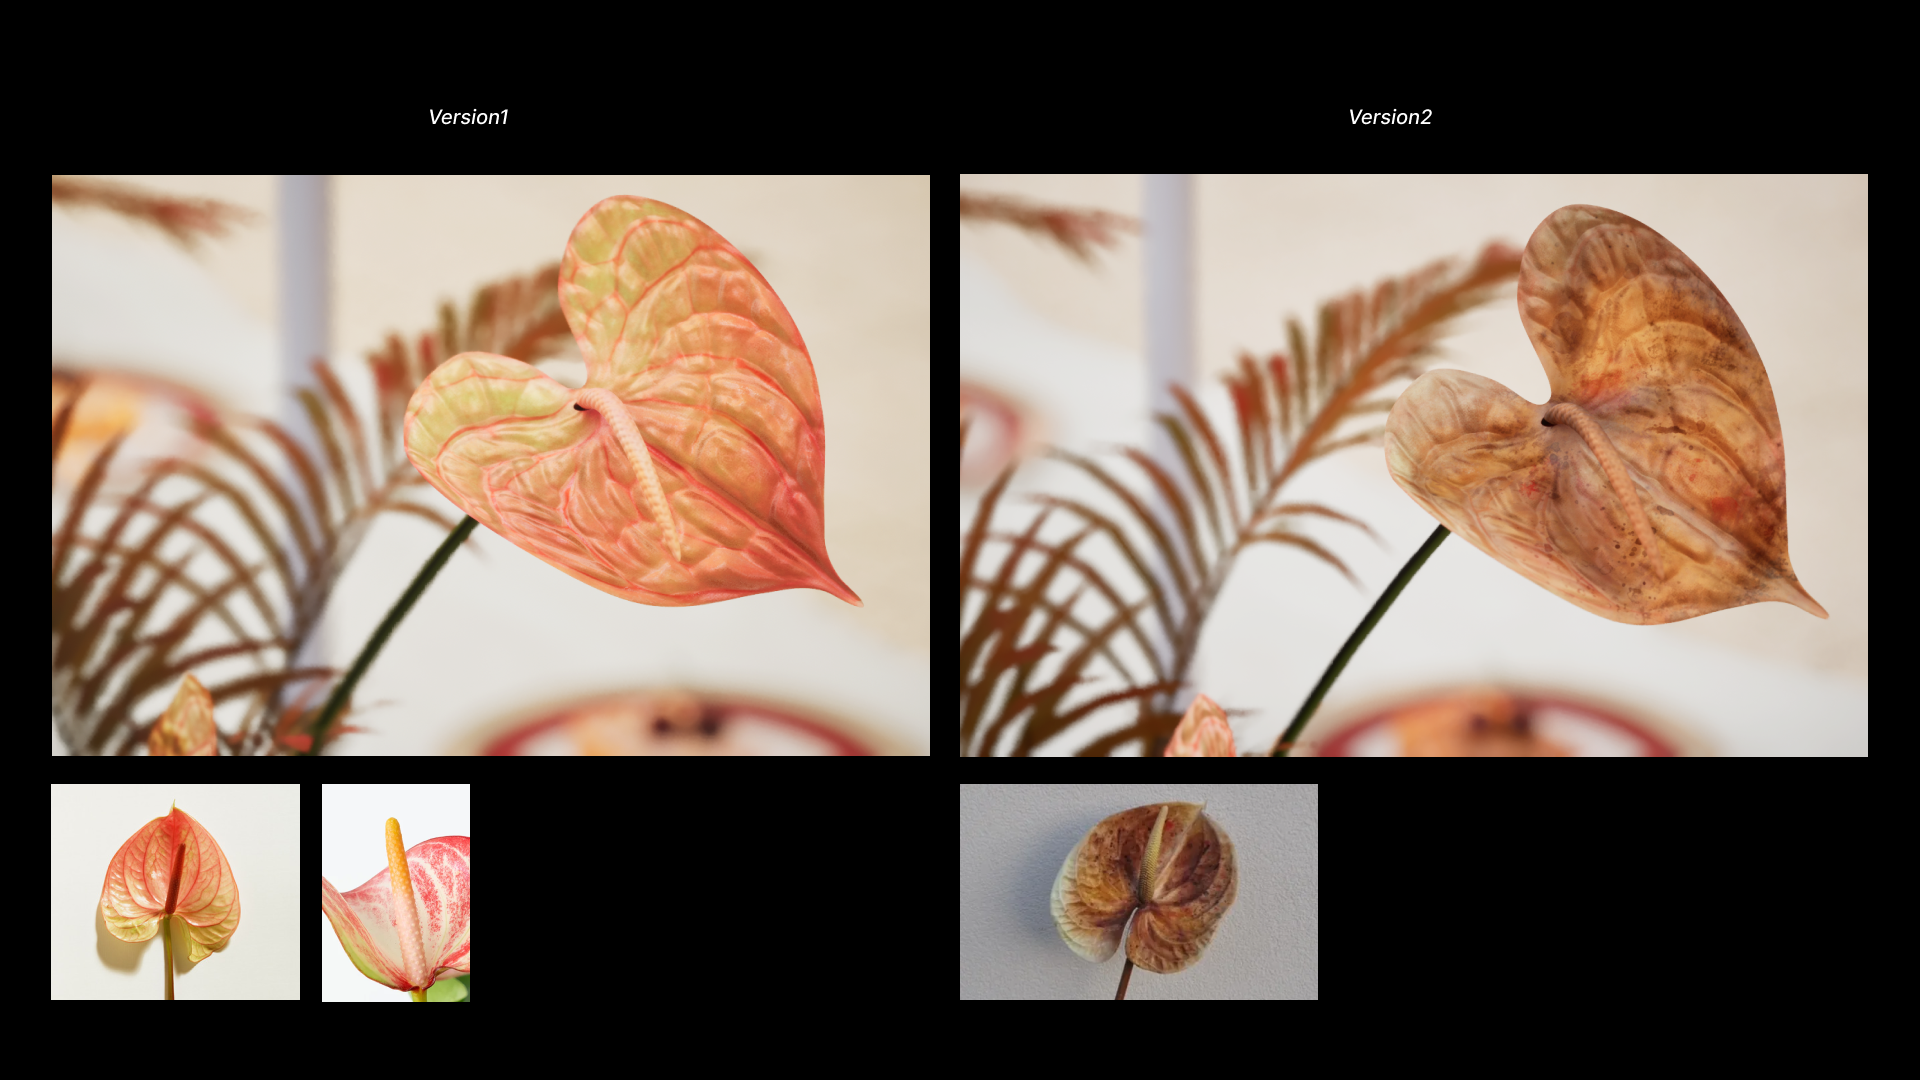
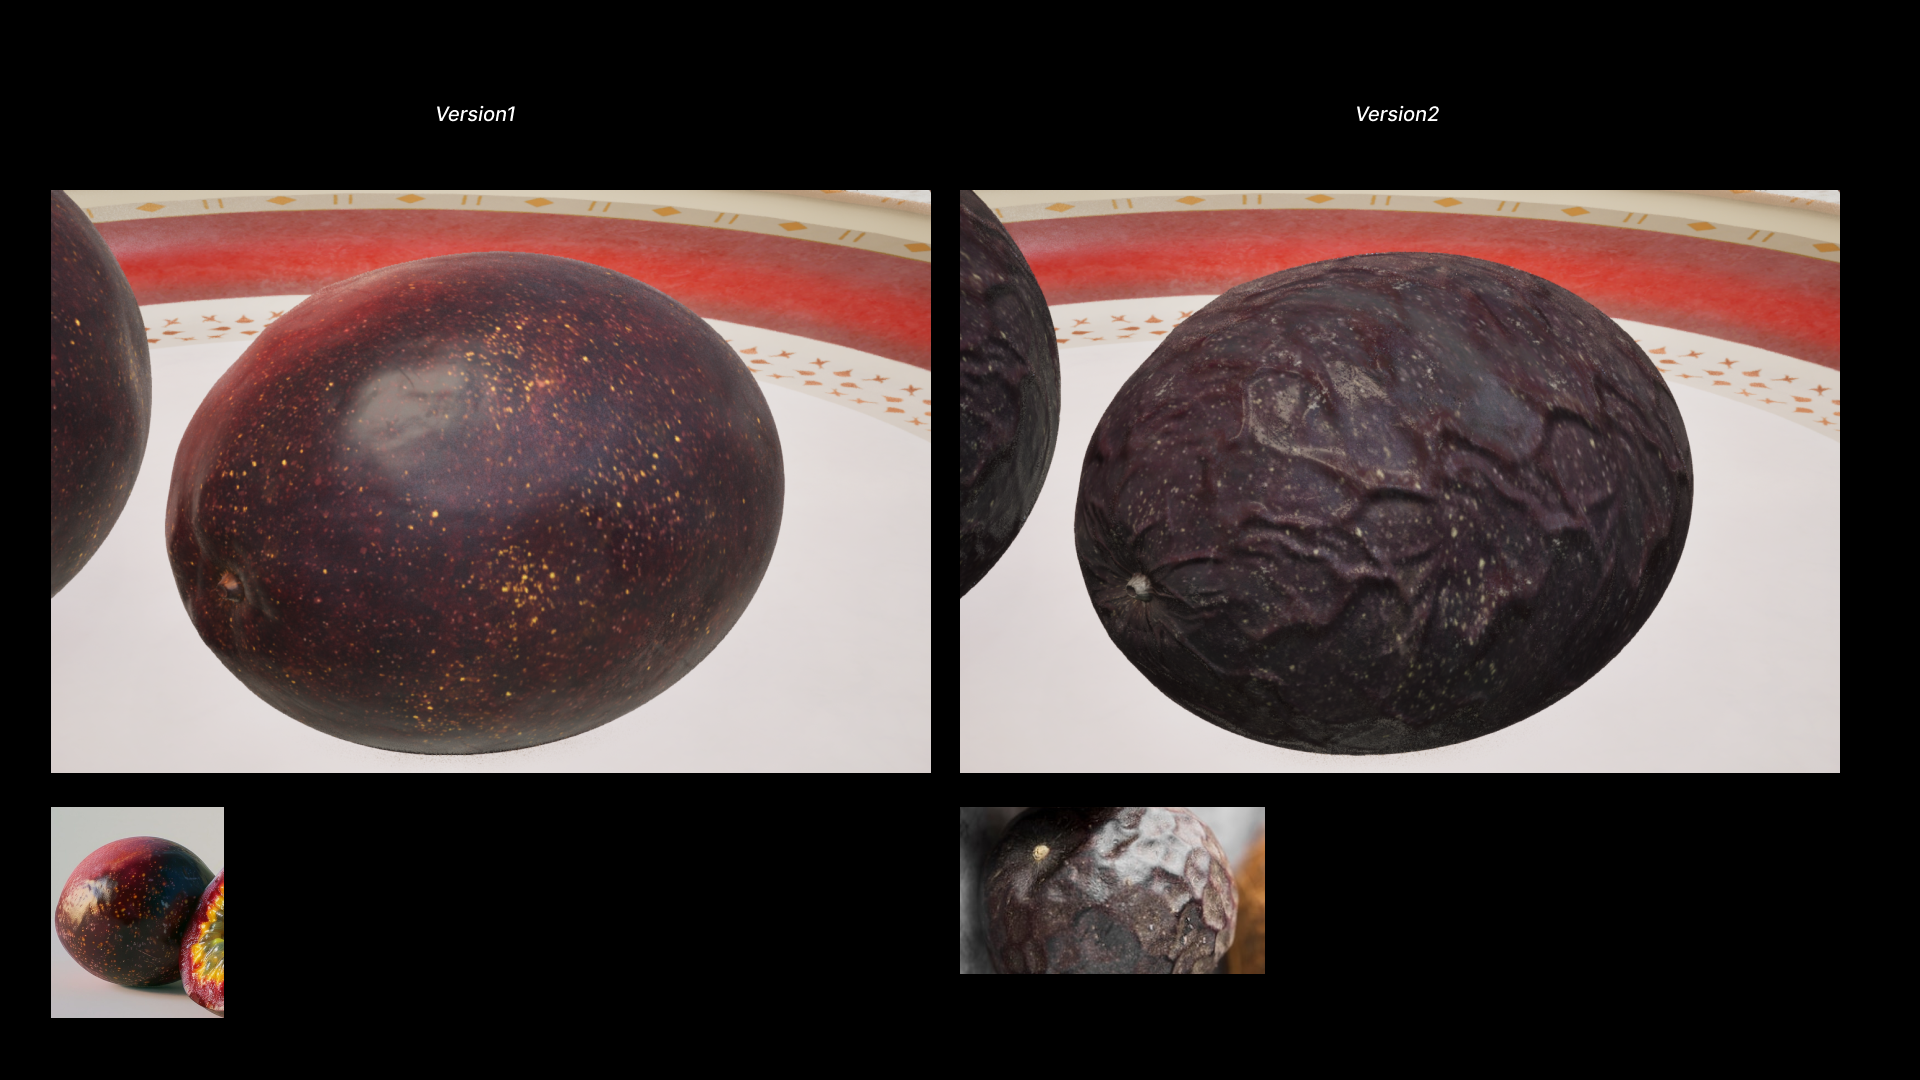
Step 04: Further Texturing For Version 2
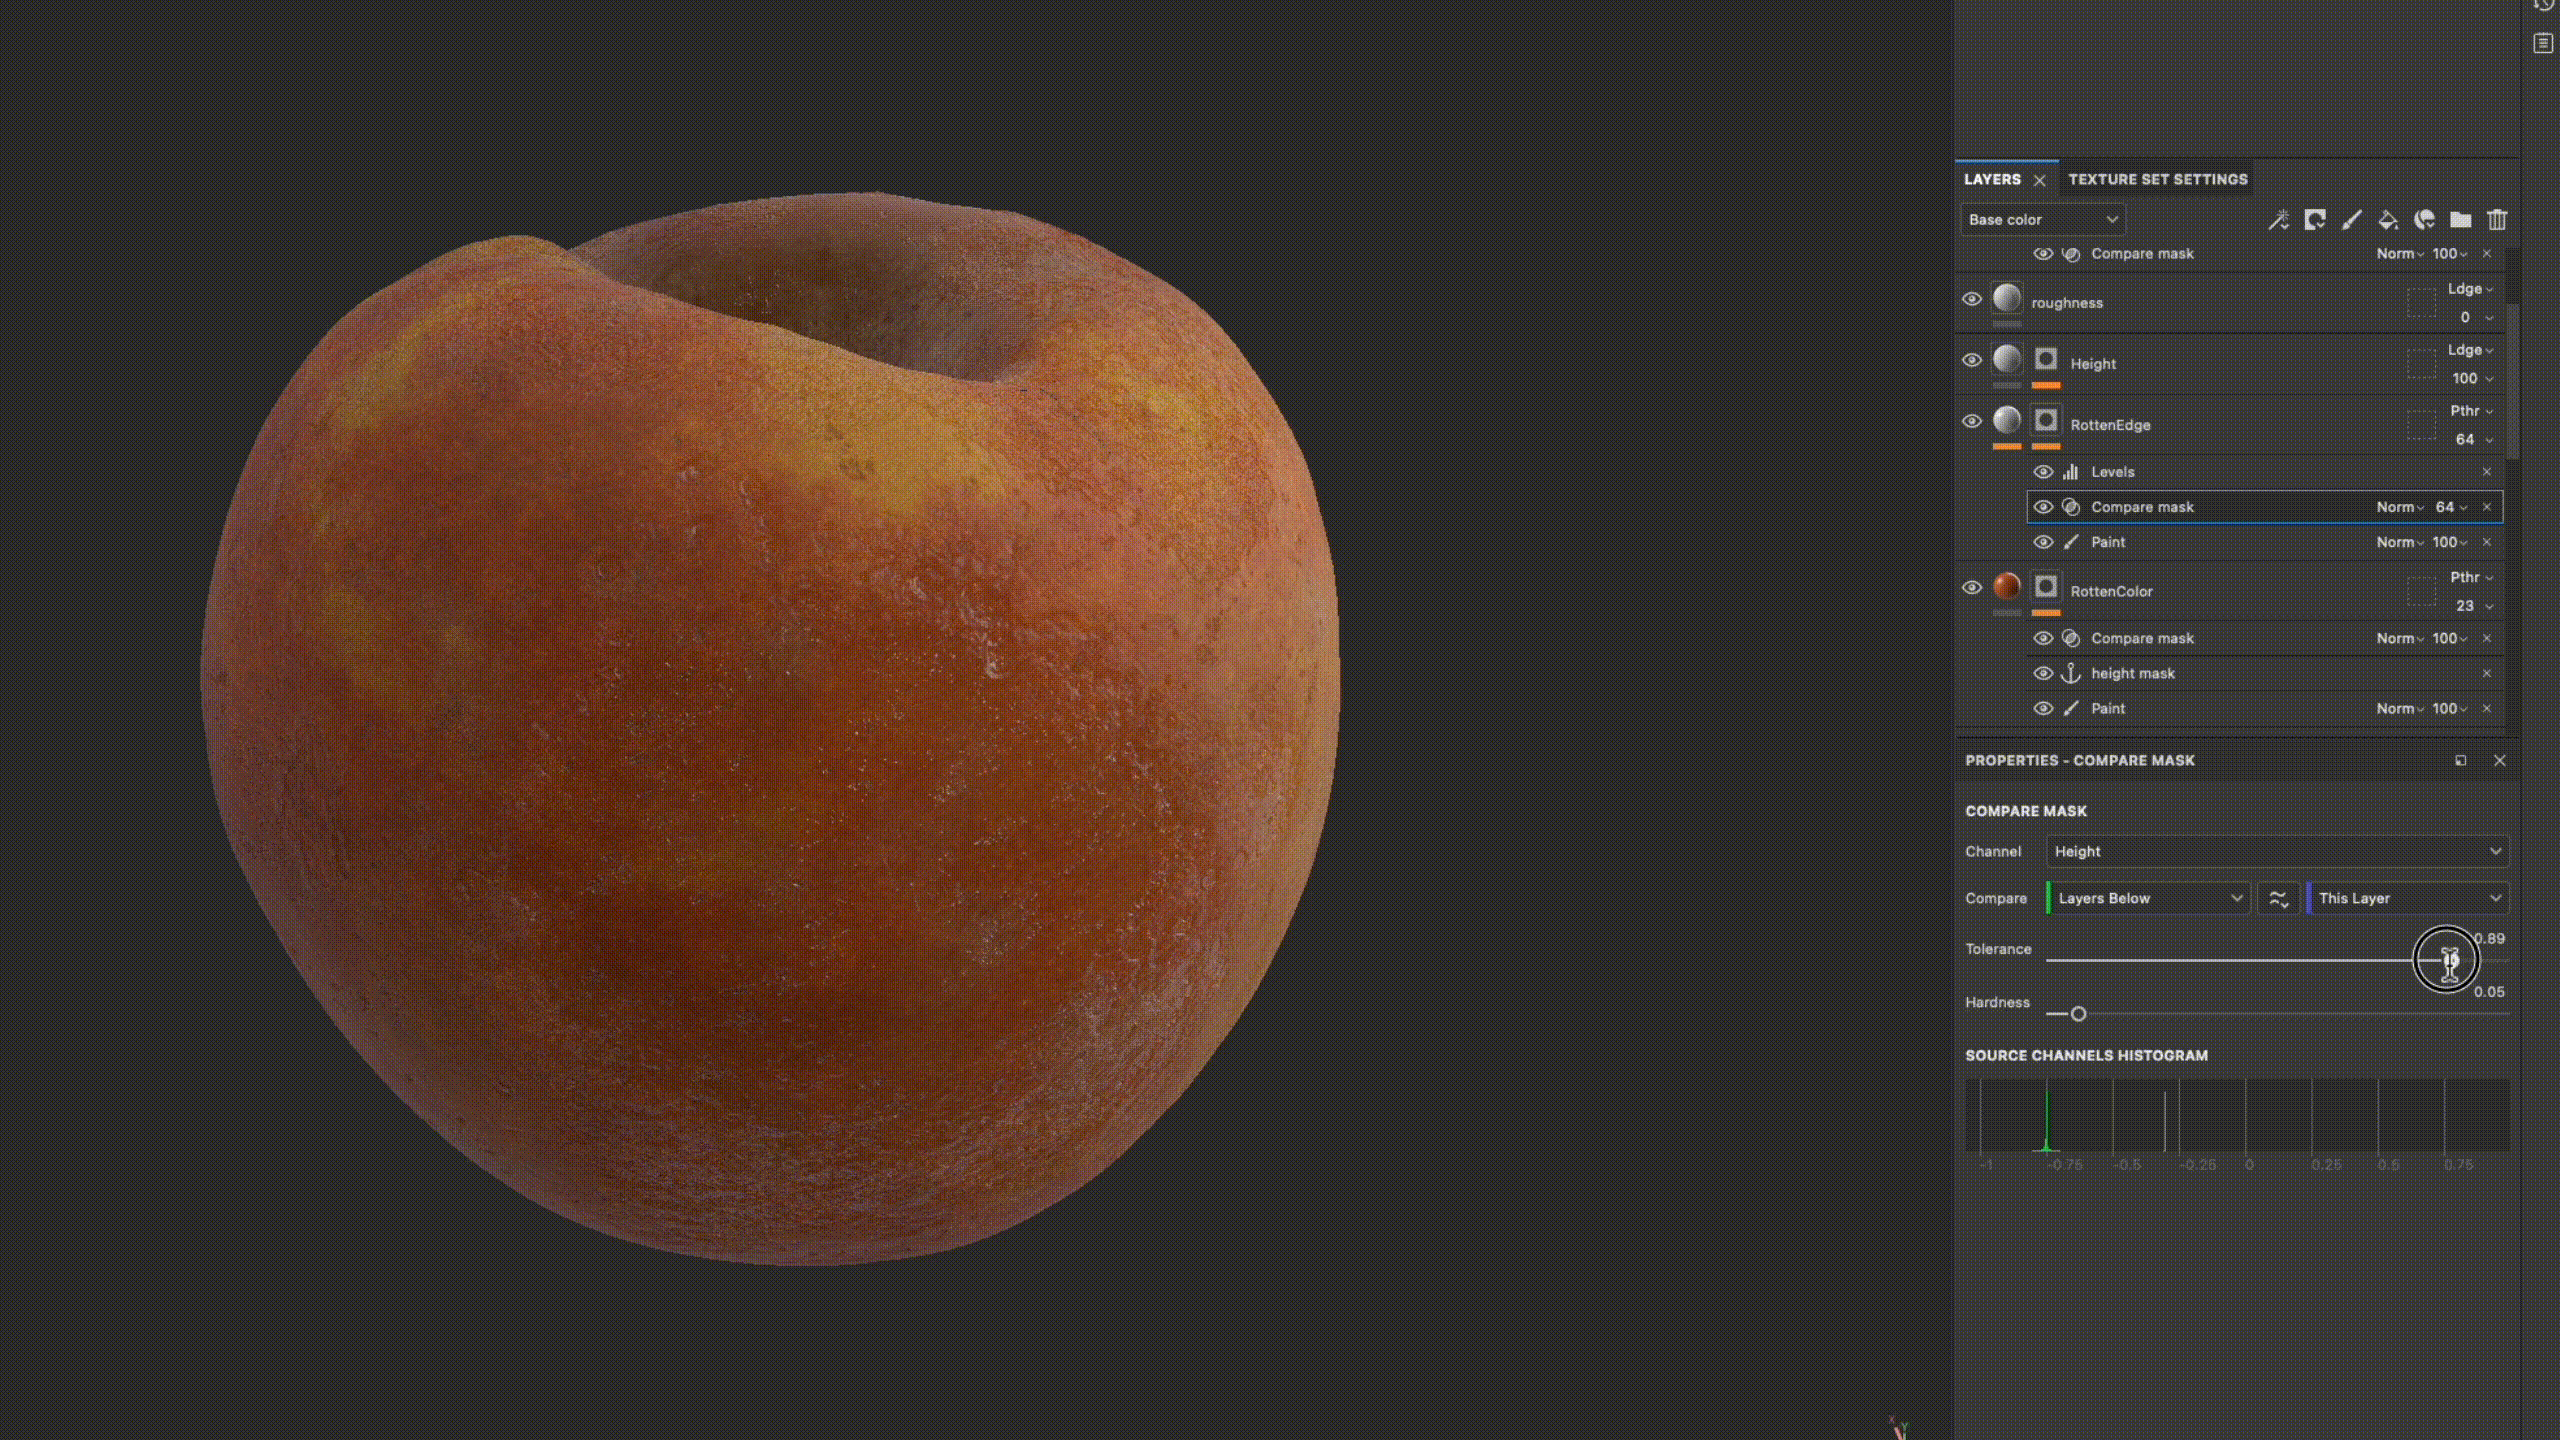
︎Example: Peach Material Breakdown
One of the most valuable tools in Substance Painter was the combination of anchor points and compare masks, which enabled me to precisely paint the intricate details of the fruits, where both height and color variations were essential. By working within a black mask, I maintained the flexibility to continue refining and adjusting the textures as needed.
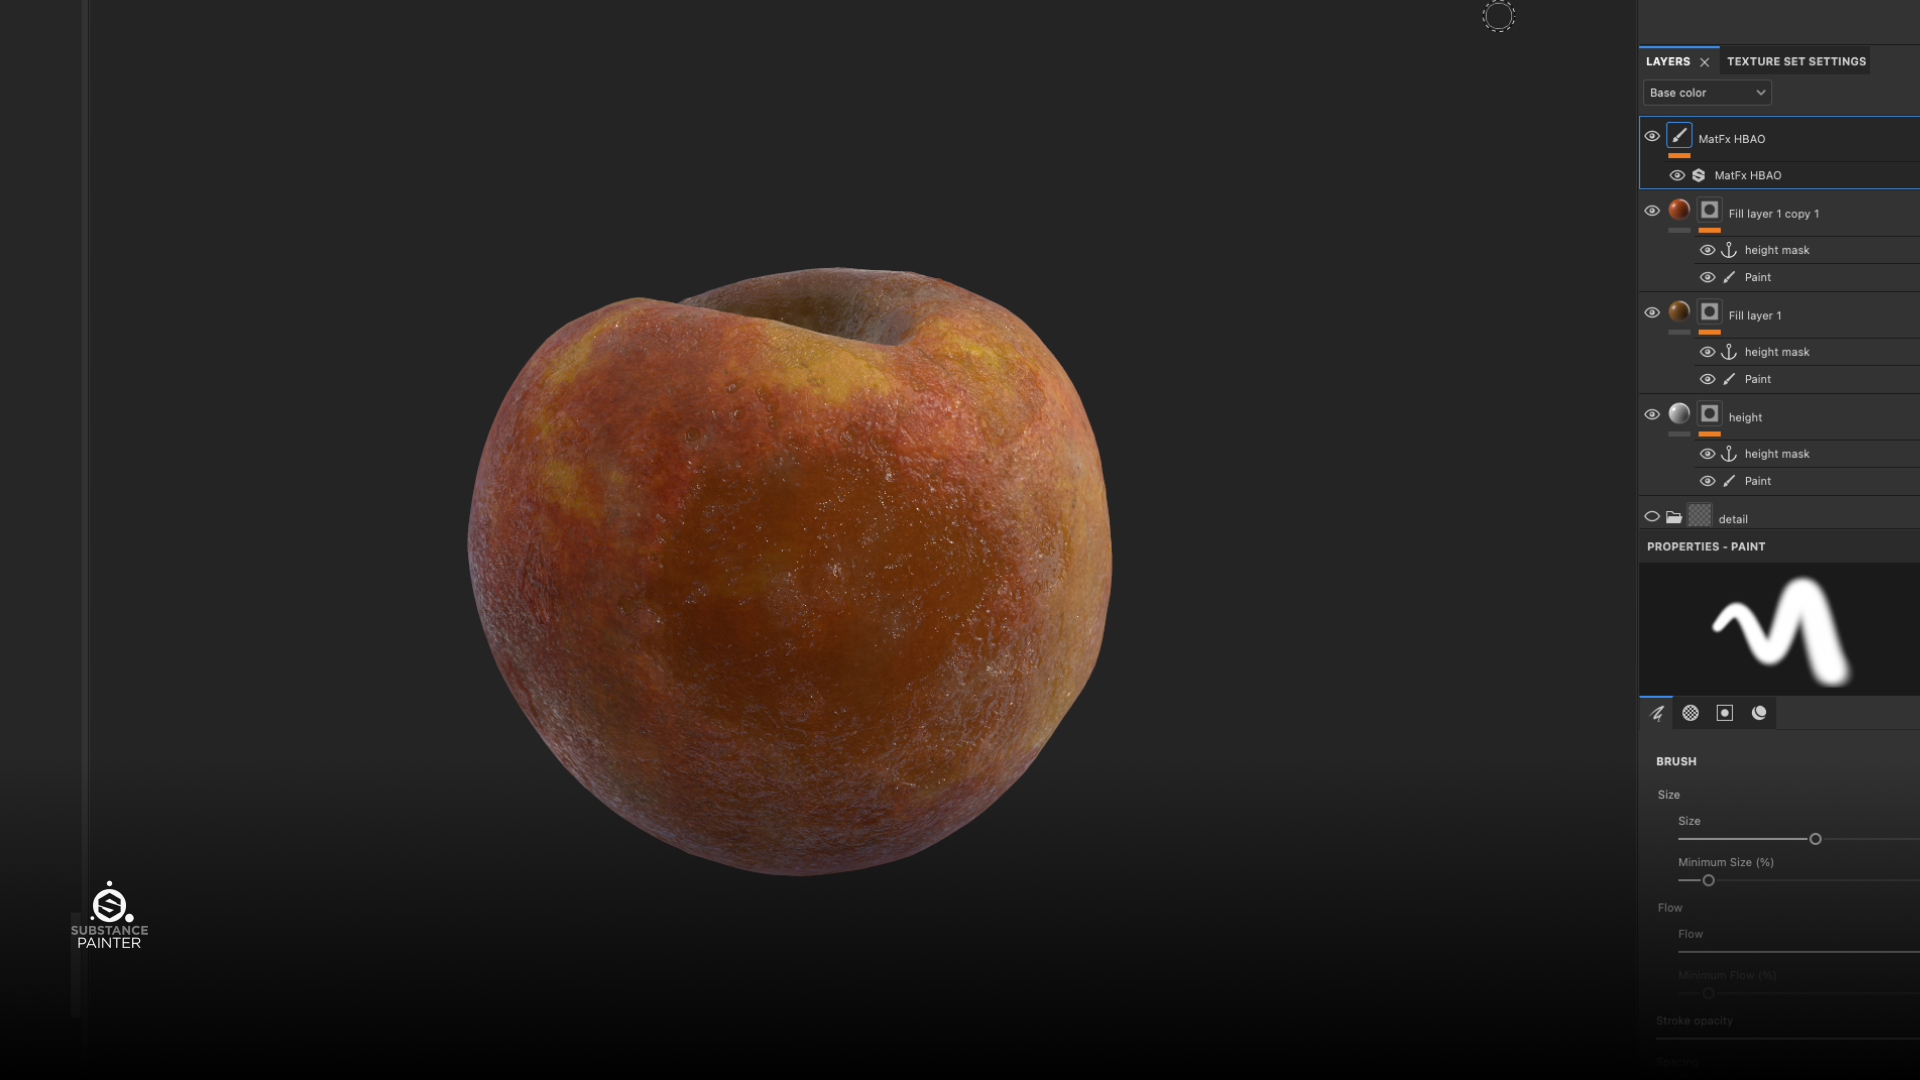
Peach Material Breakdown - Anchor Point and Compare Mask
⑴ Anchor Points and Black mask: Locking key details and pin specific areas of a texture. By painting it in black mask, giving me the freedom to tweak or remove details later.

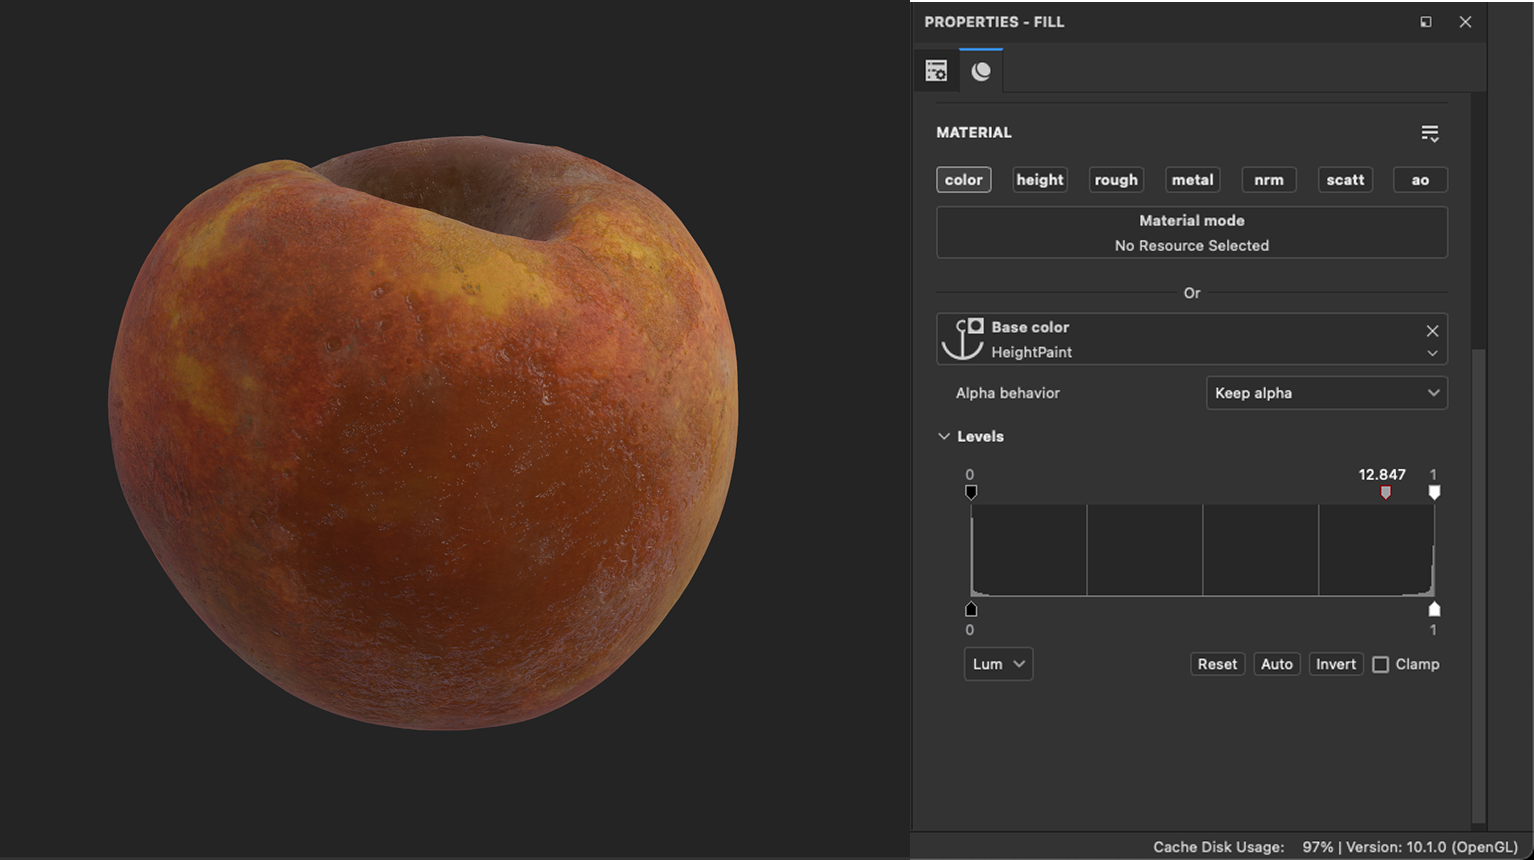
⑵ Compare Masks: Blending color based on height, curvature and the anchor point as well.
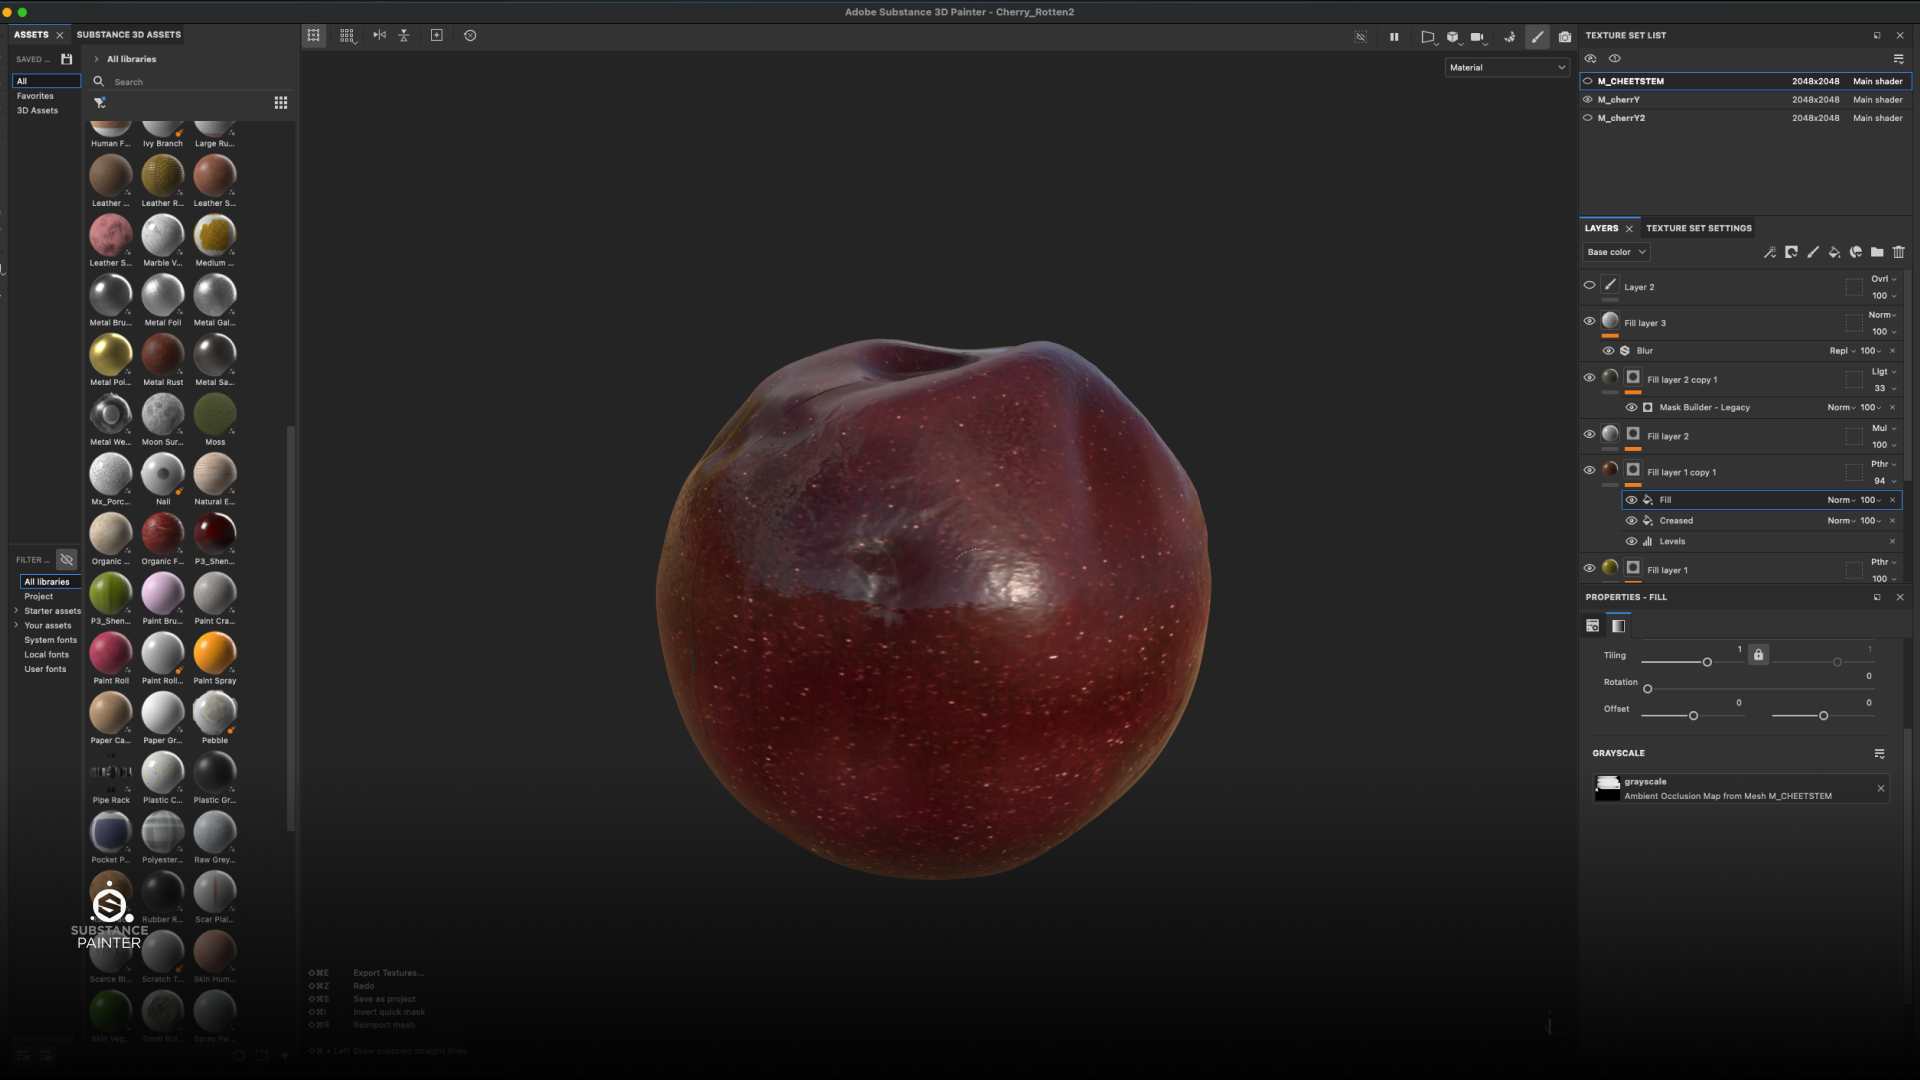
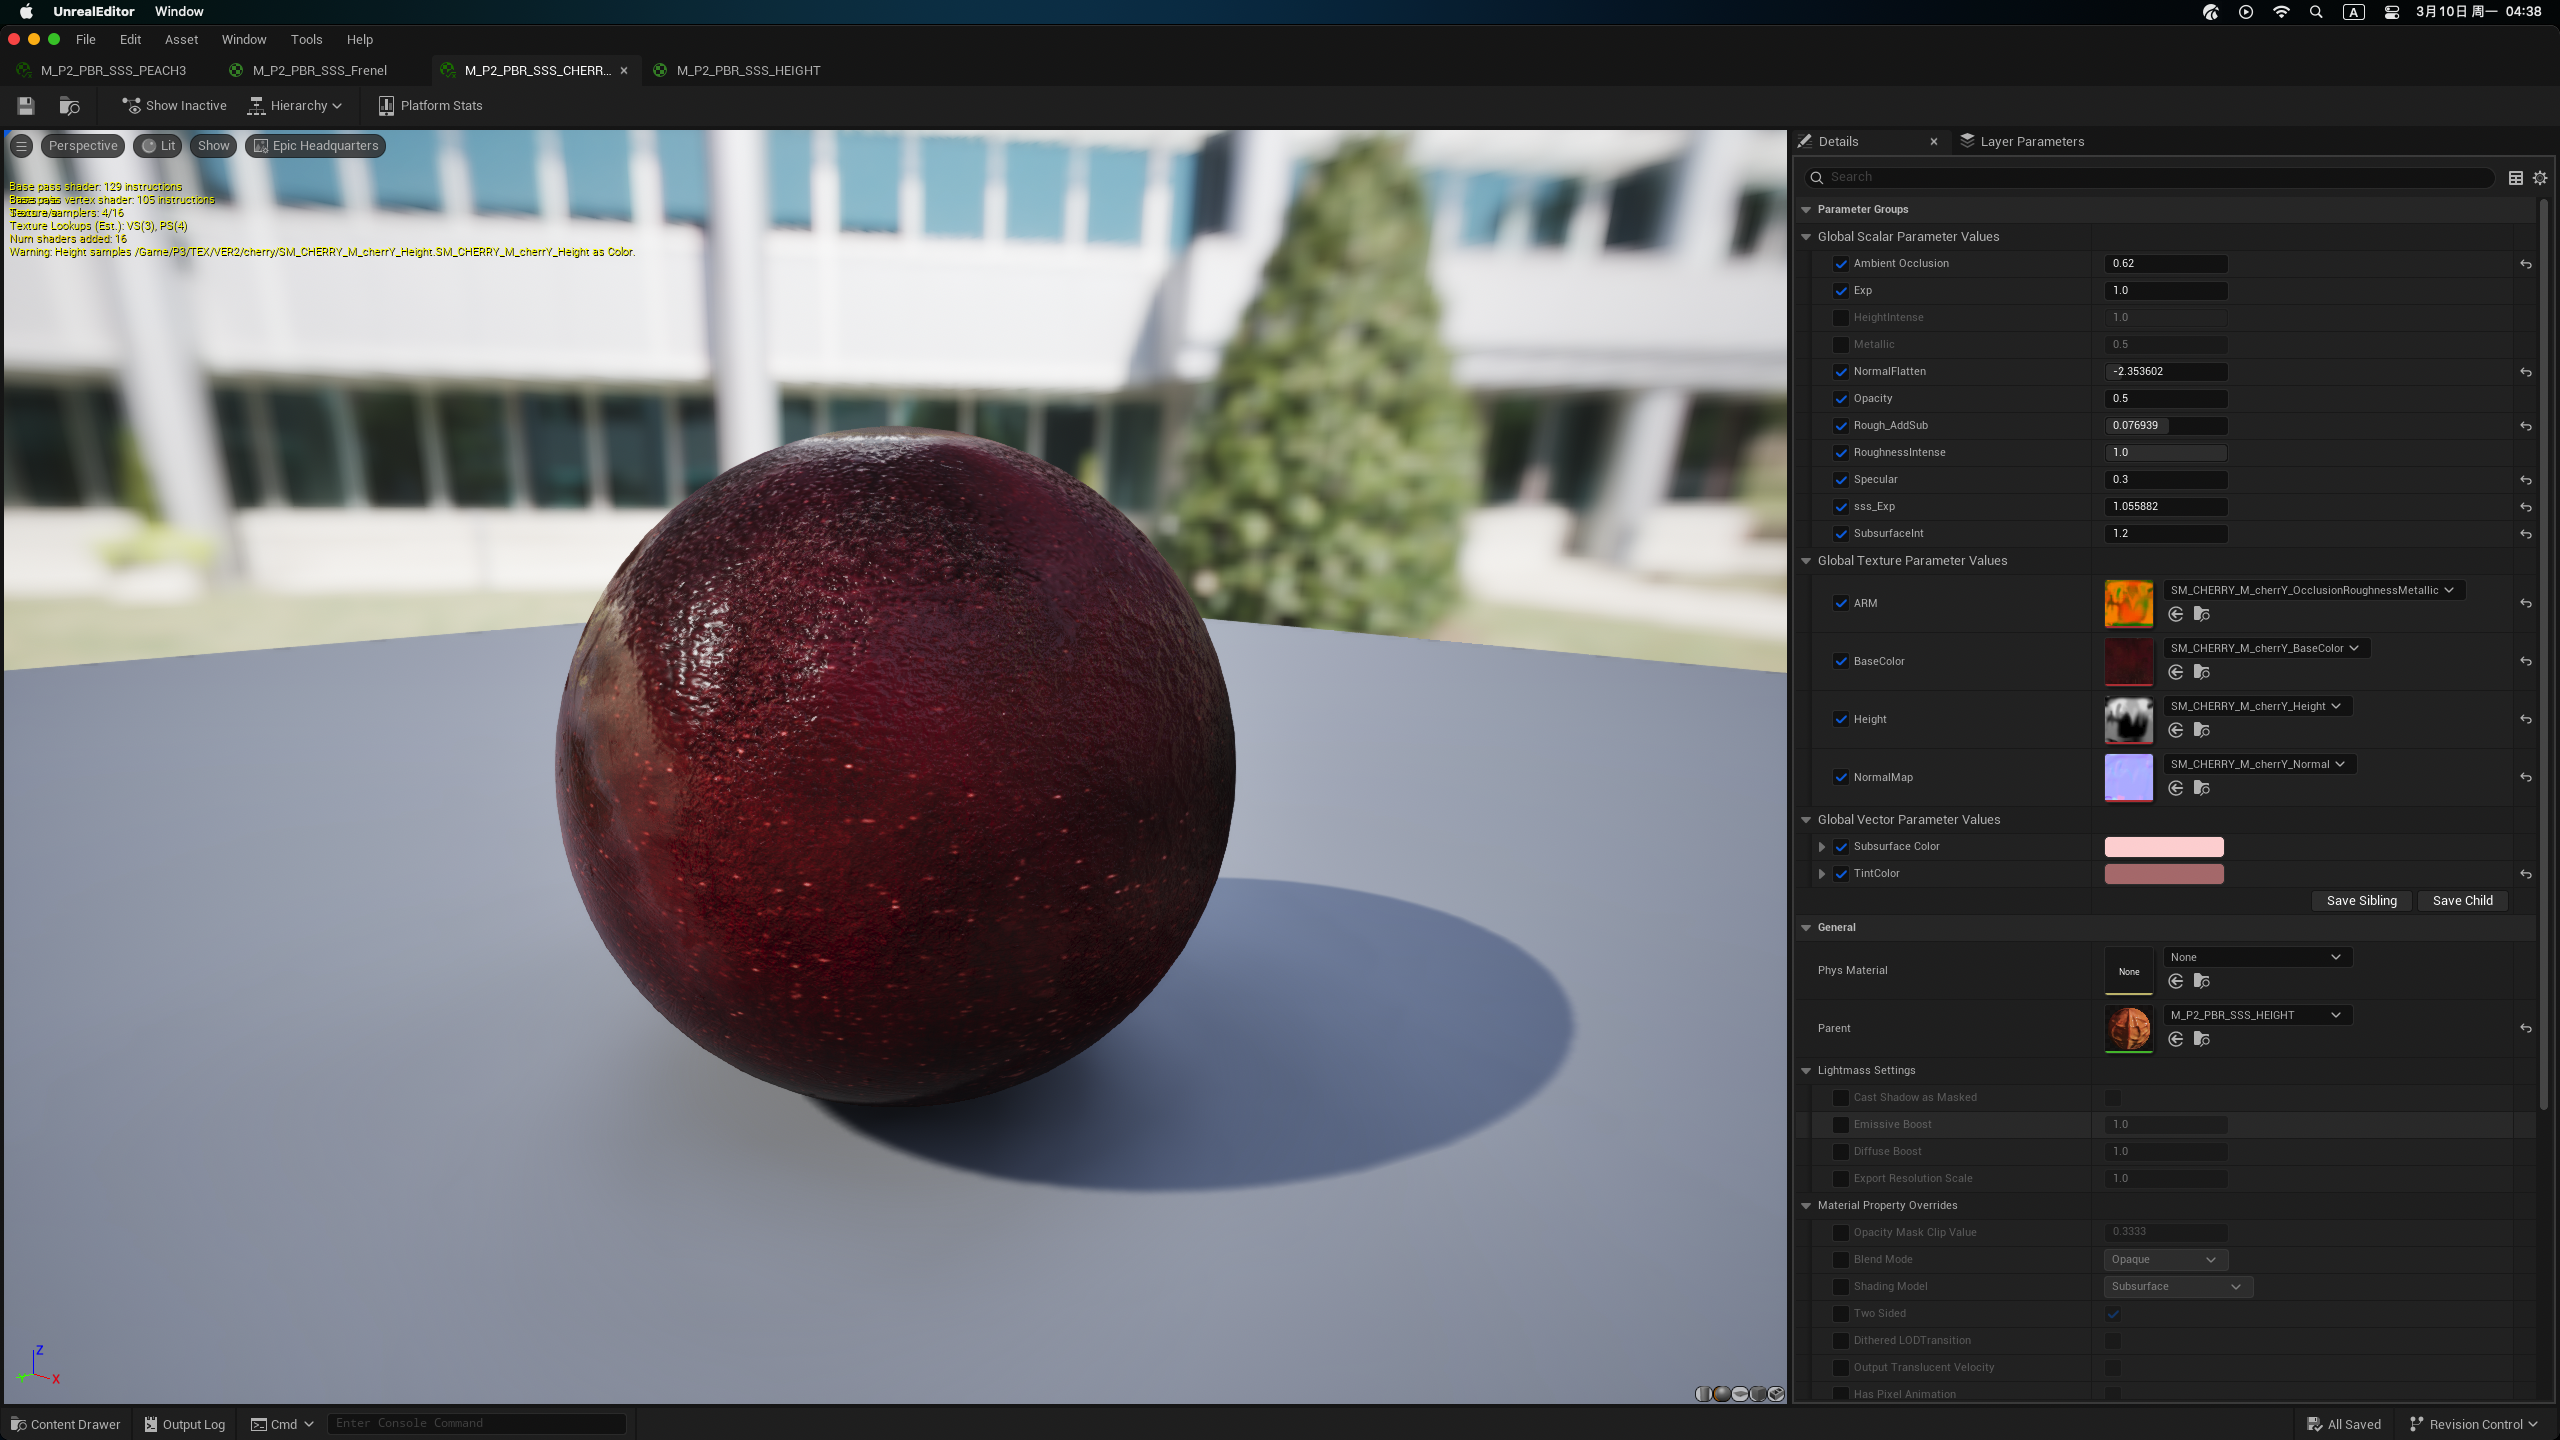
︎Cherry
![]()
︎Passion Fruit
![]()
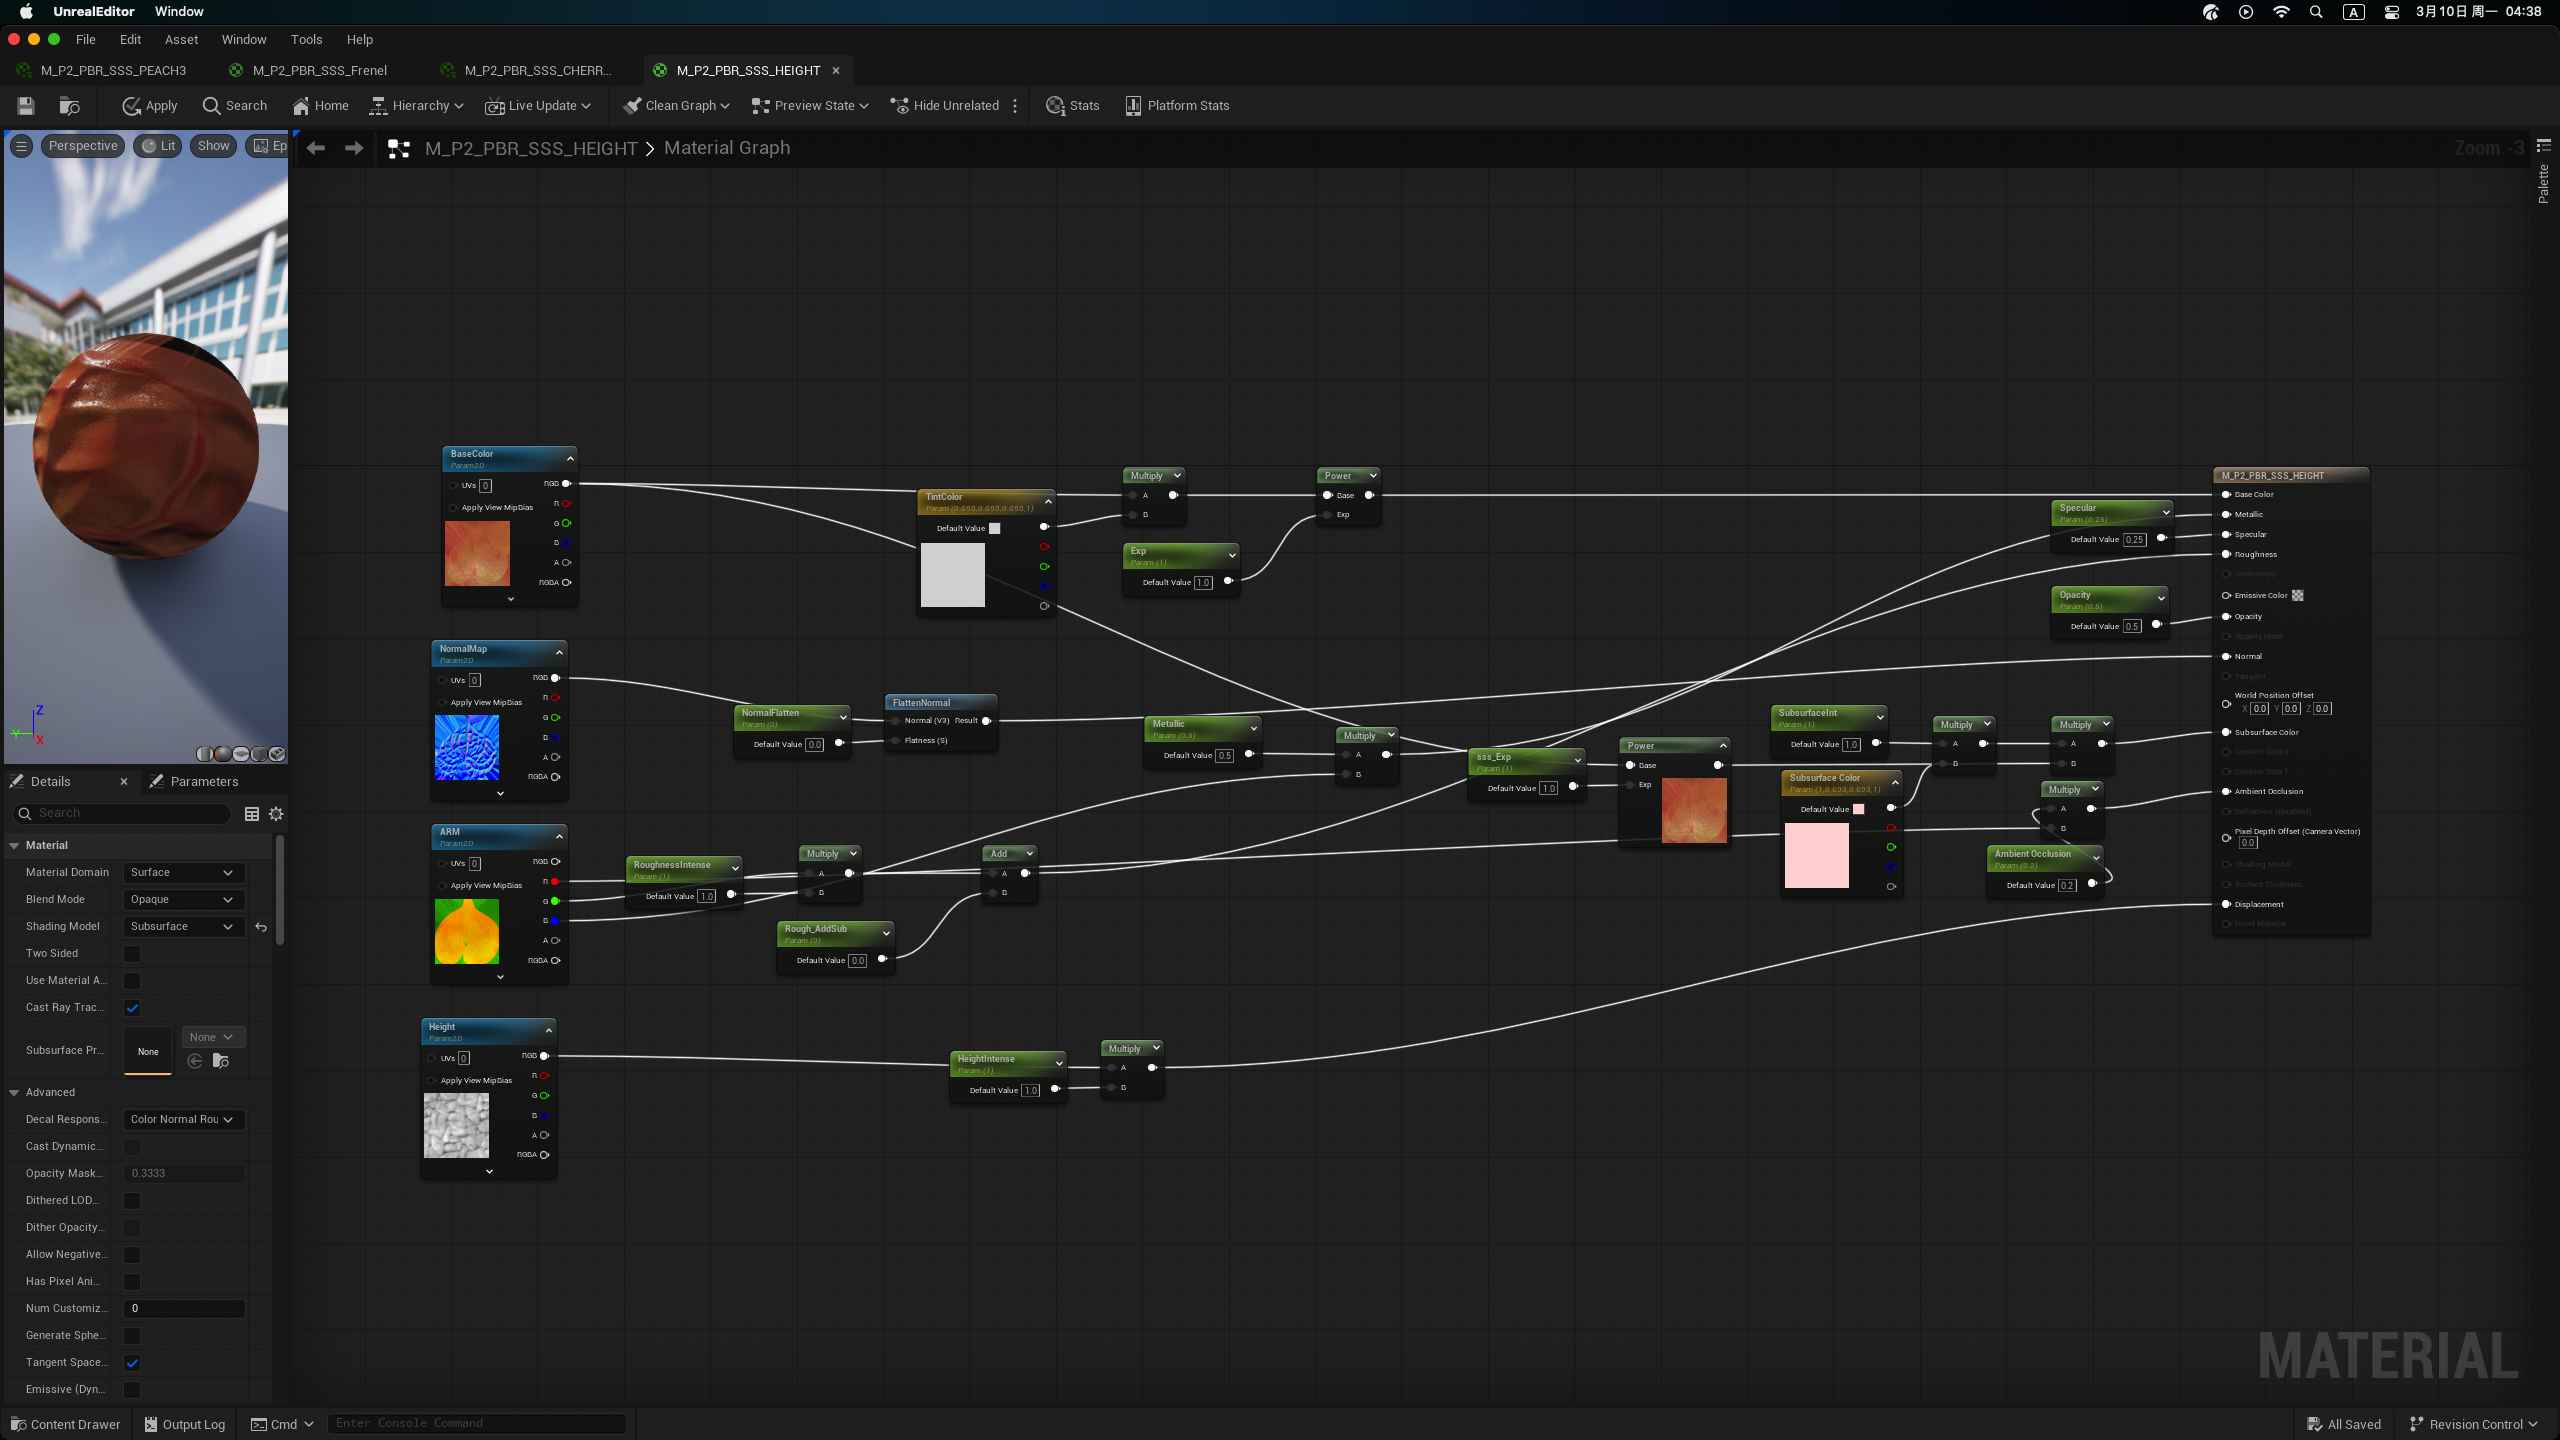
Real-Time Material Optimization in Unreal Engine
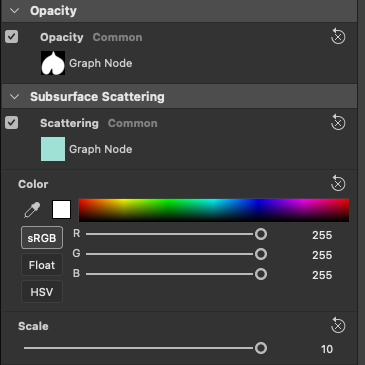
With the materials ready, I turned my attention to the Unreal Engine, where I could truly harness the power of real-time rendering. Subsurface scattering played crucial roles in enhancing the realism of the organic elements. I also explored the use of displacement and tessellation to add depth and dimensionality to the materials, ensuring that the details were not lost even at close inspection.
Version 1 and Version 2 in Unreal
Step 05: Shader Development in Unreal Engine
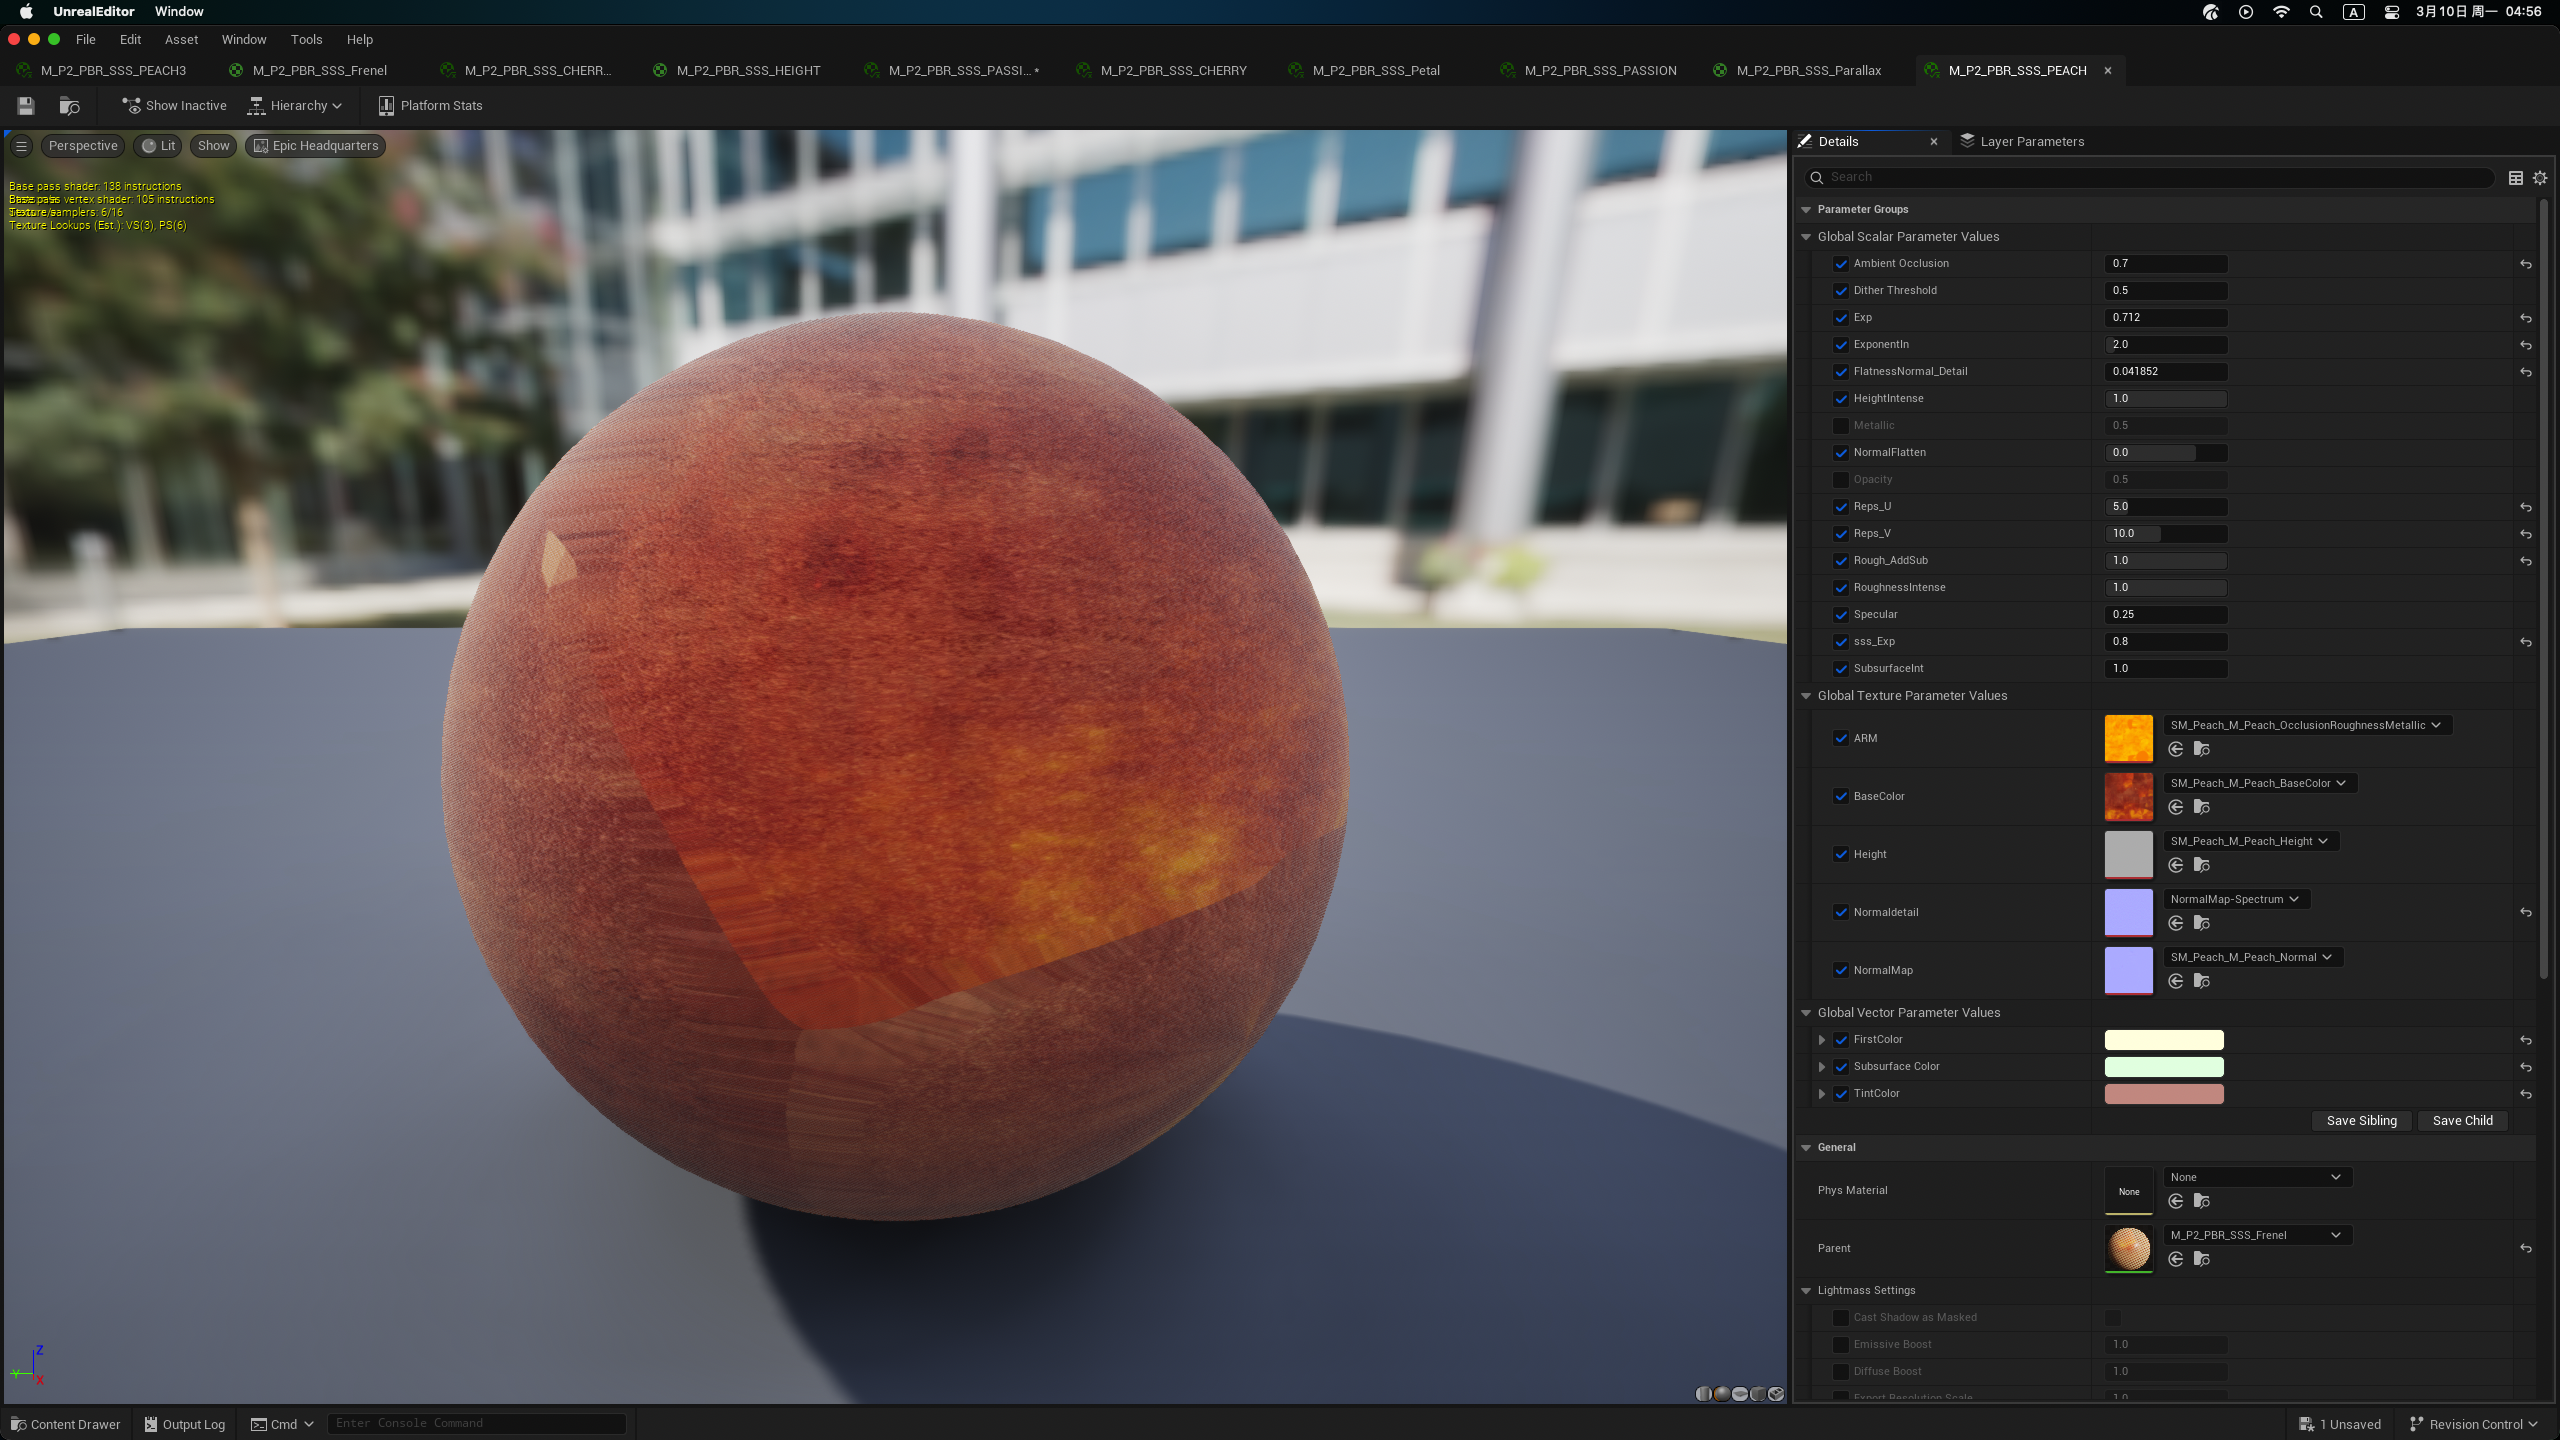
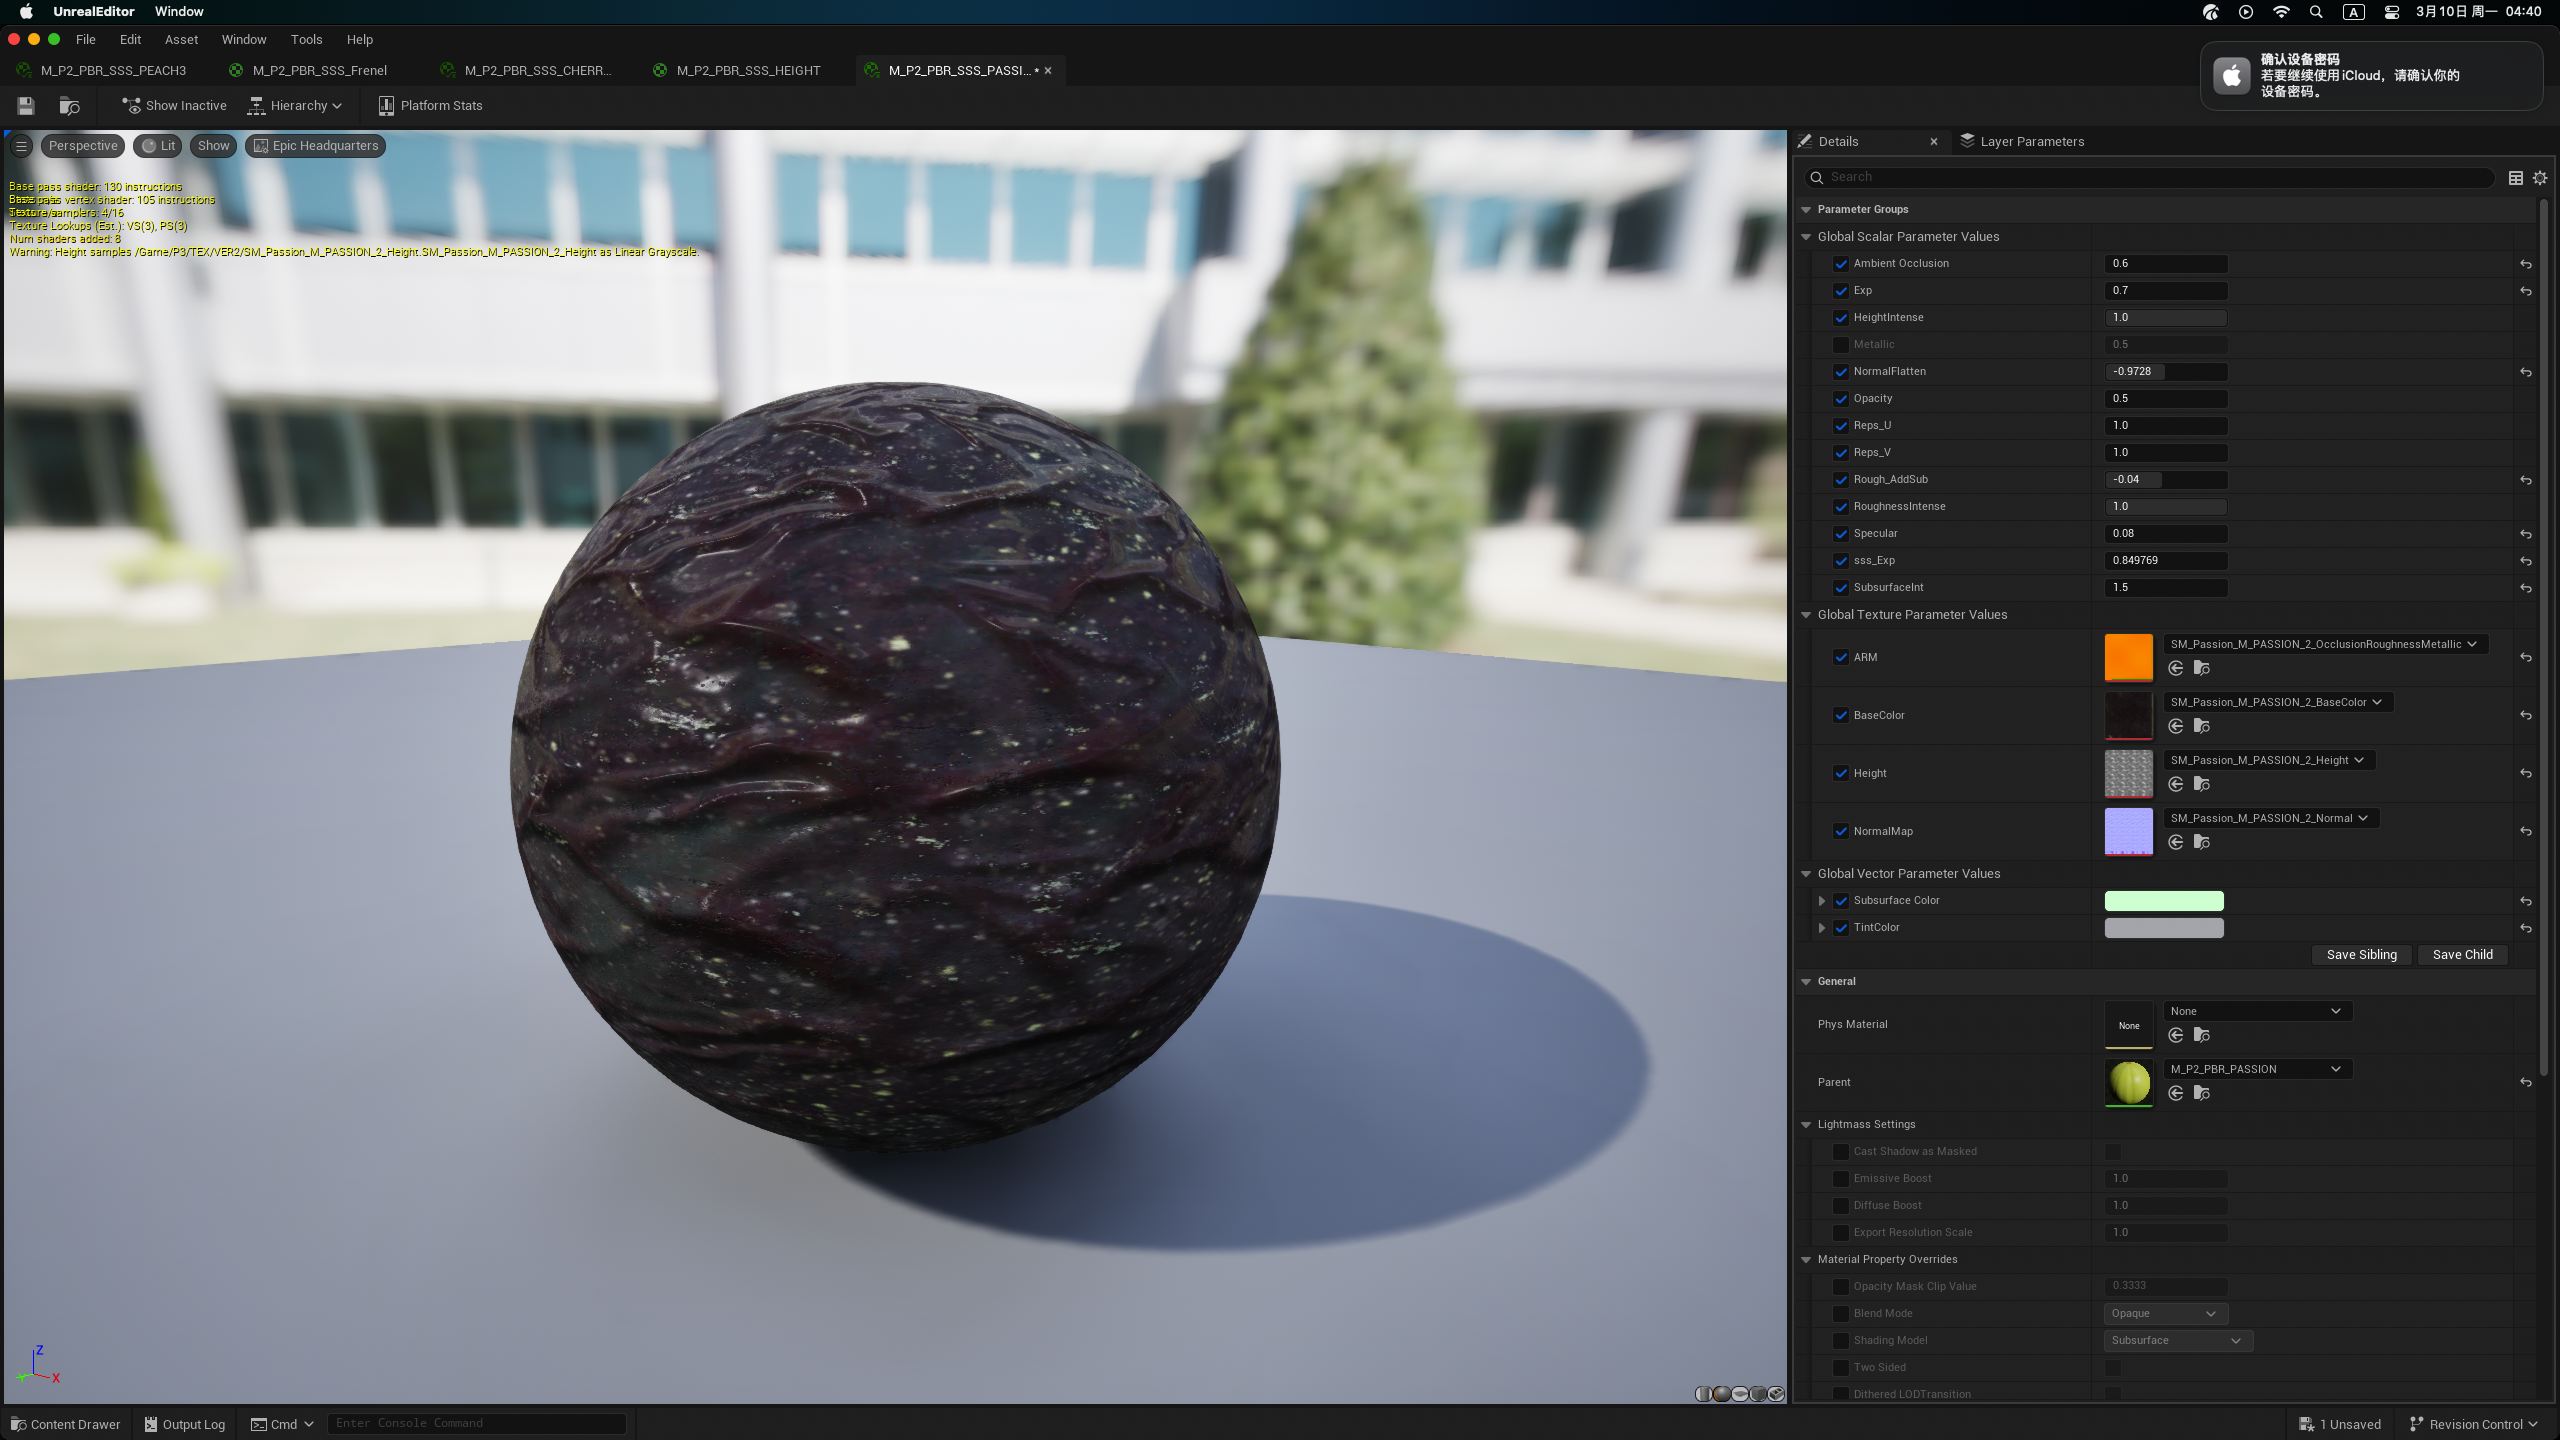
︎Example: Peach Shader Breakdown
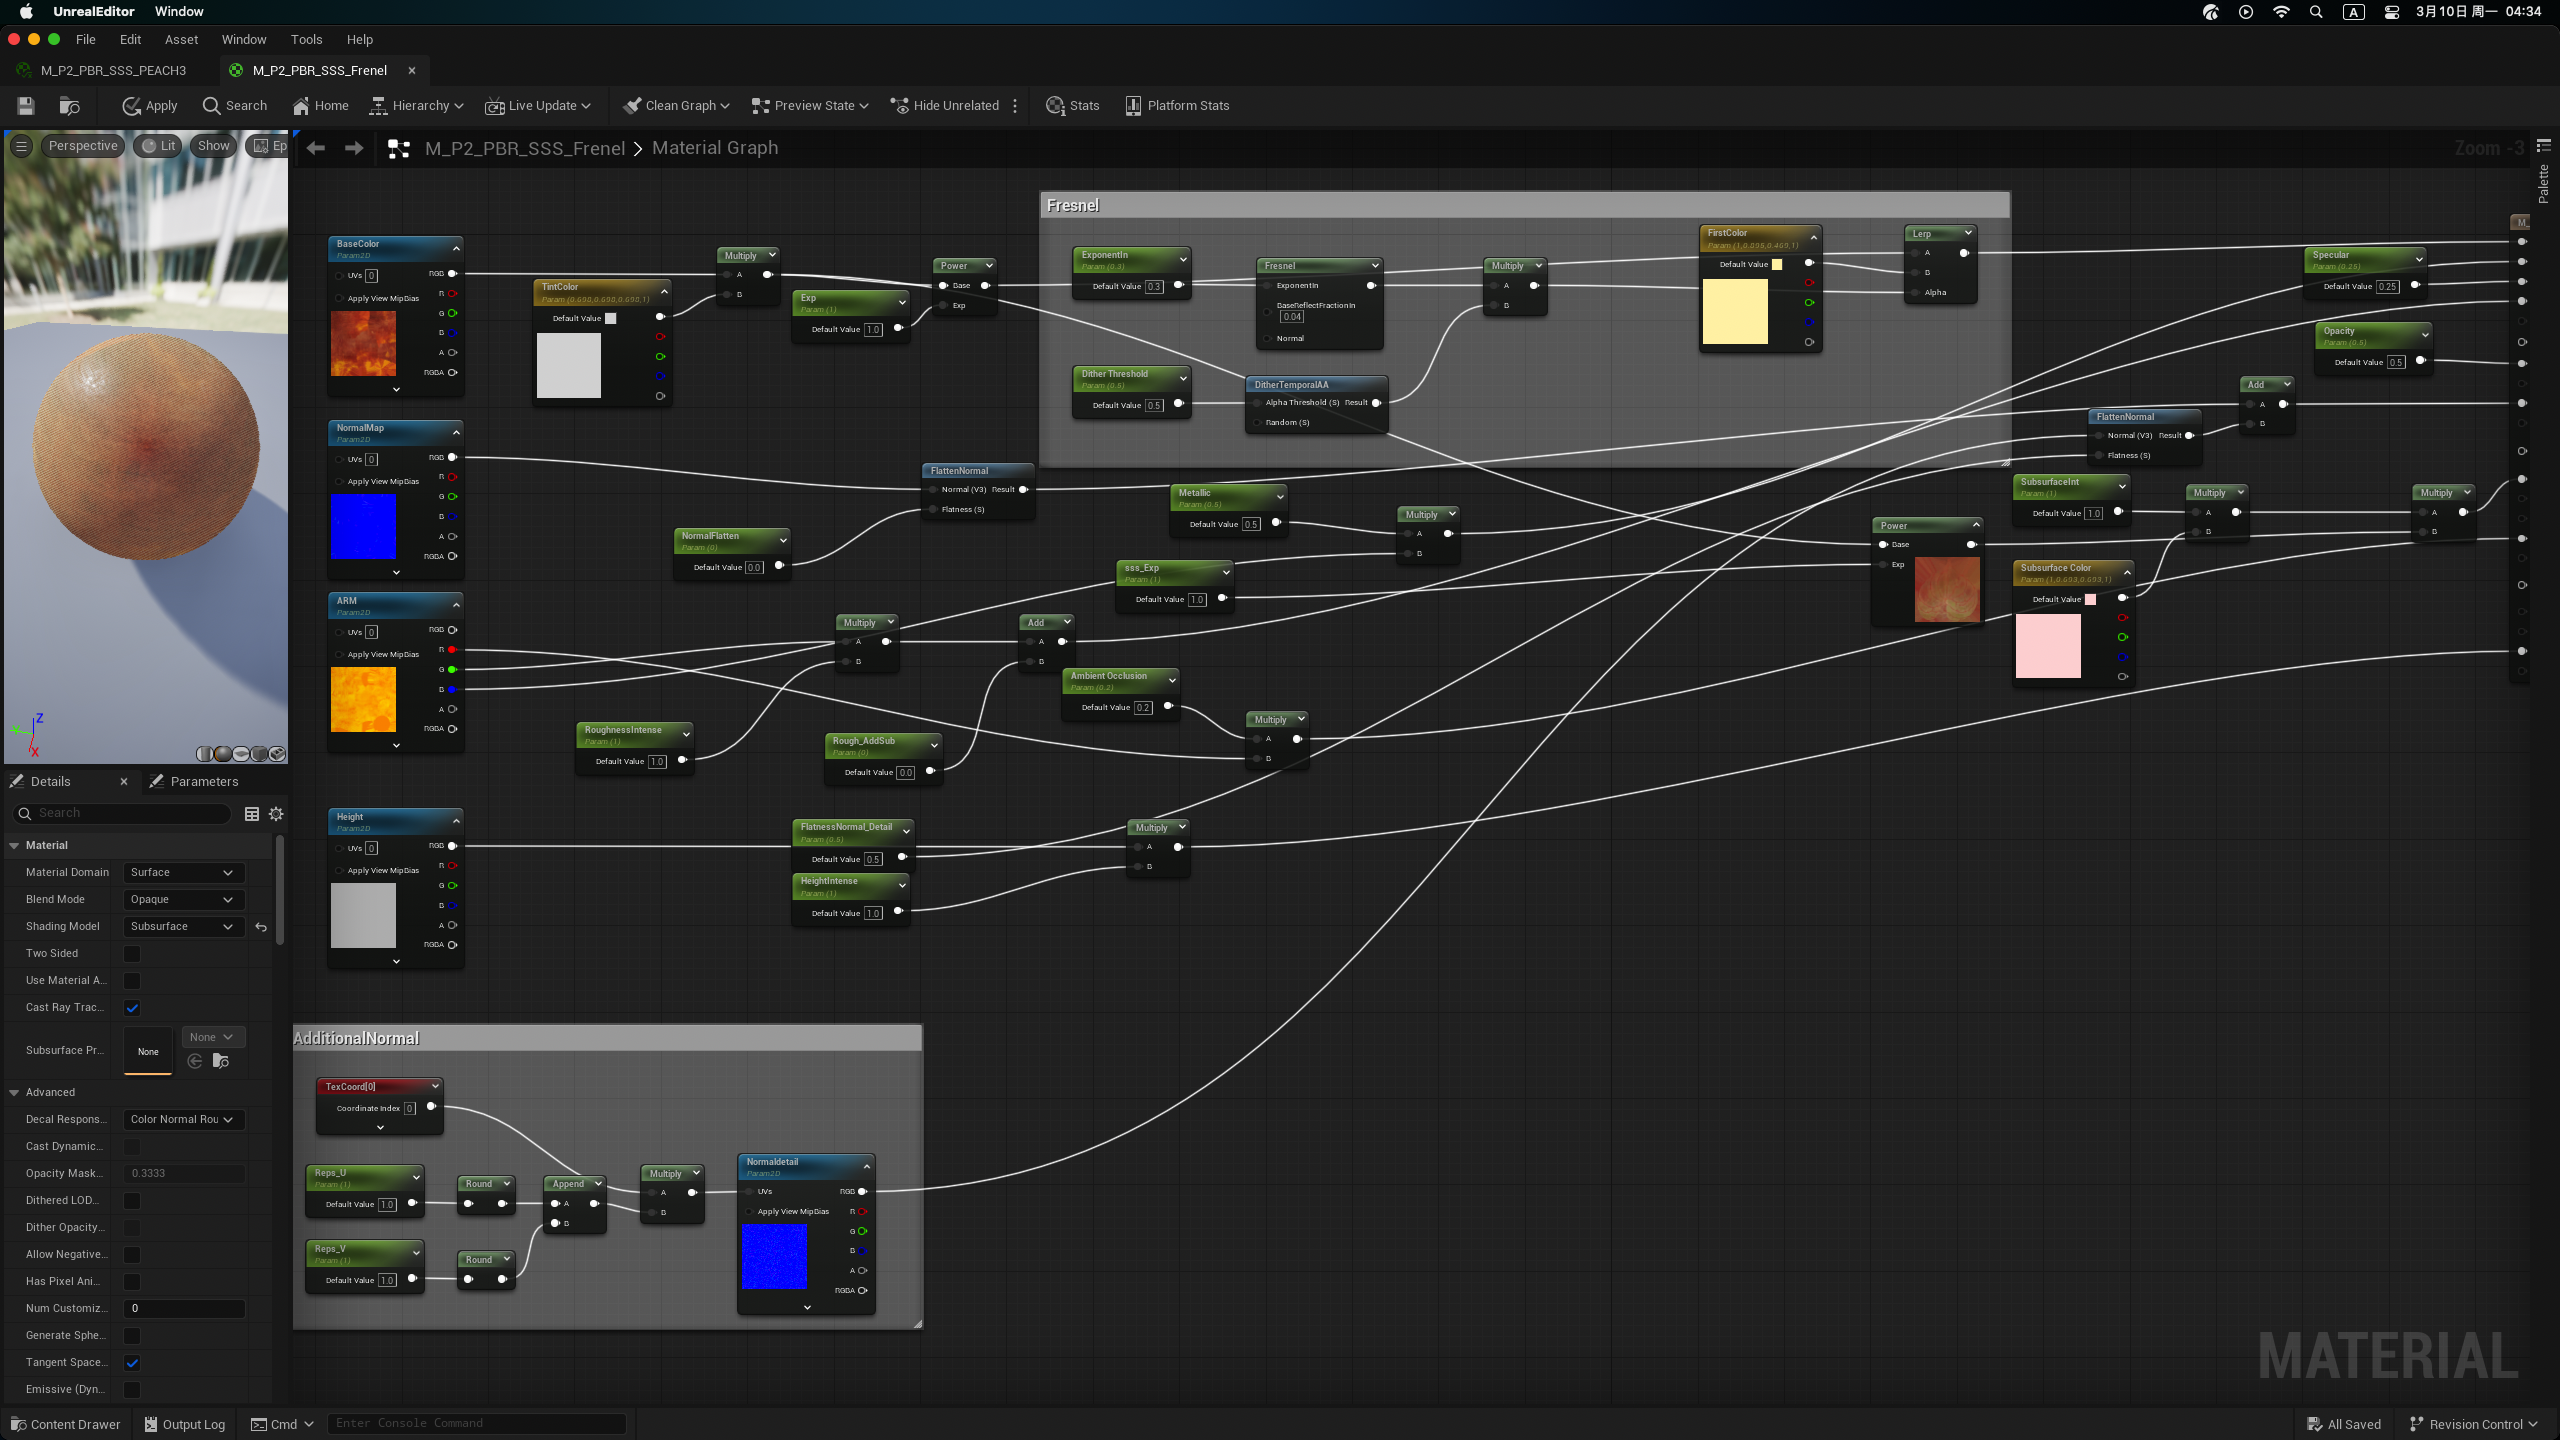
Subsurface Material and Fresnel Setting for Peach
 Peach_Version1_Instence
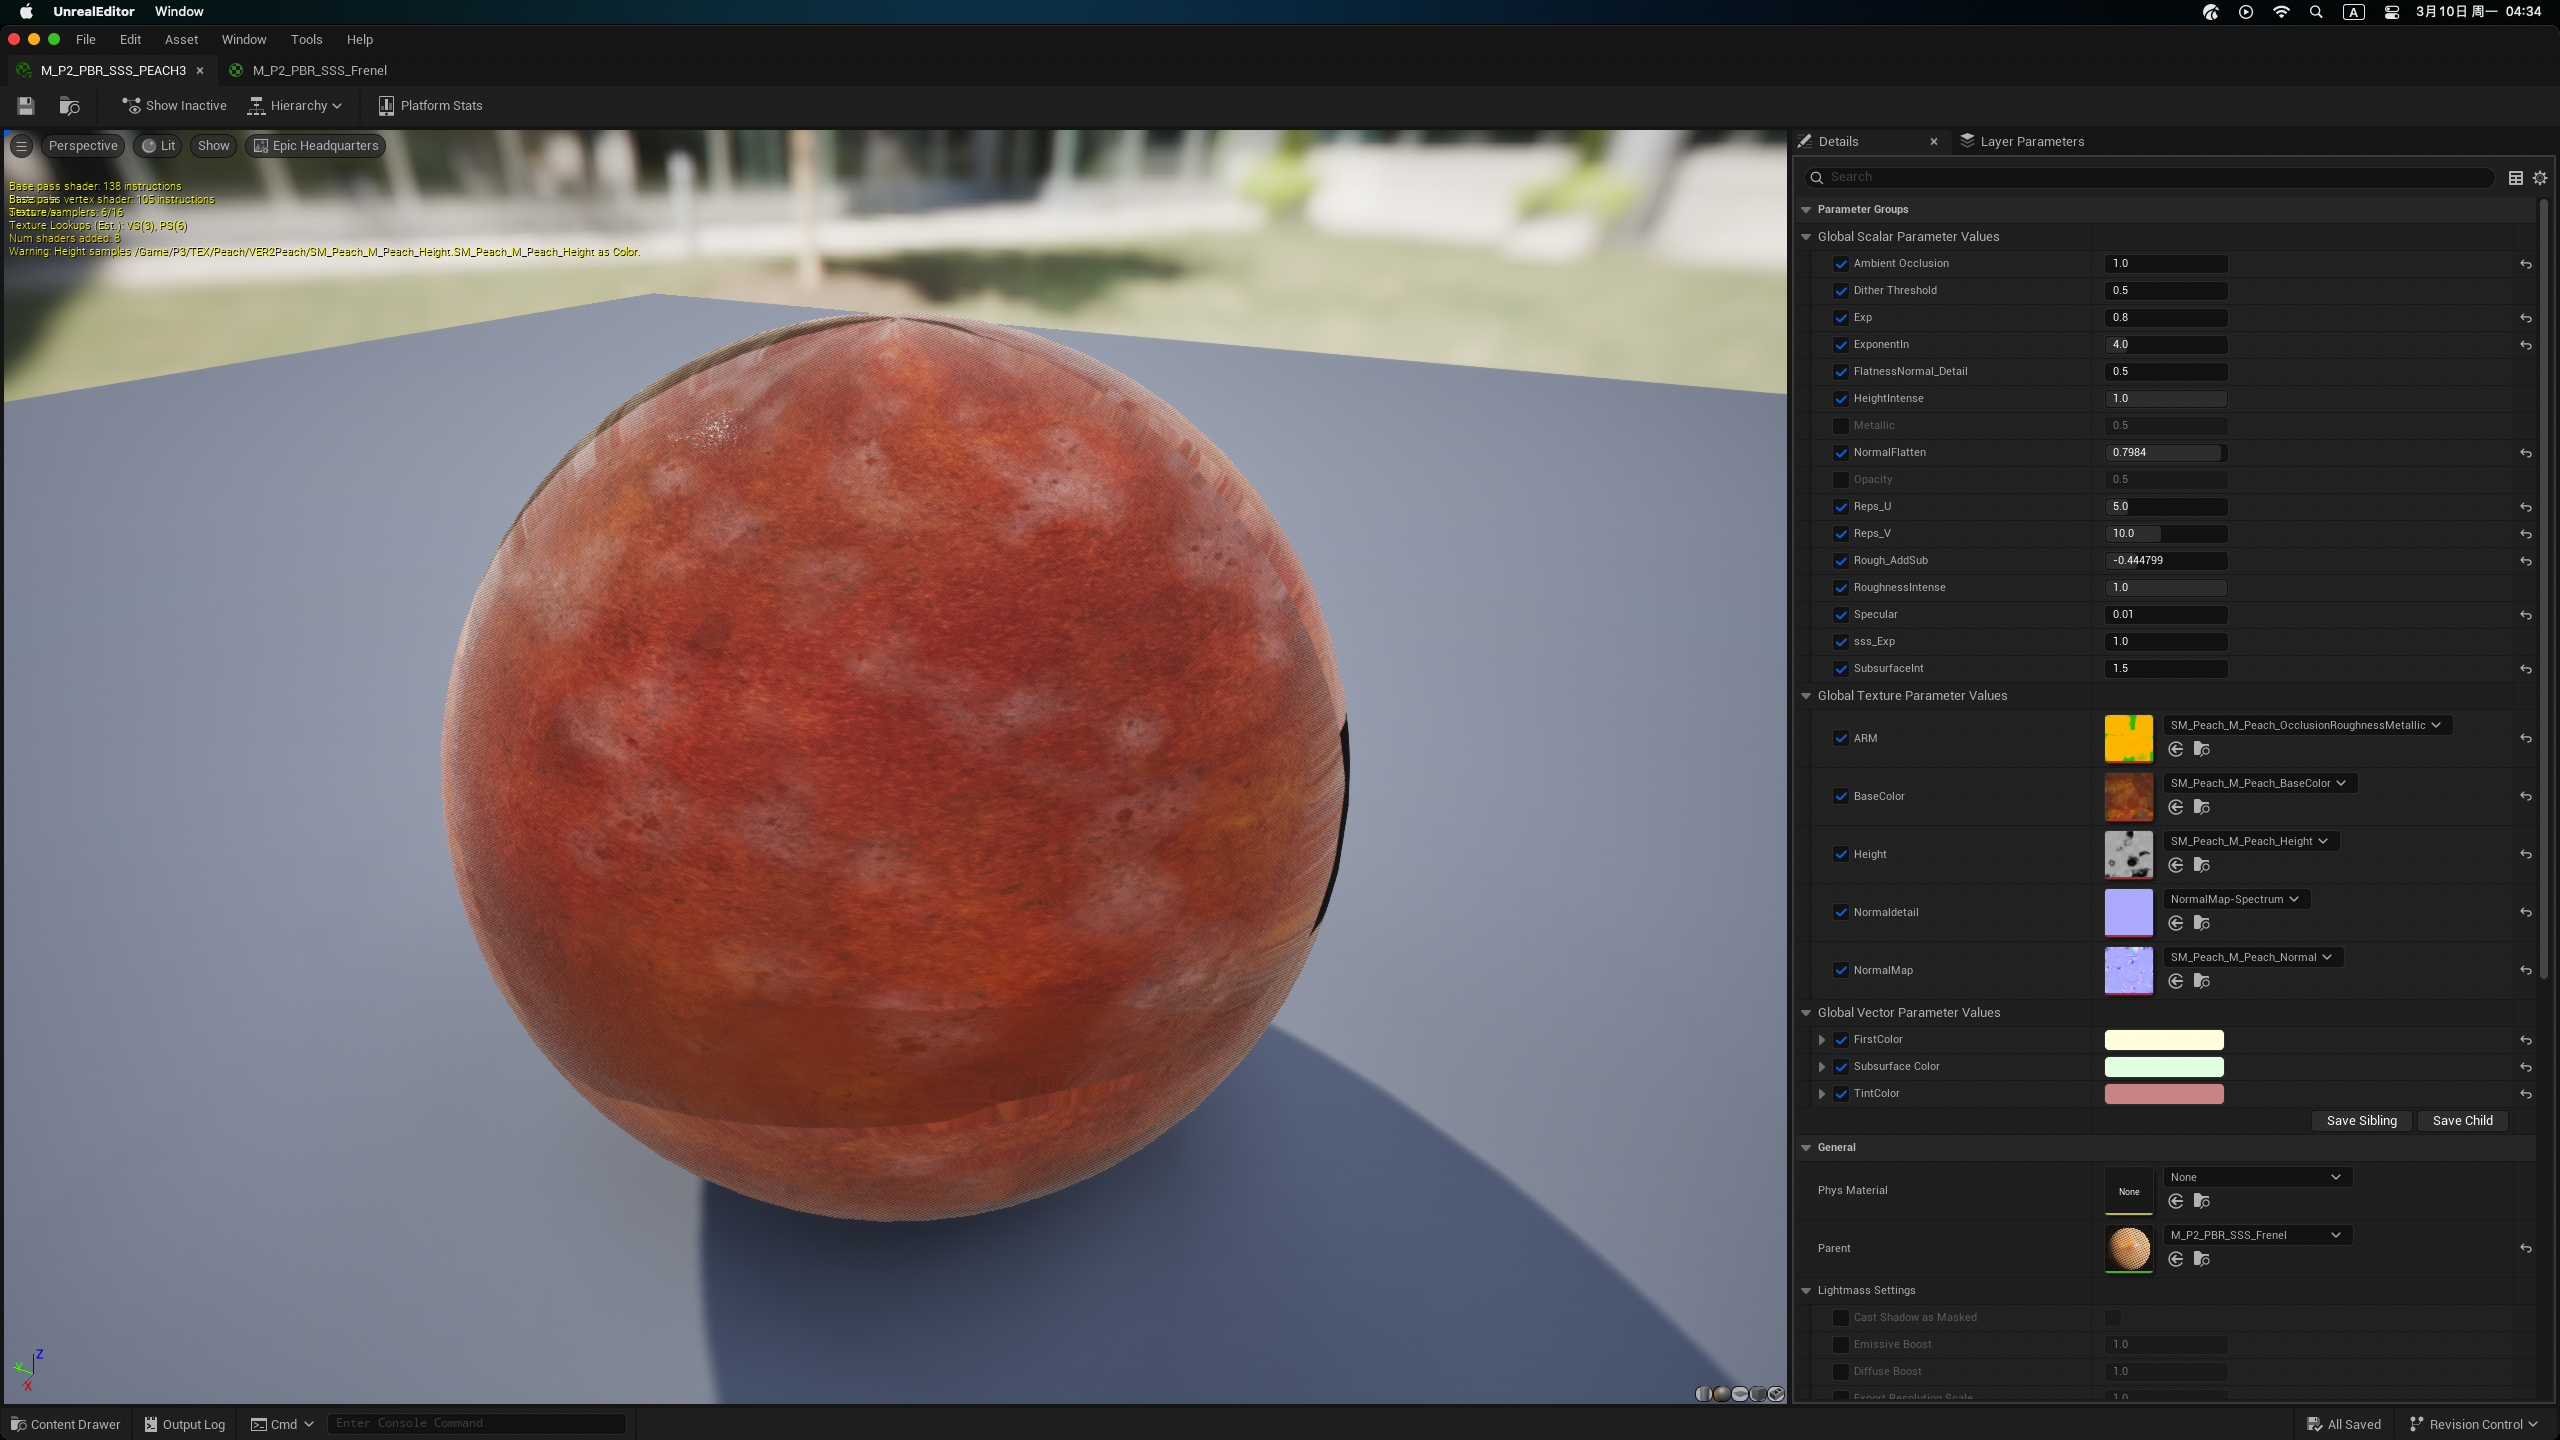 Peach_Version2_Instence
Carefully managing the ORM (Ambient Occlusion, Roughness, Metalness) channels separately allowed me to fine-tune the materials, getting more contorl of final results.
Displacement and Tessellation Material Setting For Fruits
Lighting and Rendering


Detailed Lighting vs Final Render
Step 06: Lighting Setup in Unreal Engine
︎HDRI Setting and Detailed Lighting
⑴ HDRI Setup
Lighting played a pivotal role in bringing this digital courtyard to life. To apply the HDRI, I took a three-pronged approach:
-
Created a dome sphere material to serve as the foundation for the lighting.
-
In the post-process settings, I configured the ambient cubemap and adjusted the tint color and intensity to achieve the desired atmospheric effect.
- For the skylight, I sourced a specific cubemap from Poly Haven to seamlessly integrate the lighting.
⑵ Additional Lighting
Additional Light setting
To further enhance the realism of the candle flame, I added point lights source and incorporated a dynamic UV panner, simulating a subtle flame motion in the y-direction.
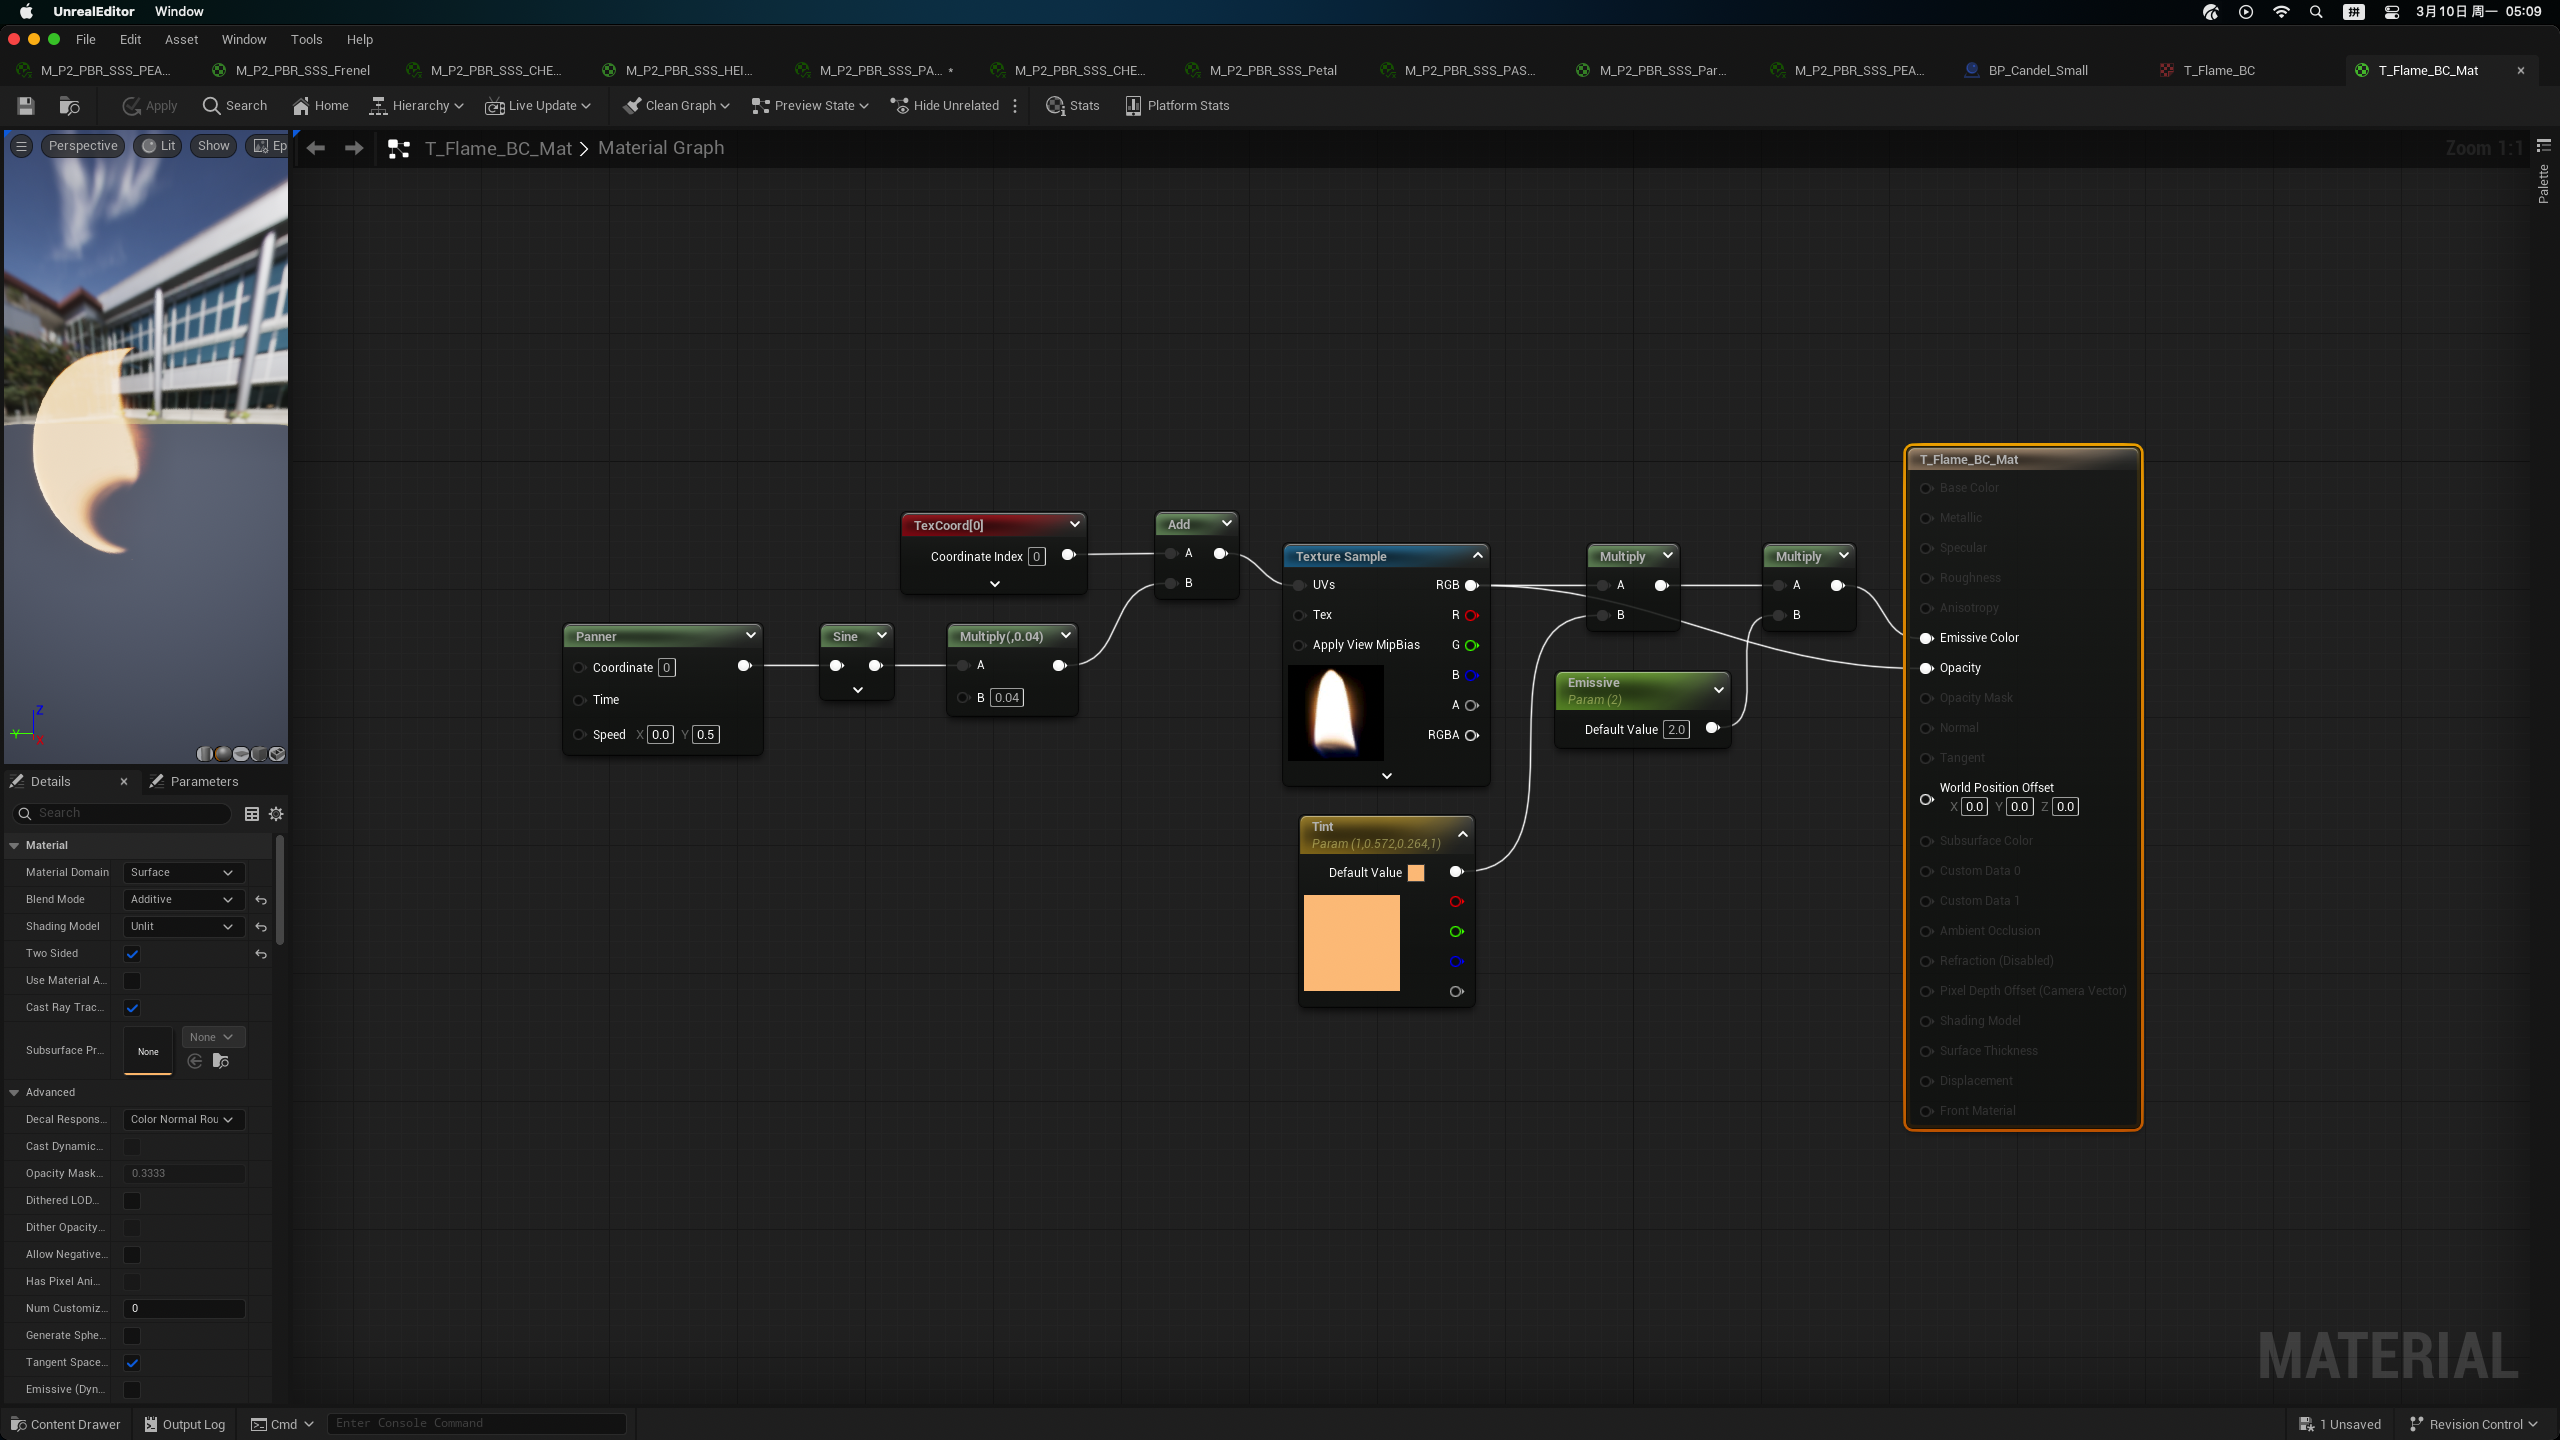
Material Setting for Flame Motion
Step 07: Post-Process Volumn
︎Post-Process Refinement
I fine-tuned the Auto Exposure settings as well, such as the Minimum Brightness, Maximum Brightness, and Exposure Bias, to achieve the desired level of exposure and contrast. This helped maintain a natural, lifelike appearance, even in scenes with a wide range of lighting conditions.
During the process, I noticed some flickering points in the scene, so I setup the Lumen lighting system within Post-Process Volumn. By adjusting parameters like Lumen Lighting Quality and Reflection Quality, I was able to refine the overall lighting and eliminate the unwanted artifacts.
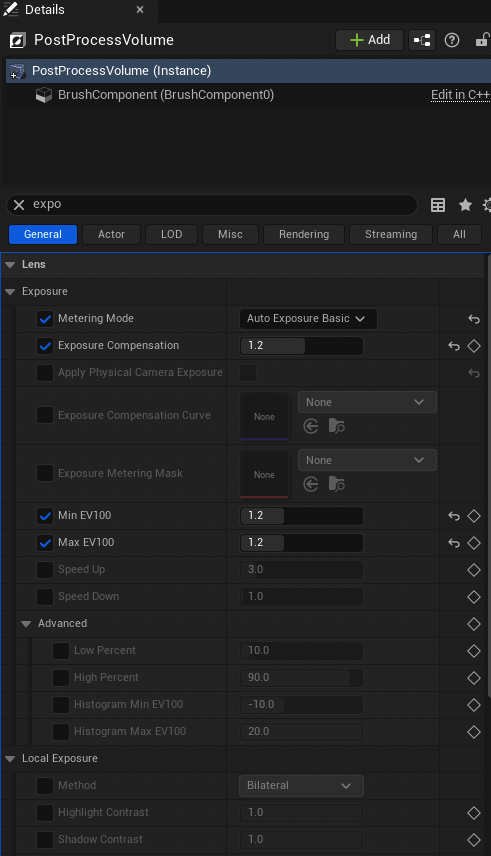
Auto Exposure Setting
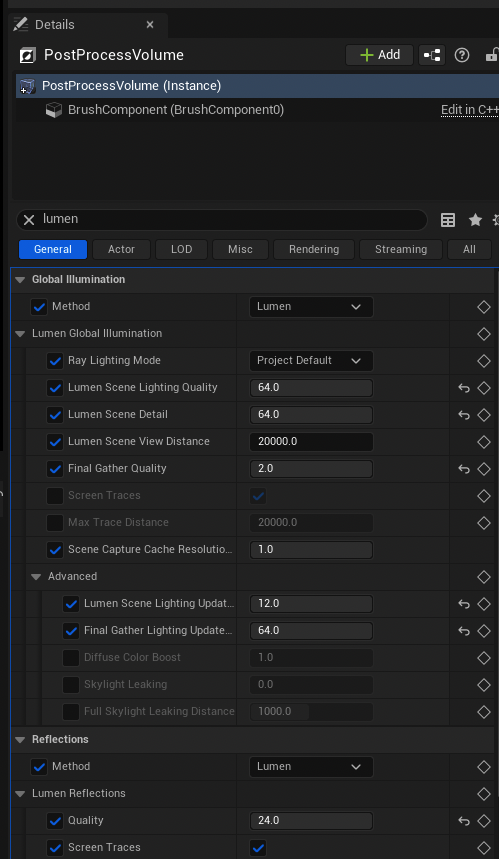
Lumen Setting Refinement
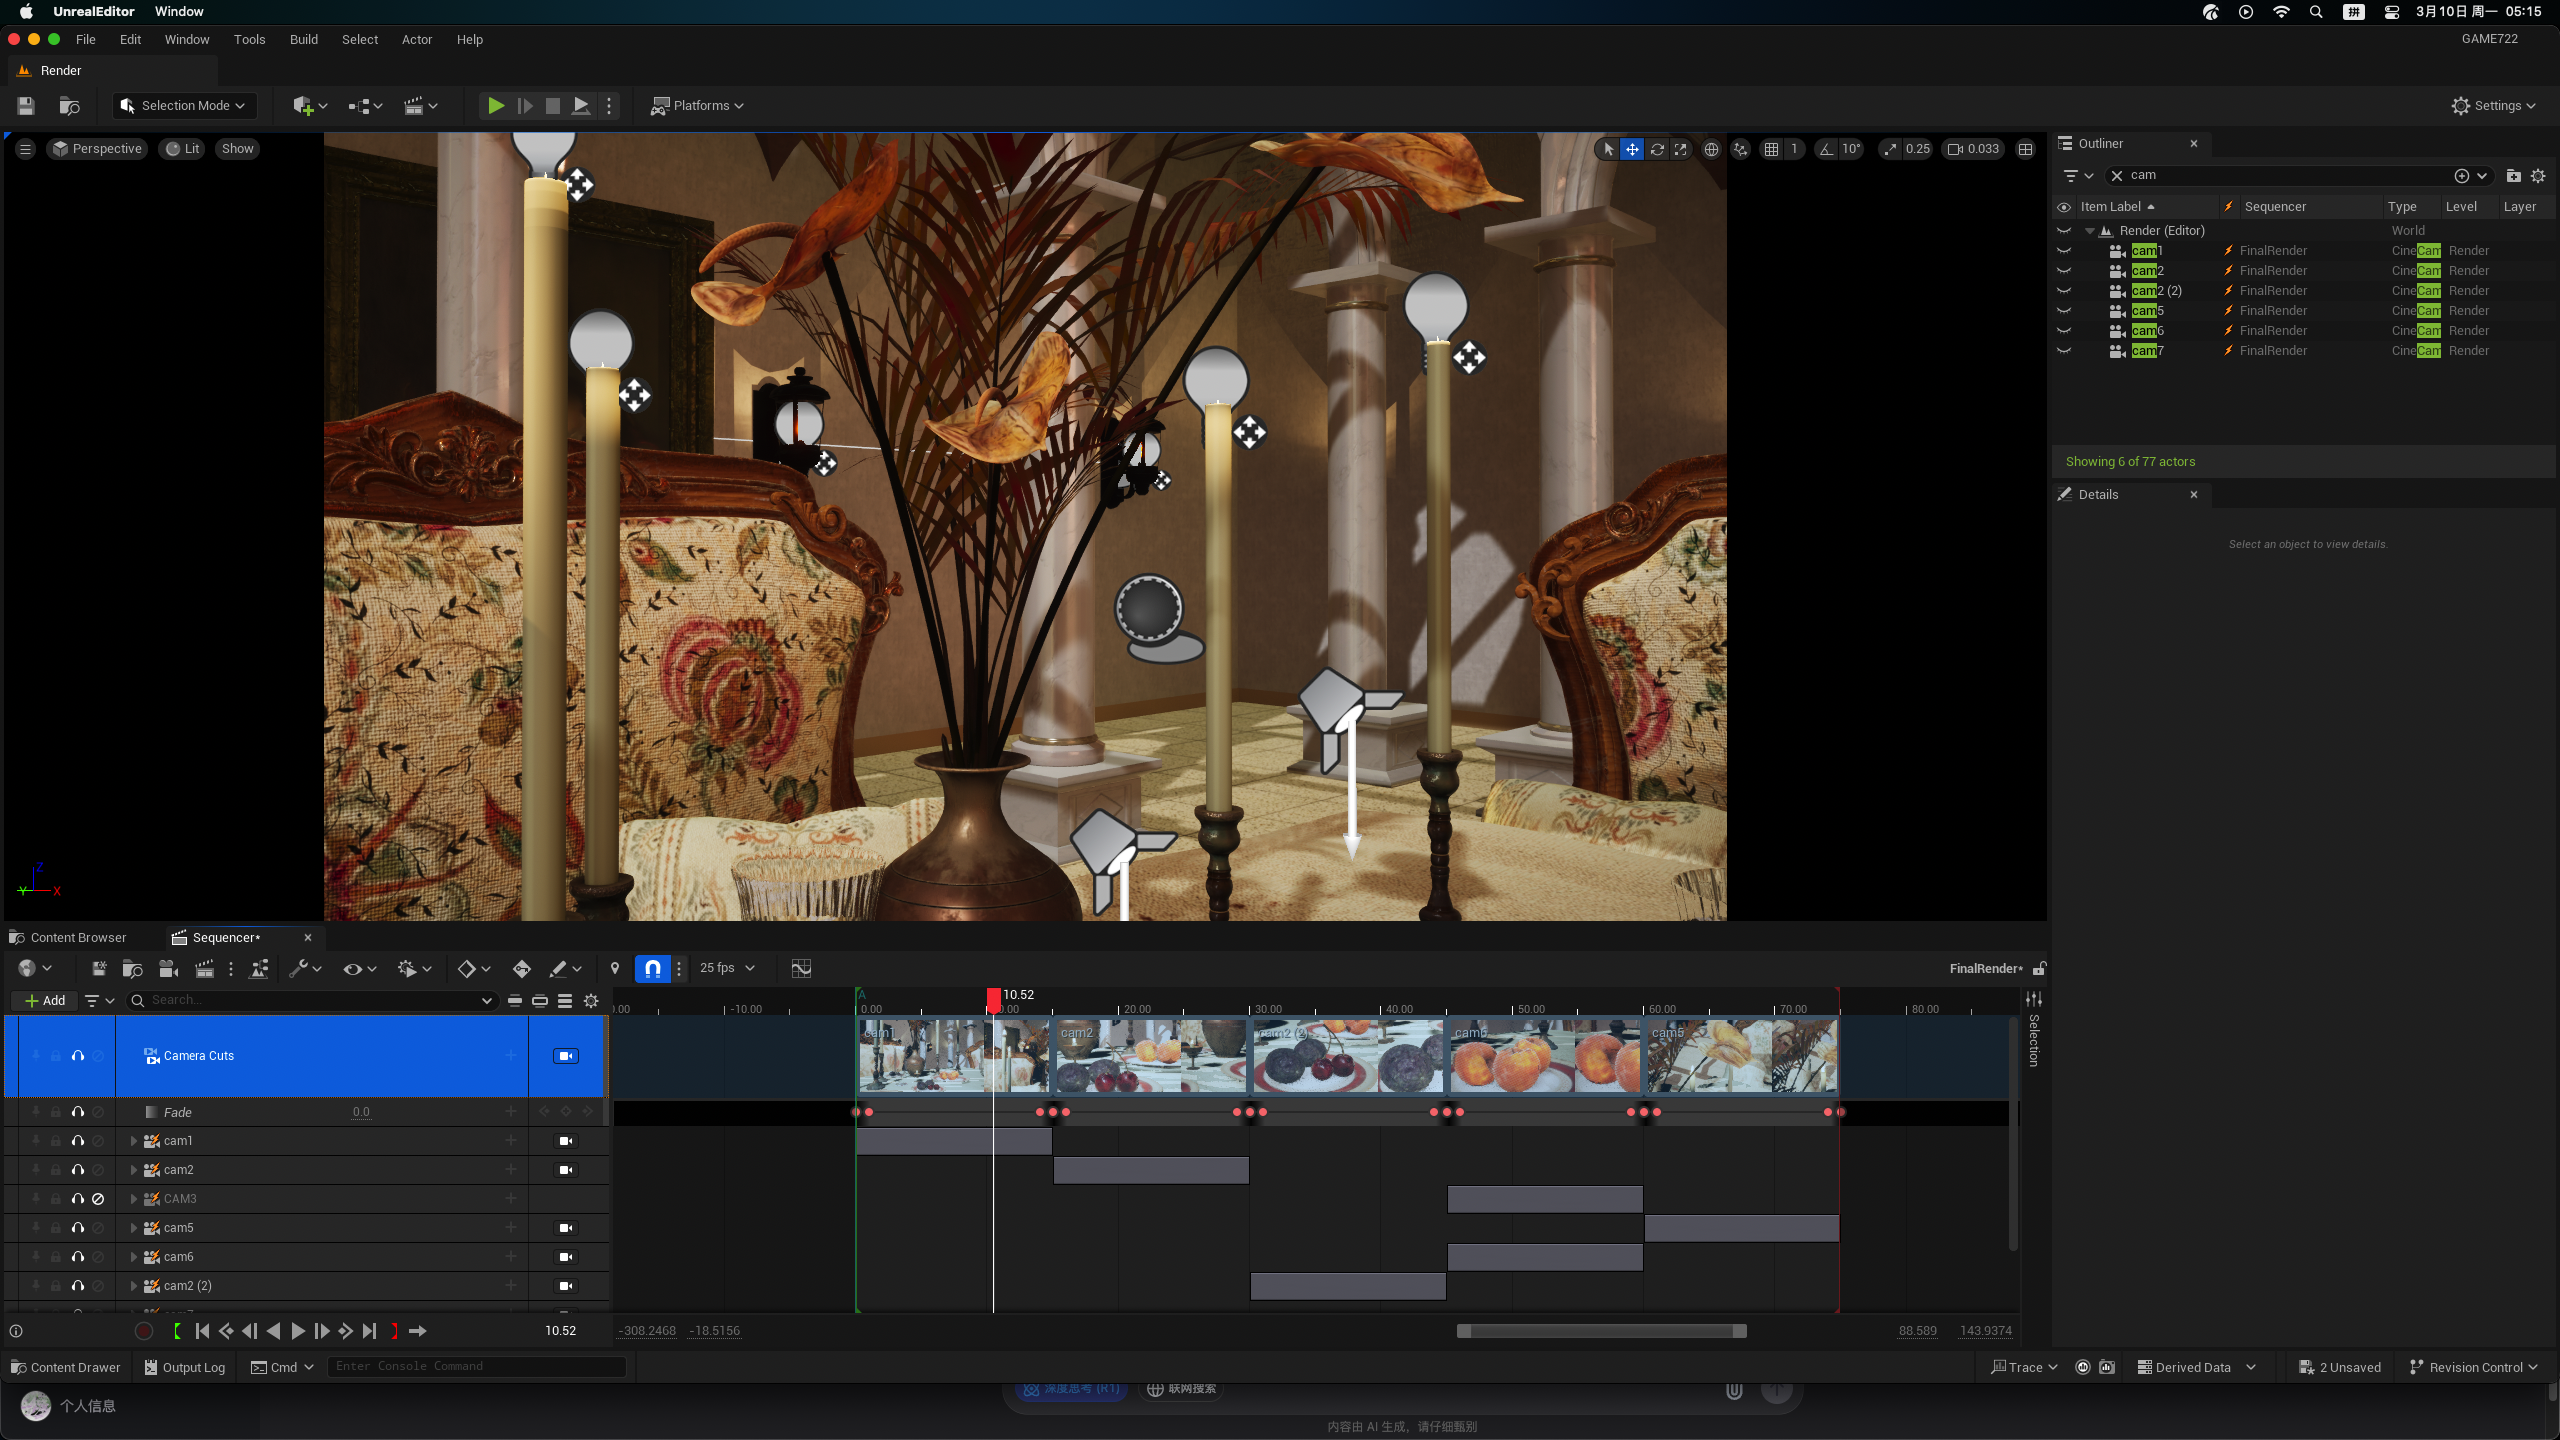
Step 08: Sequencer and Movie Render Queue
︎Render Setting in Movie Render Queue
Using Sequencer tool, I created camera movements that guides the viewer's gaze through the courtyard setting. I also incorporated subtle fade transitions, adding a touch of cinematic flair to the final render.
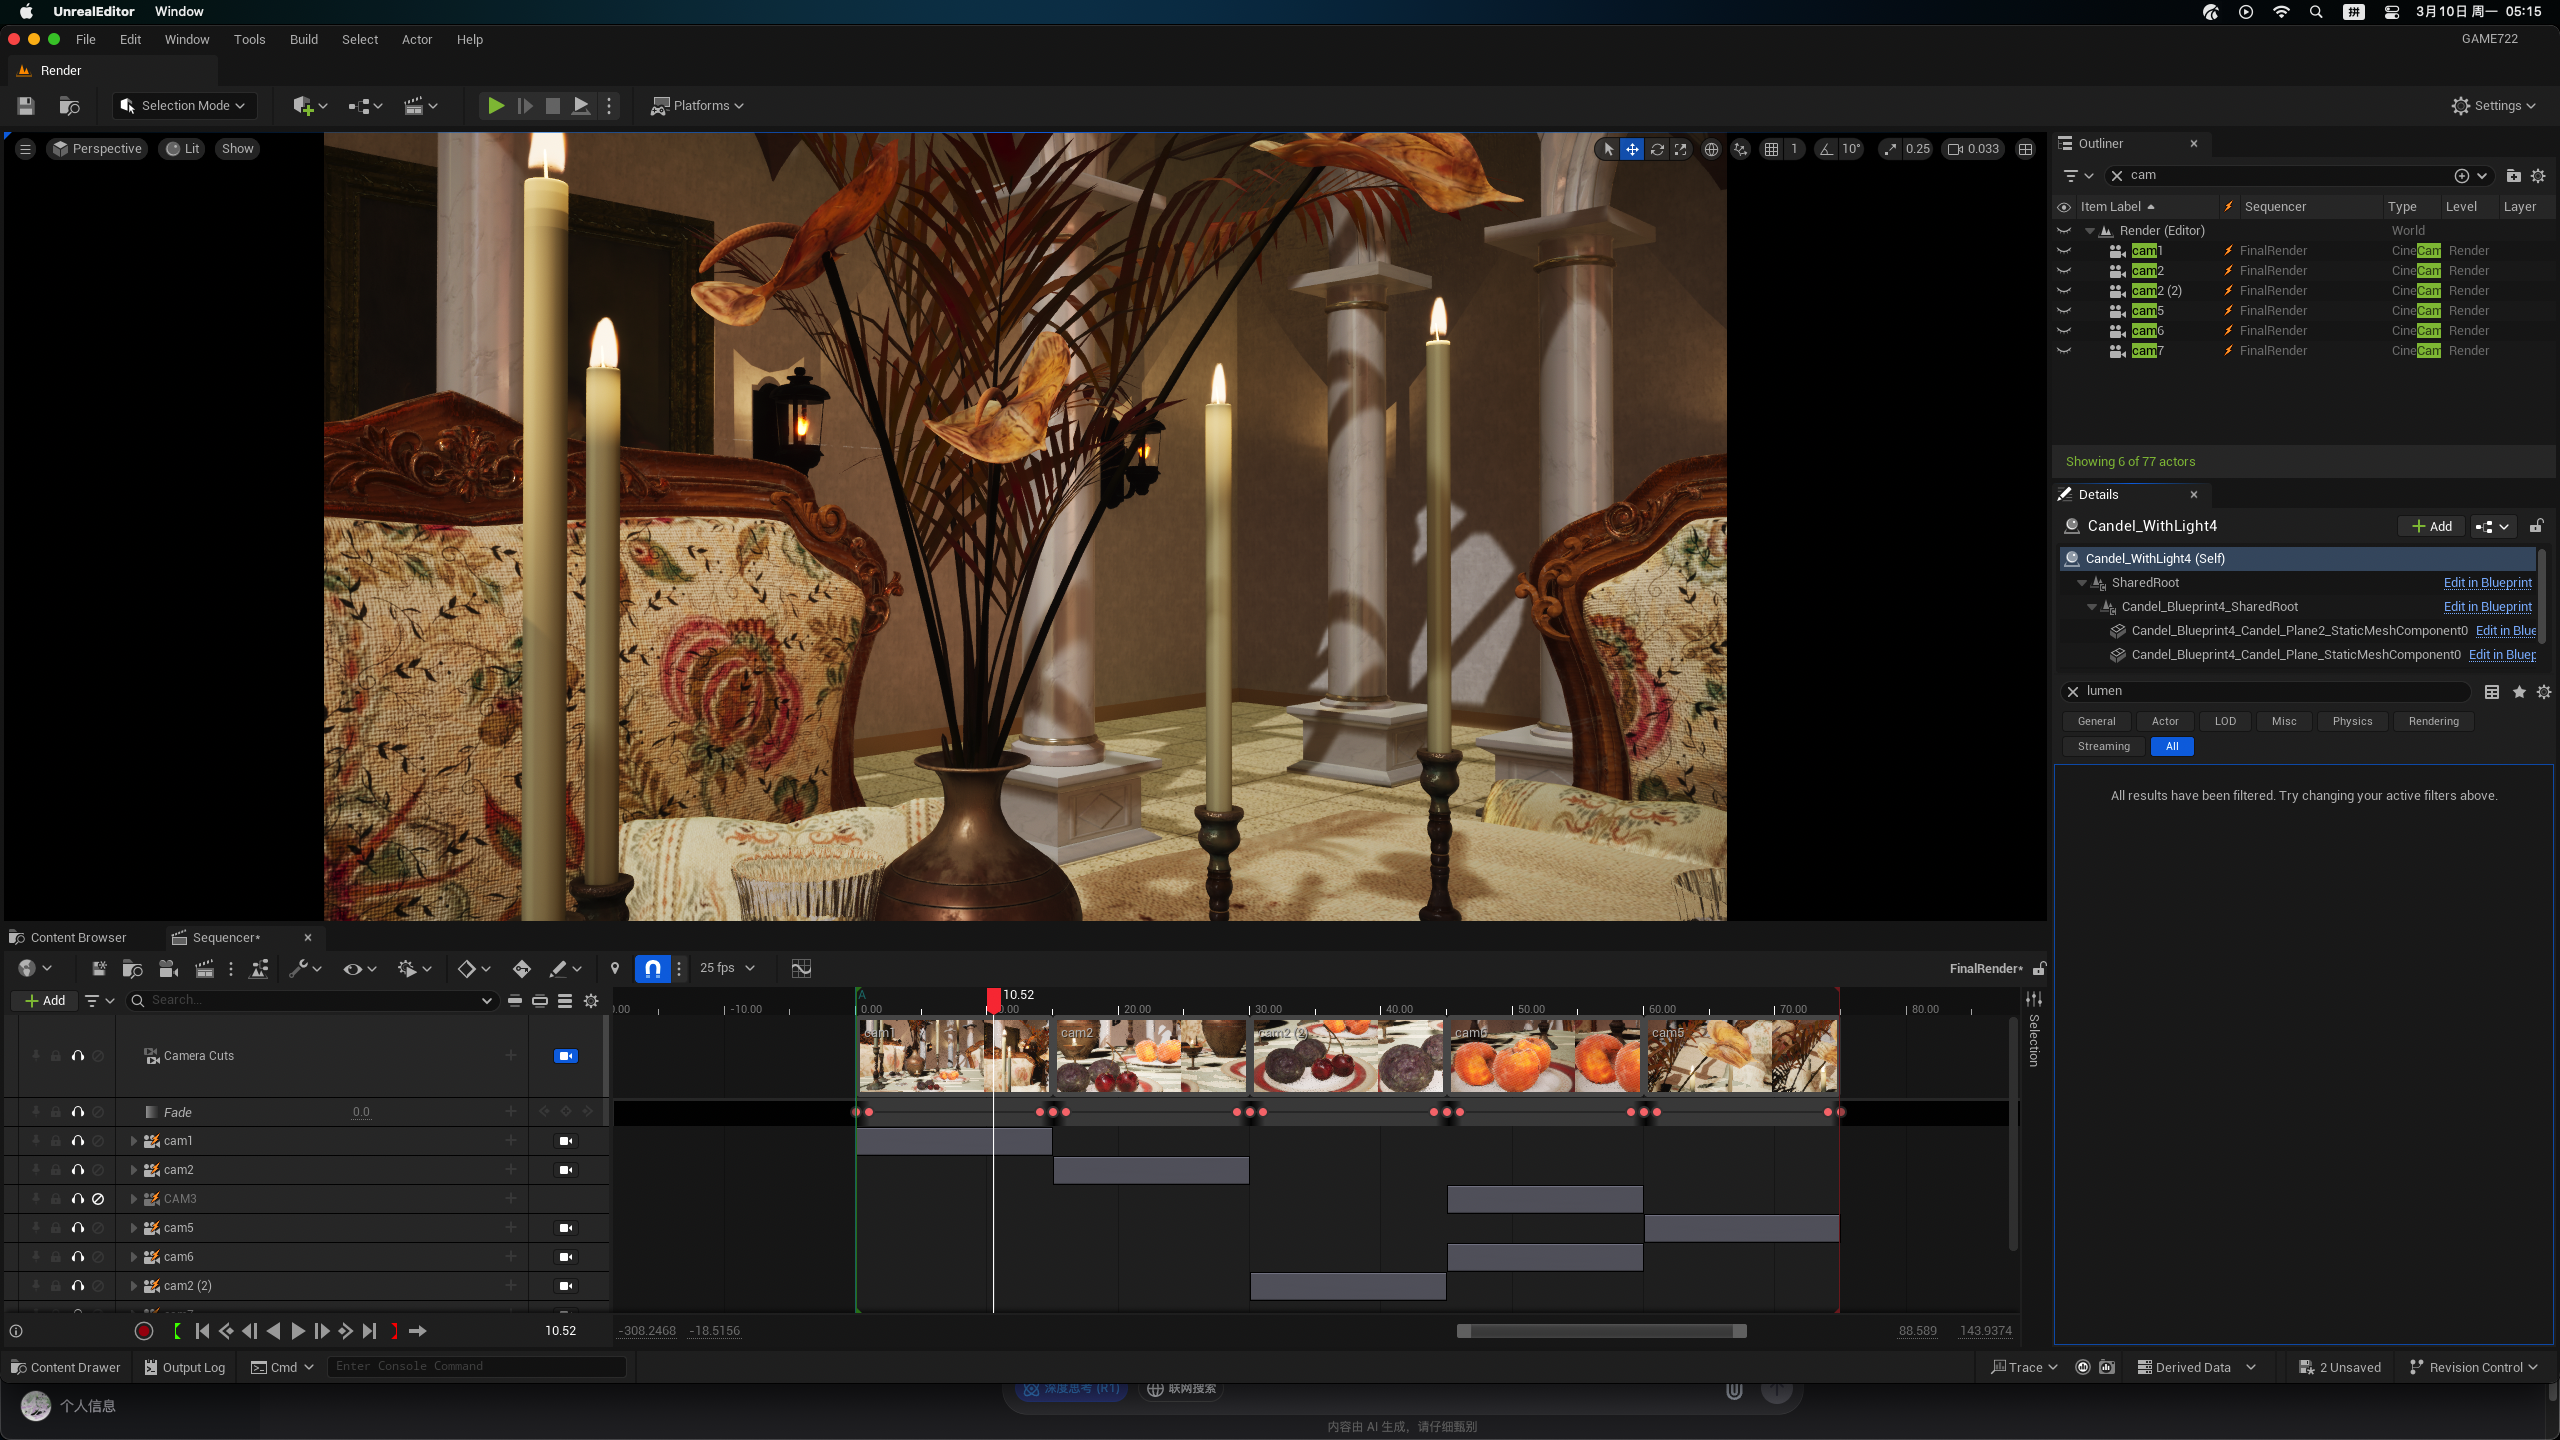

To produce the final high-quality renders, I turned to Movie Render Queue. Here, I modified the custom frame rate to 30 fps and enabled Anti-aliasing to ensure a polished, cinematic output.
Overview
︎Anthurium
![]()
︎Peach
![]()

︎Passion Fruit
![]()
︎Cherry
![]()
Conclusion
From the initial modeling in Maya to the intricate material creation in Substance Suite and the real-time rendering in Unreal Engine, this project was a deep dive into the technical artistry of crafting realistic materials. One of the biggest lessons is how important it is to stay organised. Whether it’s in your workflow or in managing your time, having a clear plan is key to staying on track and reducing stress. If I had more time, I would focus on refining things like textures and lighting to make them even better. But overall, this project gave me a solid base to build on.
Thanks to Professor Manuel Prada, who taught me to see the art in the tech setup, and for every classmates who’s ever stayed up till 3 AM arguing with a height map.
Thank you for taking the time to read about my project!
Credit
1. HDRI, https://polyhaven.com/a/flamingo_pan
2. Anthurium, https://www.cgtrader.com/free-3d-models/plant/flower/anthurium-with-decorative-objects
3. Shrub, https://www.fab.com/fr/listings/d422ac6c-ce50-4273-8d4a-2ac594a3a2b2
4. Peach, https://www.blenderkit.com/asset-gallery-detail/3bd95e68-86e4-485c-92ef-de56a064685c/